HubSpot Tutorial
How to Connect Airtable to HubSpot: 1-Min Interactive Guide
Integrate Mailchimp with HubSpot to streamline your email marketing and CRM workflows. Superjoin makes syncing data easy and efficient.
Table of Contents
Here's a quick step-by-step guide 🔝
Here's a quick step-by-step guide 🔝
Streamline your data management by integrating Airtable with HubSpot. Learn how to make these powerful tools work together effortlessly.
Why Connect Airtable to HubSpot?
Are you looking to manage and sync your data between Airtable and HubSpot seamlessly? Integrating Airtable with HubSpot enables you to:
Centralize Your Data: Keep all your project management, CRM, and marketing data in sync across platforms.
Improve Workflow Efficiency: Automate data transfers to eliminate manual entry and reduce errors.
Enhance Reporting: Use integrated data for comprehensive reporting and better decision-making.
Connecting these platforms helps you maintain up-to-date information across your marketing and CRM efforts, making your workflows more efficient.
Method 1: Connecting Airtable to HubSpot Using Superjoin
Step-by-Step Guide:
Install Superjoin on Google Sheets
Open Google Sheets and navigate to the Extensions tab. Select Add-ons > Get add-ons.
Search for Superjoin in the Google Workspace Marketplace, install it, and grant necessary permissions.
Launch Superjoin from Extensions > Superjoin > Launch.
Alternatively, install Superjoin on Microsoft Excel
Open this link, click on Get it now.
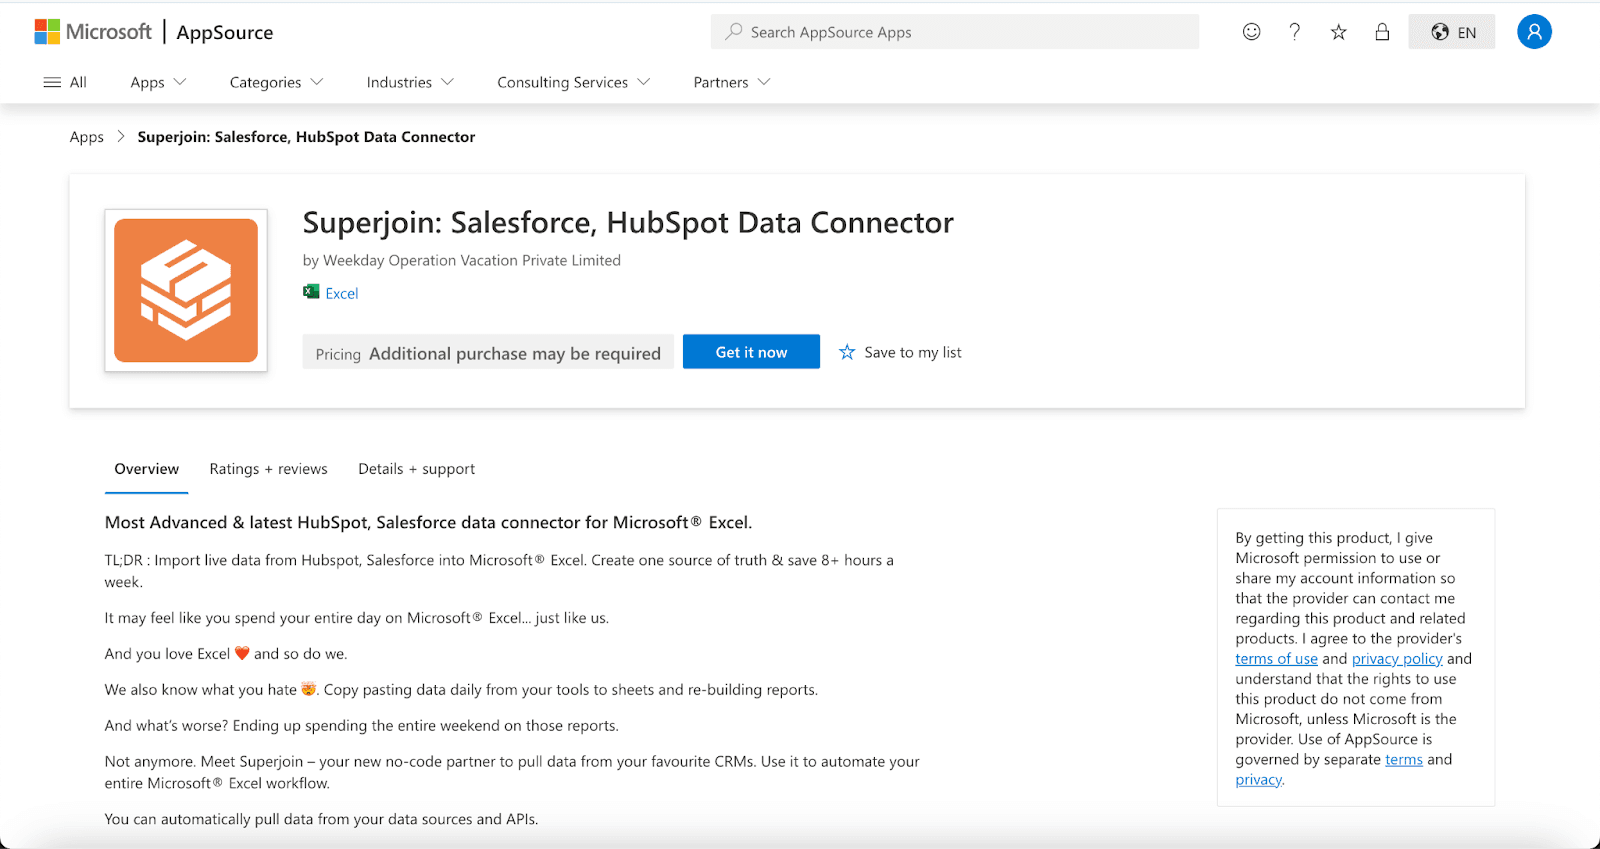
Once installed, click on Open in Excel or Try using it online (for Excel online).
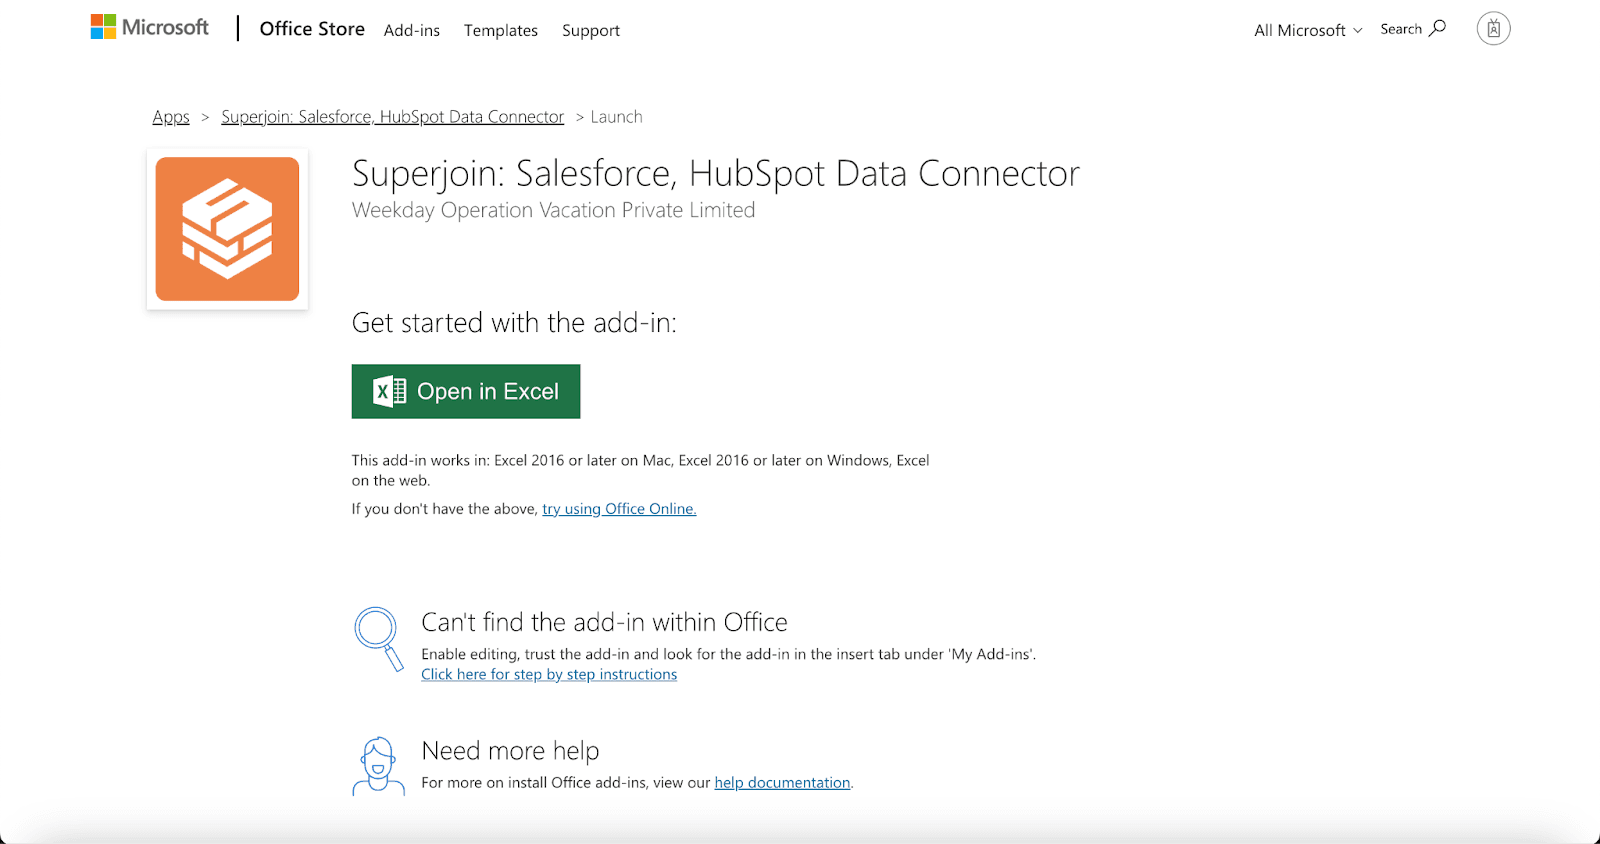
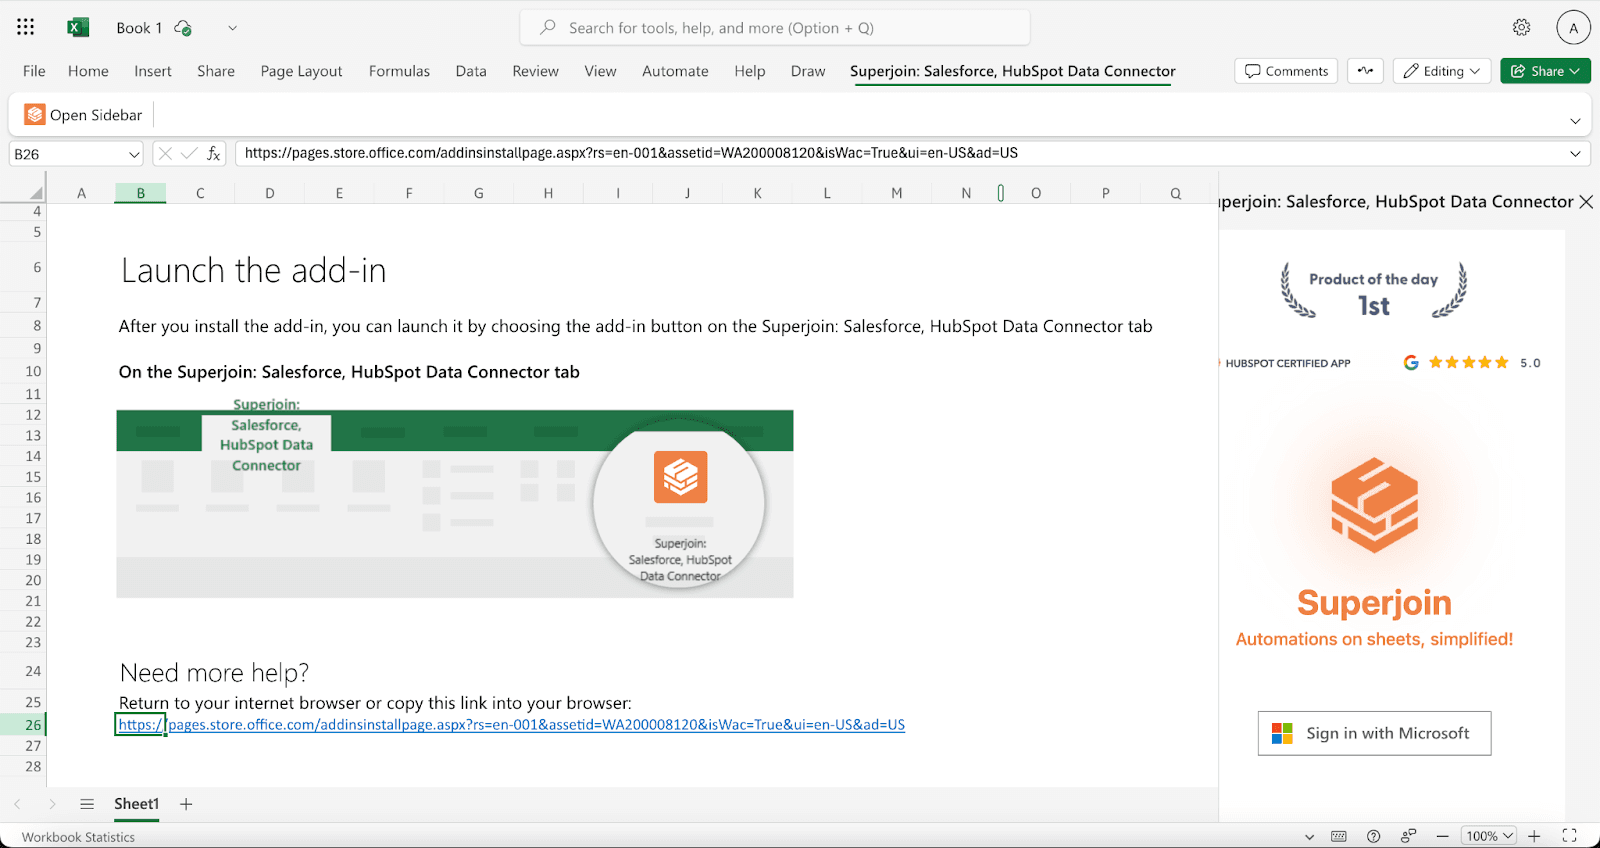
Launch Superjoin by opening the add-in and clicking on Open Sidebar. Login with your Microsoft account to start using Superjoin.
Connect and Import Data from Airtable
In the Superjoin sidebar, select Sources and choose Airtable.
Authenticate your Airtable account by following the prompts.
Select the base and table you want to import data from, then choose the fields and records you want to pull into Google Sheets.
Export Data to HubSpot
n the Superjoin sidebar, navigate to sources, choose Hubspot as your source — click Export
Choose the sheet and header row containing the data to export.
Select the HubSpot Object (e.g., Contacts, Deals) and the type of action: Update, Insert or Delete.
Map fields from Google Sheets to corresponding fields in HubSpot, either manually or using Superjoin’s auto-mapping feature.
Complete the export to sync your Airtable data with HubSpot.
Benefits of Using Superjoin for Airtable-HubSpot Integration
Superjoin offers several advantages for syncing Airtable and HubSpot:
No Coding Needed: Easily integrate Airtable with HubSpot without any technical knowledge.
Customizable Data Import/Export: Select exactly what data to import from Airtable and how to map it to HubSpot.
Smooth Data Flow: Use Google Sheets as an intermediary to ensure accurate and efficient data transfer.
Real-Time Updates: Superjoin supports scheduled or real-time data updates, keeping both platforms in sync.
By using Superjoin, you can efficiently manage and sync your Airtable and HubSpot data, enhancing your data workflows.
Method 2: Connecting Airtable to HubSpot via Zapier
Zapier can help you automate the connection between Airtable and HubSpot by creating custom workflows.
Step-by-Step Guide:
Create a Zapier Account
Sign up at zapier.com and log in to your dashboard.
Set Up a Zap
Click Create Zap in the Zapier dashboard.
For the trigger app, select Airtable and choose a trigger event such as “New Record” or “Updated Record.”

Configure HubSpot Action
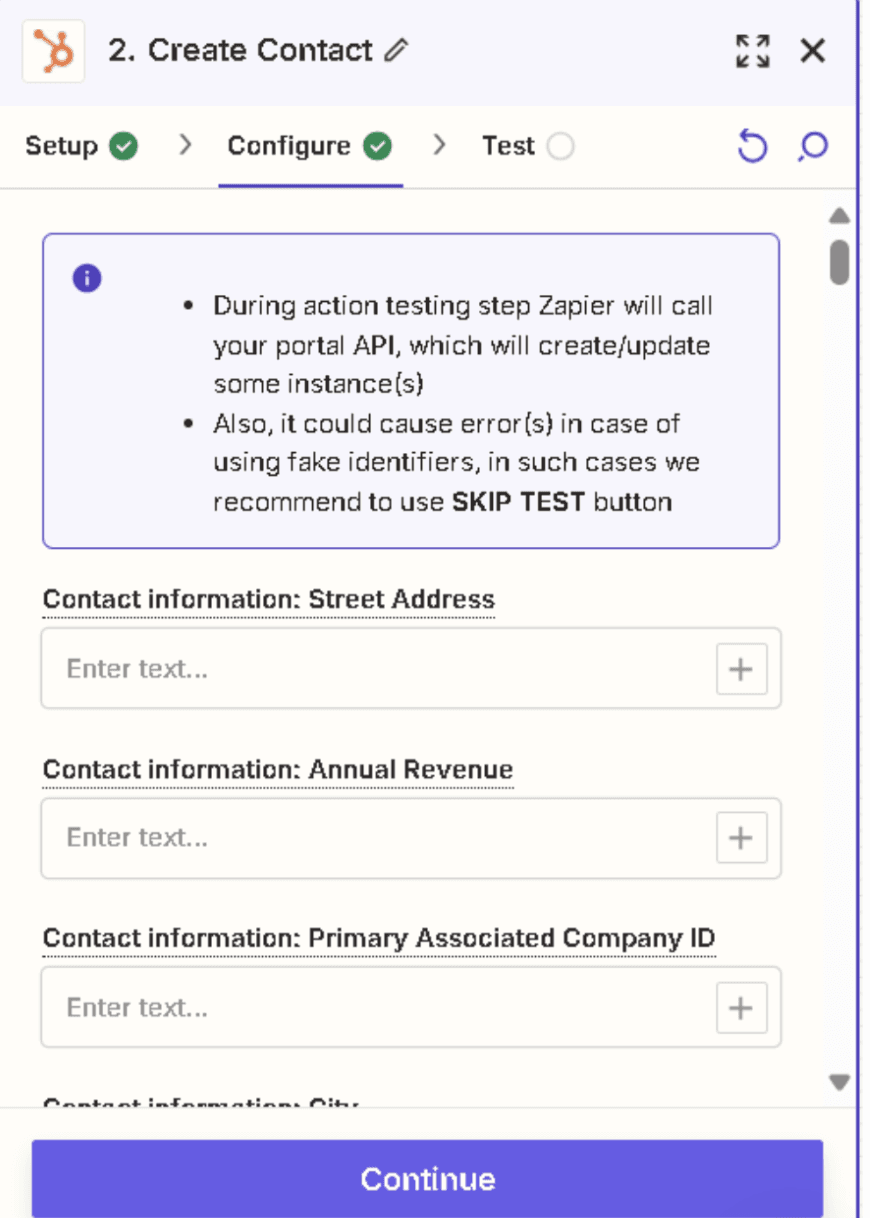
For the action app, select HubSpot and choose an action event like Create Contact or Update Deal.
Authenticate both your Airtable and HubSpot accounts.

Map Data Fields
In the Zap setup, map the data fields from Airtable to HubSpot (e.g., email, name, status).
Test and Activate
Test the Zap to ensure it works correctly. Once confirmed, turn on the Zap to start the automation.
Pros:
Automated Syncing: Automatically transfer data between Airtable and HubSpot based on your triggers.
Customizable Workflows: Tailor the integration to fit your specific needs.
Easy Setup: No coding required for basic integrations.
Cons:
Limited Customization: Advanced features may be restricted compared to native integrations.
Costs: Zapier’s pricing can increase with the number of Zaps and usage.
Sync Delays: Data may not sync in real-time and may have a slight delay.
Conclusion
Integrating Airtable with HubSpot can significantly enhance your data management and workflow automation. Superjoin can help you get you there!
Get started with these integrations and elevate your data management to the next level!
Streamline your data management by integrating Airtable with HubSpot. Learn how to make these powerful tools work together effortlessly.
Why Connect Airtable to HubSpot?
Are you looking to manage and sync your data between Airtable and HubSpot seamlessly? Integrating Airtable with HubSpot enables you to:
Centralize Your Data: Keep all your project management, CRM, and marketing data in sync across platforms.
Improve Workflow Efficiency: Automate data transfers to eliminate manual entry and reduce errors.
Enhance Reporting: Use integrated data for comprehensive reporting and better decision-making.
Connecting these platforms helps you maintain up-to-date information across your marketing and CRM efforts, making your workflows more efficient.
Method 1: Connecting Airtable to HubSpot Using Superjoin
Step-by-Step Guide:
Install Superjoin on Google Sheets
Open Google Sheets and navigate to the Extensions tab. Select Add-ons > Get add-ons.
Search for Superjoin in the Google Workspace Marketplace, install it, and grant necessary permissions.
Launch Superjoin from Extensions > Superjoin > Launch.
Alternatively, install Superjoin on Microsoft Excel
Open this link, click on Get it now.
Once installed, click on Open in Excel or Try using it online (for Excel online).
Launch Superjoin by opening the add-in and clicking on Open Sidebar. Login with your Microsoft account to start using Superjoin.
Connect and Import Data from Airtable
In the Superjoin sidebar, select Sources and choose Airtable.
Authenticate your Airtable account by following the prompts.
Select the base and table you want to import data from, then choose the fields and records you want to pull into Google Sheets.
Export Data to HubSpot
n the Superjoin sidebar, navigate to sources, choose Hubspot as your source — click Export
Choose the sheet and header row containing the data to export.
Select the HubSpot Object (e.g., Contacts, Deals) and the type of action: Update, Insert or Delete.
Map fields from Google Sheets to corresponding fields in HubSpot, either manually or using Superjoin’s auto-mapping feature.
Complete the export to sync your Airtable data with HubSpot.
Benefits of Using Superjoin for Airtable-HubSpot Integration
Superjoin offers several advantages for syncing Airtable and HubSpot:
No Coding Needed: Easily integrate Airtable with HubSpot without any technical knowledge.
Customizable Data Import/Export: Select exactly what data to import from Airtable and how to map it to HubSpot.
Smooth Data Flow: Use Google Sheets as an intermediary to ensure accurate and efficient data transfer.
Real-Time Updates: Superjoin supports scheduled or real-time data updates, keeping both platforms in sync.
By using Superjoin, you can efficiently manage and sync your Airtable and HubSpot data, enhancing your data workflows.
Method 2: Connecting Airtable to HubSpot via Zapier
Zapier can help you automate the connection between Airtable and HubSpot by creating custom workflows.
Step-by-Step Guide:
Create a Zapier Account
Sign up at zapier.com and log in to your dashboard.
Set Up a Zap
Click Create Zap in the Zapier dashboard.
For the trigger app, select Airtable and choose a trigger event such as “New Record” or “Updated Record.”
Configure HubSpot Action
For the action app, select HubSpot and choose an action event like Create Contact or Update Deal.
Authenticate both your Airtable and HubSpot accounts.
Map Data Fields
In the Zap setup, map the data fields from Airtable to HubSpot (e.g., email, name, status).
Test and Activate
Test the Zap to ensure it works correctly. Once confirmed, turn on the Zap to start the automation.
Pros:
Automated Syncing: Automatically transfer data between Airtable and HubSpot based on your triggers.
Customizable Workflows: Tailor the integration to fit your specific needs.
Easy Setup: No coding required for basic integrations.
Cons:
Limited Customization: Advanced features may be restricted compared to native integrations.
Costs: Zapier’s pricing can increase with the number of Zaps and usage.
Sync Delays: Data may not sync in real-time and may have a slight delay.
Conclusion
Integrating Airtable with HubSpot can significantly enhance your data management and workflow automation. Superjoin can help you get you there!
Get started with these integrations and elevate your data management to the next level!
FAQs
Why should I integrate Airtable with HubSpot?
Why should I integrate Airtable with HubSpot?
Can I integrate Airtable with HubSpot without coding?
Can I integrate Airtable with HubSpot without coding?
What are the benefits of using Superjoin for integration?
What are the benefits of using Superjoin for integration?
Automatic Data Pulls
Visual Data Preview
Set Alerts

Try it now