HubSpot Tutorial
How to Connect Zendesk to HubSpot: 1-Min Interactive Guide 2024
Seamlessly sync support and CRM data to enhance customer service and marketing efforts!
Table of Contents
Here's a quick step-by-step guide 🔝
Here's a quick step-by-step guide 🔝
Maximize the potential of your customer support data by integrating Zendesk with HubSpot. Learn how Superjoin simplifies this integration for improved workflow and better insights.
Why Connect Zendesk to HubSpot?
Are you tired of switching between platforms to track customer support interactions and sales?
Connecting Zendesk with HubSpot allows your teams to operate more efficiently by syncing critical customer support and CRM data. Here are some key benefits:
Unified View of Customer Data: Get a complete view of your customers' support interactions and sales history in one platform.
Better Customer Experience: Ensure smoother communication between your customer support and sales teams, enabling faster and more personalized service.
Actionable Insights: Gain deeper insights into how support issues impact customer journeys, helping you improve marketing and sales efforts.
Method 1: Connecting Zendesk to HubSpot Using Superjoin
Step-by-Step Guide:
Install Superjoin on Google Sheets
Open Google Sheets, click on the Extensions tab, and select Add-ons > Get add-ons.
Search for Superjoin in the Google Workspace Marketplace. Install it and grant the necessary permissions.
Launch Superjoin by selecting Extensions > Superjoin > Launch.
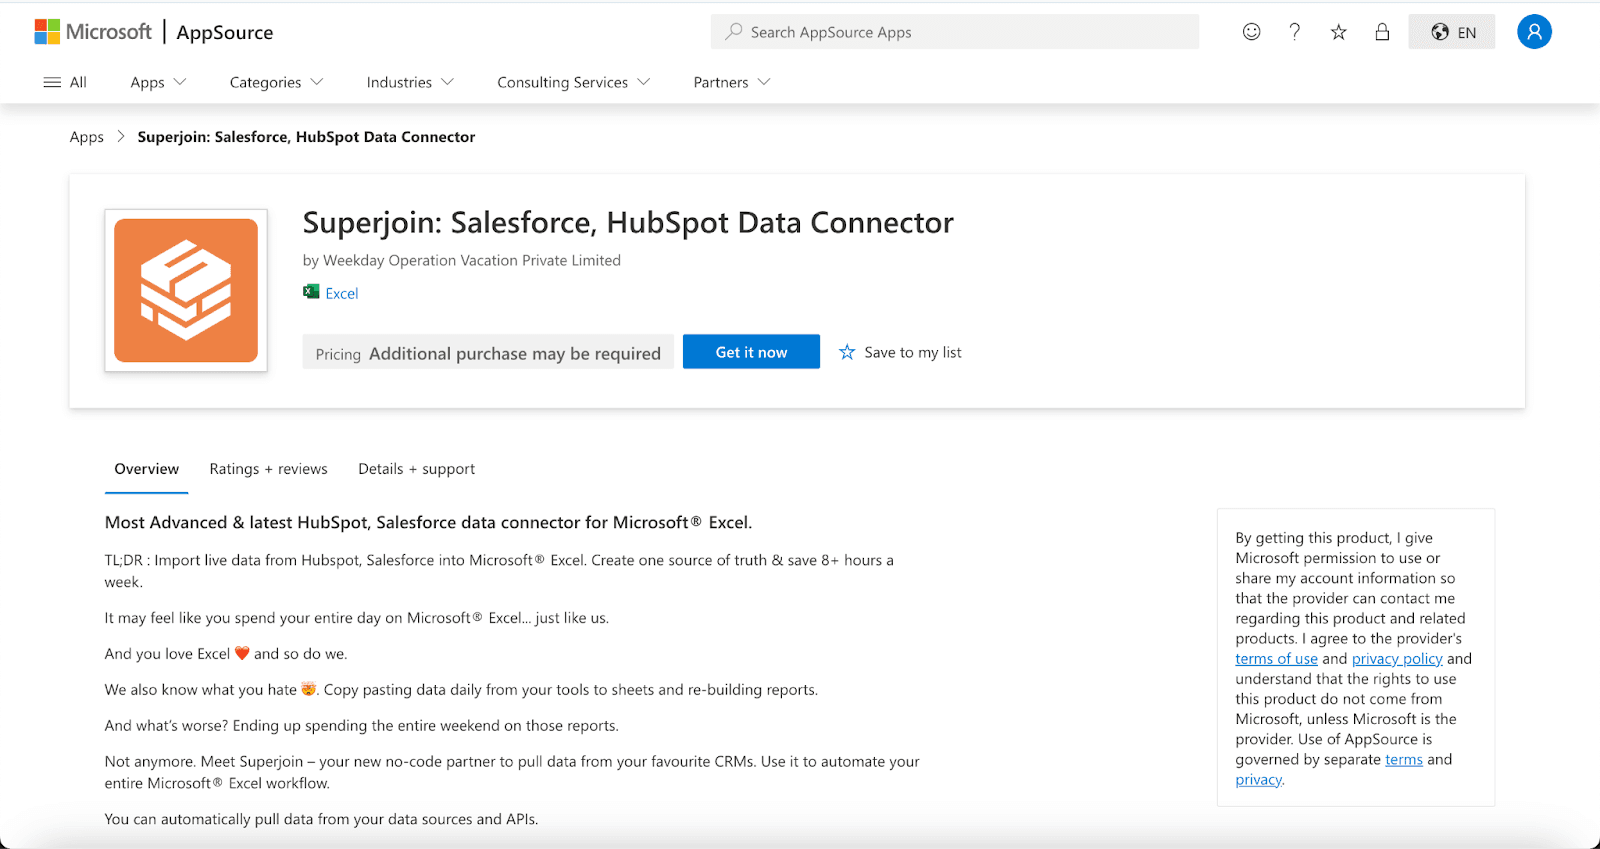
Alternatively, install Superjoin on Microsoft Excel
Open this link, click on Get it now.
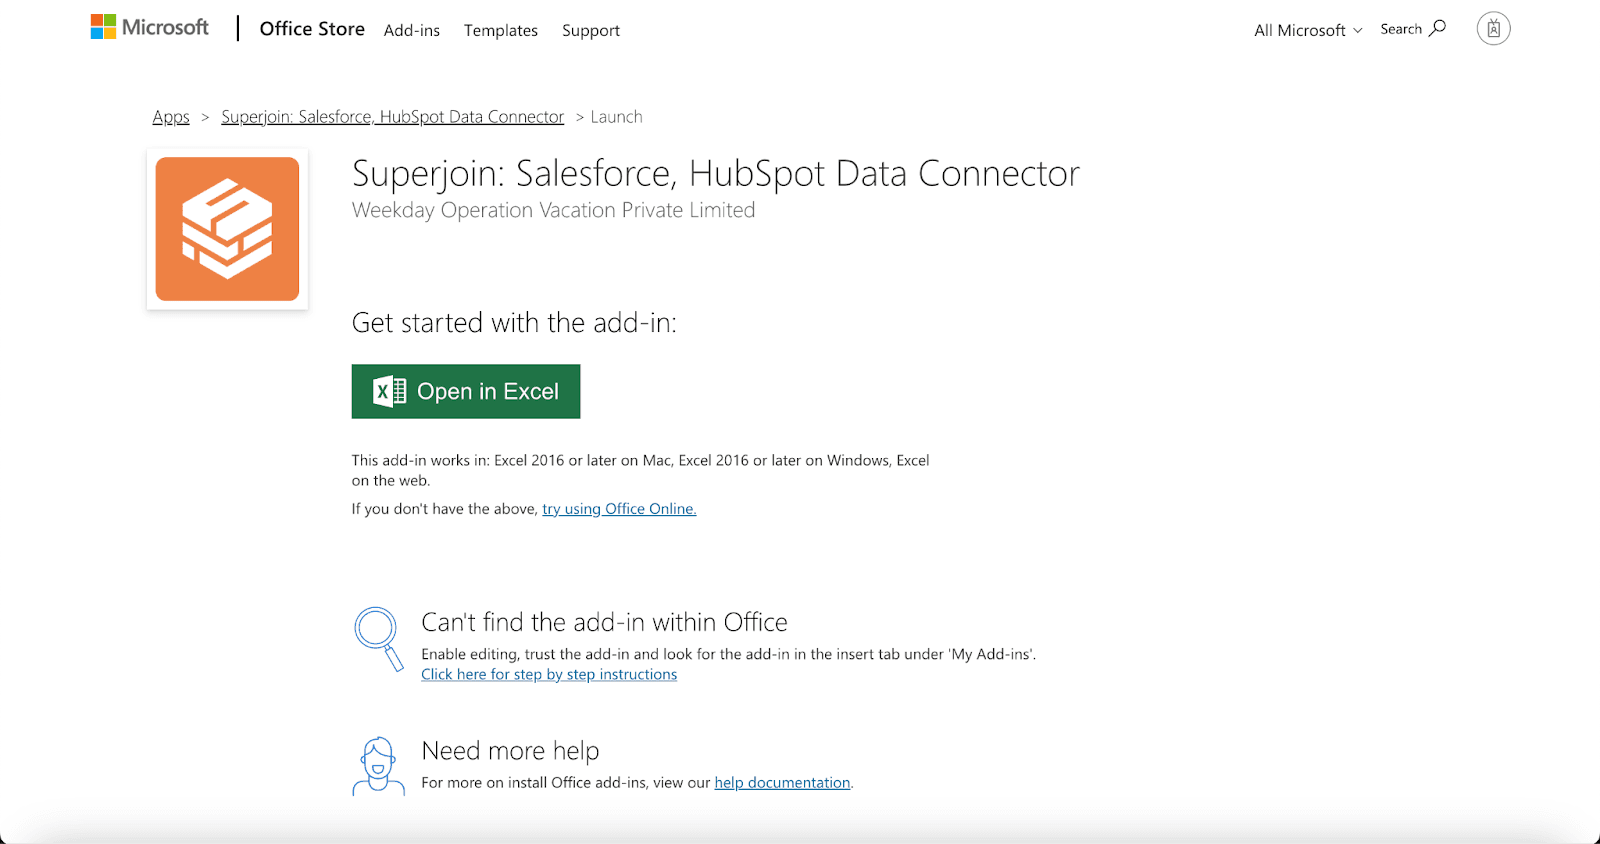
Once installed, click on Open in Excel or Try using it online (for Excel online).
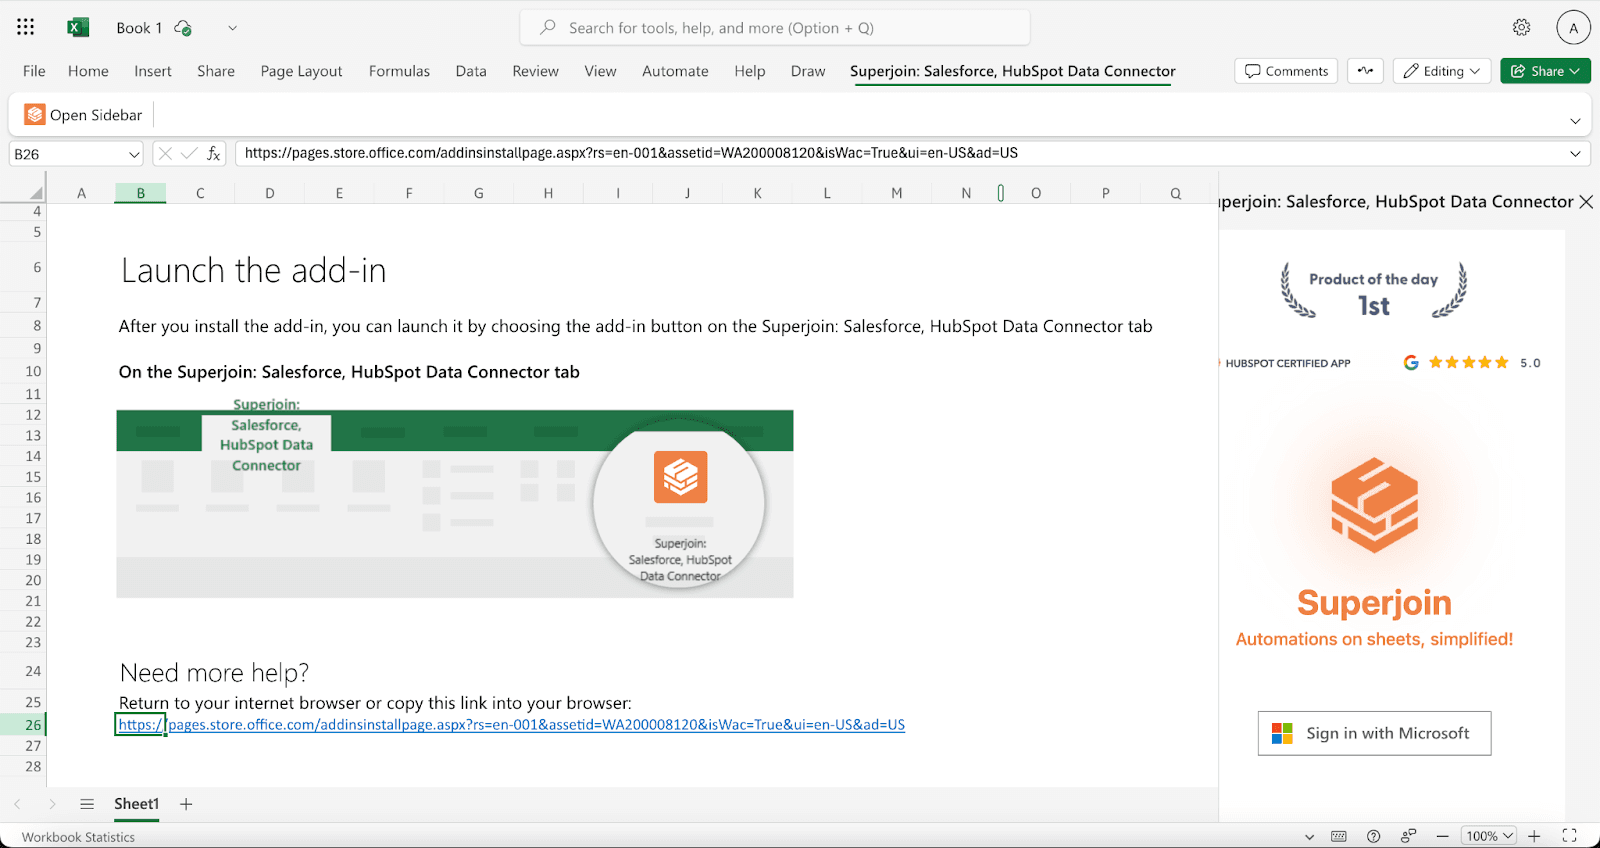
Launch Superjoin by opening the add-in and clicking on Open Sidebar. Login with your Microsoft account to start using Superjoin.
Connect and Import Data from Zendesk
In the Superjoin sidebar, click Sources and select Zendesk.
Authenticate your Zendesk account by following the prompts.
Select the data you need, such as Tickets, Users, or Organizations.
Configure any necessary filters and import the data into Google Sheets.
Export Data to HubSpot
In the Superjoin sidebar, navigate to sources, choose Hubspot as your source — click Export
Choose the tab and header row with the Zendesk data you wish to export.
Select the relevant HubSpot object (e.g., Contacts, Tickets, Companies).
Map the fields from Zendesk to corresponding HubSpot fields (auto-mapping is available, or you can map manually).
Choose an action type: Insert, Update, or Delete, and start the data transfer.
Benefits of Using Superjoin for Zendesk-HubSpot Integration
Superjoin provides a seamless way to integrate Zendesk and HubSpot, making it a highly effective tool for businesses. Here’s why:
Easy-to-Use Interface: No coding is required. Superjoin’s intuitive interface makes it simple to move data between Zendesk and HubSpot.
Granular Data Control: You can selectively import the specific metrics or data you need from Zendesk and sync them directly with HubSpot.
Custom Field Mapping: Superjoin allows you to map fields easily, ensuring accurate data transfer.
Real-Time Data Sync: Keep your HubSpot CRM up to date with the latest support data from Zendesk, reducing manual errors.
Faster Workflows: Automated syncs between Zendesk and HubSpot save time, letting your teams focus on more important tasks.
Method 2: Native Zendesk-HubSpot Integration
HubSpot provides a native integration to sync data between Zendesk and HubSpot.
Step-by-Step Guide:
Access the Integration in HubSpot
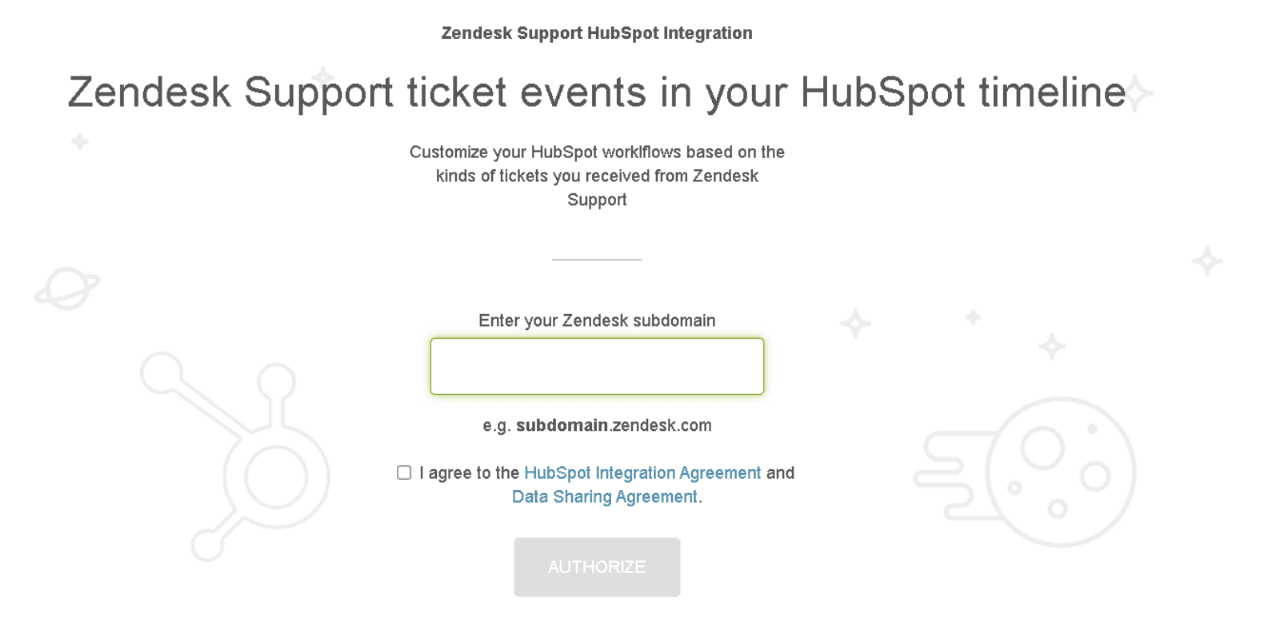
Open the Settings menu in HubSpot and navigate to Integrations under the Account Settings.
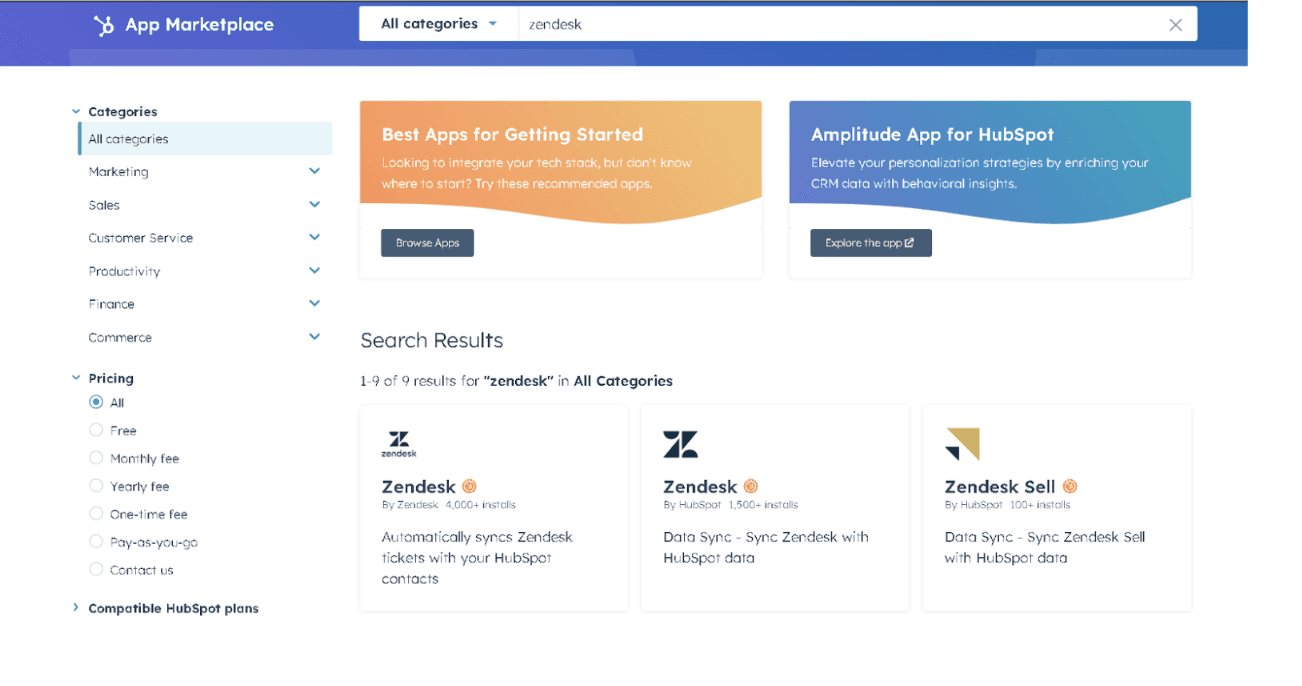
Find Zendesk in the App Marketplace
Go to the App Marketplace and search for Zendesk.
Click Connect App and follow the prompts to authenticate your Zendesk account.
Configure Sync Settings
Customize how data syncs between Zendesk and HubSpot. You can sync Tickets, Contacts, or Users between platforms.
Set up bi-directional or one-way sync, depending on your business needs.
Track and Manage Zendesk Data in HubSpot
After syncing, Zendesk tickets and other relevant data will appear in HubSpot.
You can now manage customer support tickets directly from HubSpot, with all relevant interactions recorded in your CRM.
Pros:
Simple Setup: Quick and easy to connect without any external tools.
Unified Dashboard: View Zendesk data in HubSpot alongside your sales and marketing metrics.
Bi-Directional Sync: Keep both platforms in sync for consistent data flow.
Cons:
Limited Customization: You may not have full control over which fields sync.
Basic Features: The integration focuses on basic support data, lacking advanced analytics.
Potential Sync Delays: Real-time data sync may not always be available.
Method 3: Connecting Zendesk to HubSpot via Zapier
Zapier is another option for integrating Zendesk with HubSpot, offering custom automations.
Step-by-Step Guide:
Create a Zapier Account
Sign up for a Zapier account and log in to your dashboard.
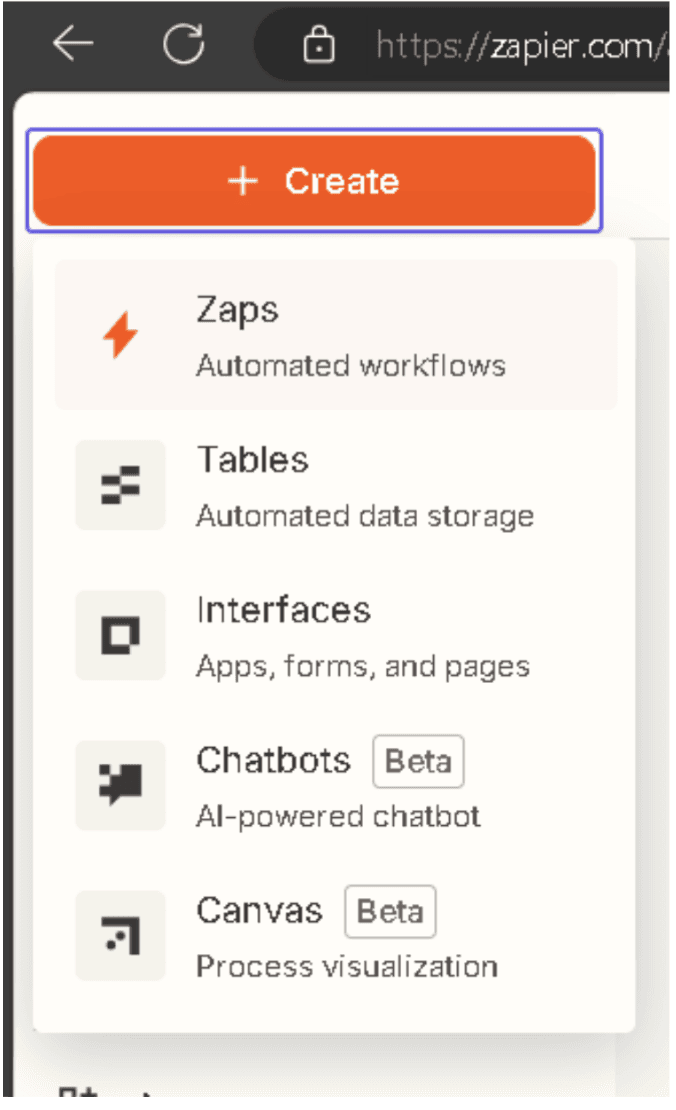
Create a New Zap
Click Create Zap and select Zendesk as the trigger app.
Choose a trigger event, such as New Ticket or Updated Ticket, depending on your needs.

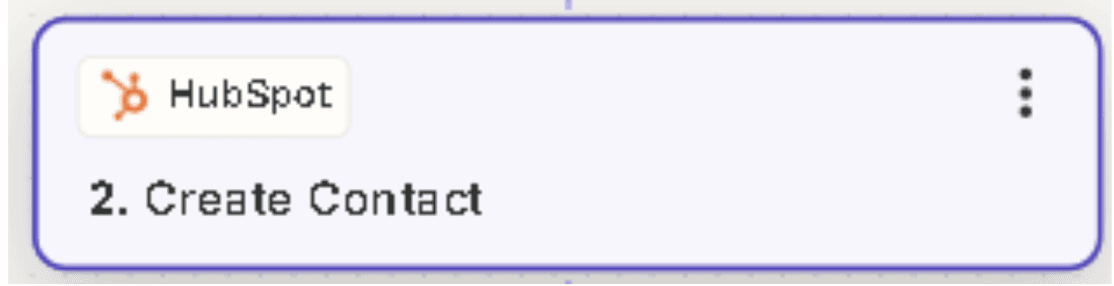
Set the Action in HubSpot
Select HubSpot as the action app.
Choose an action event like Create or Update Contact or Create Ticket to sync Zendesk data to HubSpot.
Map Fields Between Zendesk and HubSpot
Customize how data fields from Zendesk should map to HubSpot’s fields, such as linking ticket IDs, user information, or status updates.
Test and Activate the Zap
Test the Zap to make sure everything works as expected.
Once you’re satisfied with the result, turn on the Zap to activate the integration.
Pros:
Highly Customizable: Allows more flexibility in how and when Zendesk data syncs with HubSpot.
No Coding Required: Zapier is user-friendly, even for non-tech professionals.
Multiple Triggers: You can choose specific actions in Zendesk to trigger workflows in HubSpot.
Cons:
Cost: Zapier pricing can increase with more complex workflows or higher usage.
Sync Delays: Syncing between Zendesk and HubSpot may not happen instantly.
Limited Features: Not as deep or feature-rich as native integrations.
Conclusion
Integrating Zendesk with HubSpot allows your customer support and sales teams to work in harmony, ensuring that customer data flows effortlessly between departments. Using Superjoin, you can streamline workflows, improve customer experience, and gain actionable insights.
Maximize the potential of your customer support data by integrating Zendesk with HubSpot. Learn how Superjoin simplifies this integration for improved workflow and better insights.
Why Connect Zendesk to HubSpot?
Are you tired of switching between platforms to track customer support interactions and sales?
Connecting Zendesk with HubSpot allows your teams to operate more efficiently by syncing critical customer support and CRM data. Here are some key benefits:
Unified View of Customer Data: Get a complete view of your customers' support interactions and sales history in one platform.
Better Customer Experience: Ensure smoother communication between your customer support and sales teams, enabling faster and more personalized service.
Actionable Insights: Gain deeper insights into how support issues impact customer journeys, helping you improve marketing and sales efforts.
Method 1: Connecting Zendesk to HubSpot Using Superjoin
Step-by-Step Guide:
Install Superjoin on Google Sheets
Open Google Sheets, click on the Extensions tab, and select Add-ons > Get add-ons.
Search for Superjoin in the Google Workspace Marketplace. Install it and grant the necessary permissions.
Launch Superjoin by selecting Extensions > Superjoin > Launch.
Alternatively, install Superjoin on Microsoft Excel
Open this link, click on Get it now.
Once installed, click on Open in Excel or Try using it online (for Excel online).
Launch Superjoin by opening the add-in and clicking on Open Sidebar. Login with your Microsoft account to start using Superjoin.
Connect and Import Data from Zendesk
In the Superjoin sidebar, click Sources and select Zendesk.
Authenticate your Zendesk account by following the prompts.
Select the data you need, such as Tickets, Users, or Organizations.
Configure any necessary filters and import the data into Google Sheets.
Export Data to HubSpot
In the Superjoin sidebar, navigate to sources, choose Hubspot as your source — click Export
Choose the tab and header row with the Zendesk data you wish to export.
Select the relevant HubSpot object (e.g., Contacts, Tickets, Companies).
Map the fields from Zendesk to corresponding HubSpot fields (auto-mapping is available, or you can map manually).
Choose an action type: Insert, Update, or Delete, and start the data transfer.
Benefits of Using Superjoin for Zendesk-HubSpot Integration
Superjoin provides a seamless way to integrate Zendesk and HubSpot, making it a highly effective tool for businesses. Here’s why:
Easy-to-Use Interface: No coding is required. Superjoin’s intuitive interface makes it simple to move data between Zendesk and HubSpot.
Granular Data Control: You can selectively import the specific metrics or data you need from Zendesk and sync them directly with HubSpot.
Custom Field Mapping: Superjoin allows you to map fields easily, ensuring accurate data transfer.
Real-Time Data Sync: Keep your HubSpot CRM up to date with the latest support data from Zendesk, reducing manual errors.
Faster Workflows: Automated syncs between Zendesk and HubSpot save time, letting your teams focus on more important tasks.
Method 2: Native Zendesk-HubSpot Integration
HubSpot provides a native integration to sync data between Zendesk and HubSpot.
Step-by-Step Guide:
Access the Integration in HubSpot
Open the Settings menu in HubSpot and navigate to Integrations under the Account Settings.
Find Zendesk in the App Marketplace
Go to the App Marketplace and search for Zendesk.
Click Connect App and follow the prompts to authenticate your Zendesk account.
Configure Sync Settings
Customize how data syncs between Zendesk and HubSpot. You can sync Tickets, Contacts, or Users between platforms.
Set up bi-directional or one-way sync, depending on your business needs.
Track and Manage Zendesk Data in HubSpot
After syncing, Zendesk tickets and other relevant data will appear in HubSpot.
You can now manage customer support tickets directly from HubSpot, with all relevant interactions recorded in your CRM.
Pros:
Simple Setup: Quick and easy to connect without any external tools.
Unified Dashboard: View Zendesk data in HubSpot alongside your sales and marketing metrics.
Bi-Directional Sync: Keep both platforms in sync for consistent data flow.
Cons:
Limited Customization: You may not have full control over which fields sync.
Basic Features: The integration focuses on basic support data, lacking advanced analytics.
Potential Sync Delays: Real-time data sync may not always be available.
Method 3: Connecting Zendesk to HubSpot via Zapier
Zapier is another option for integrating Zendesk with HubSpot, offering custom automations.
Step-by-Step Guide:
Create a Zapier Account
Sign up for a Zapier account and log in to your dashboard.
Create a New Zap
Click Create Zap and select Zendesk as the trigger app.
Choose a trigger event, such as New Ticket or Updated Ticket, depending on your needs.
Set the Action in HubSpot
Select HubSpot as the action app.
Choose an action event like Create or Update Contact or Create Ticket to sync Zendesk data to HubSpot.
Map Fields Between Zendesk and HubSpot
Customize how data fields from Zendesk should map to HubSpot’s fields, such as linking ticket IDs, user information, or status updates.
Test and Activate the Zap
Test the Zap to make sure everything works as expected.
Once you’re satisfied with the result, turn on the Zap to activate the integration.
Pros:
Highly Customizable: Allows more flexibility in how and when Zendesk data syncs with HubSpot.
No Coding Required: Zapier is user-friendly, even for non-tech professionals.
Multiple Triggers: You can choose specific actions in Zendesk to trigger workflows in HubSpot.
Cons:
Cost: Zapier pricing can increase with more complex workflows or higher usage.
Sync Delays: Syncing between Zendesk and HubSpot may not happen instantly.
Limited Features: Not as deep or feature-rich as native integrations.
Conclusion
Integrating Zendesk with HubSpot allows your customer support and sales teams to work in harmony, ensuring that customer data flows effortlessly between departments. Using Superjoin, you can streamline workflows, improve customer experience, and gain actionable insights.
FAQs
What are the main benefits of integrating Zendesk with HubSpot?
What are the main benefits of integrating Zendesk with HubSpot?
What types of data can be synced between Zendesk and HubSpot?
What types of data can be synced between Zendesk and HubSpot?
Is coding required to integrate Zendesk with HubSpot?
Is coding required to integrate Zendesk with HubSpot?
Automatic Data Pulls
Visual Data Preview
Set Alerts

Try it now