Salesforce Tutorial
How to Add a Formula Field in Salesforce Reports?
Add a formula field to Salesforce reports to perform custom calculations, enhance data analysis, and unlock deeper insights with step-by-step guidance.
Table of Contents

Mastering Salesforce formula fields is critical for admins and report builders to boost organizational efficiency. These fields automate calculations, customize data displays, and deliver real-time insights directly in reports, cutting manual work.
To add formula fields, use the report editor’s “Add Formula” option to create calculations with fields, operators, and functions. After naming the field and selecting a data type, validate and save it to generate dynamic values like discounts or cross-object metrics.
For spreadsheet integration, tools like superjoin automate data transfers between Salesforce and Excel/Google Sheets, enabling real-time analysis without manual exports. This bridges reporting gaps, letting teams work in familiar environments while leveraging Salesforce data.
Understanding Formula Fields in Salesforce
Formula fields in Salesforce are basically your personal math and logic wizards. They’re custom fields that automatically calculate values based on other fields or data in your records. You set up the logic once, and Salesforce keeps the field updated for you—no manual math, no copy-pasting, and no risk of someone forgetting to update a number. These fields are read-only, meaning you can’t edit them directly; their values are always calculated on the fly based on the formula you define. You can reference other fields, constants, or even system values like TODAY or NOW, and formulas can handle everything from simple math to complex business logic
Types of Formula Fields
These are the types of formula fields:
Text Formula Fields
Definition: Formula fields that produce text values by applying specific conditions or combining existing text fields.
Use Case: Helpful for creating custom labels, merging multiple text fields, or generating conditional text outputs.
Numeric Formula Fields
Definition: Formula fields designed to perform operations like addition, subtraction, multiplication, or division on numeric data.
Use Case: Perfect for extracting insights from numerical data, calculating margins, or developing custom scoring systems.
Date Formula Fields
Definition: Formula fields that manage date and time calculations, enabling users to adjust date values or compute durations.
Use Case: Ideal for monitoring opportunity aging, calculating SLAs, or establishing project timelines.
Checkbox Formula Fields
Definition: Formula fields that assess conditions and return a true/false value, functioning as dynamic checkboxes.
Use Case: Great for automating criteria evaluations or generating flags based on specific conditions.
Benefits of Using Formula Fields
Real-time Calculations: Values update automatically whenever the referenced fields change, so your reports always show the latest numbers—no need to refresh or recalculate manually.
Consistency: Since the calculation is done the same way every time, you avoid human error and keep your data accurate across all records.
Flexibility: You can use formula fields for just about anything—math, text manipulation, conditional logic, or even pulling info from related records up to 10 levels deep.
Saves Time: Automating calculations means less manual work for you and your team, freeing everyone up to focus on more important stuff.
Better Reporting: Formula fields can be used directly in reports, making it easy to analyze custom metrics without exporting data to Excel or running extra calculations elsewhere.
Preparing to Create a Formula Field
Before using the formula field, you must have the necessary prerequisites and consider key aspects for a successful implementation. These includes:
Prerequisites and Key Considerations
Permissions: You’ll need the right permissions to create or edit reports and formula fields. Usually, this means having at least “Create and Customize Reports” access.
Know Your Data: Understand the structure of your Salesforce objects and which fields you want to reference. This helps you avoid errors and makes your formulas more efficient.
Data Types Matter: Make sure you know what type of data your formula should return (number, text, date, etc.). Mixing up data types is a common source of errors4.
Formula Limits: Salesforce has some limits, like maximum formula size (3,900 characters for syntax, 4,000 bytes when saved), and limits on how many formula fields you can have per object or report1.
Performance: Complex or deeply nested formulas can slow down your reports. Try to keep things as simple as possible and avoid referencing too many fields or using too many functions in a single formula1.
Formula Syntax: Get comfortable with the formula editor and the functions/operators available. Use the “Check Syntax” button to catch mistakes before saving.
Step-by-Step Process for Creating a Formula Field
Incorporating formula fields into Salesforce reports can significantly elevate your data analysis capabilities by enabling dynamic insights and calculations.
Follow this detailed walkthrough to seamlessly add formula fields to your reports, enhanced by Superjoin for real-time synchronization between Salesforce and spreadsheets.
Before proceeding, familiarize yourself with Salesforce’s formula field limitations, such as character restrictions and cross-object reference constraints.
To bypass these limitations, leverage Superjoin's bidirectional data connector, which syncs Salesforce data with Google Sheets or Excel.
This integration allows you to pull live Salesforce data into spreadsheets, apply custom formulas to generate calculated fields, and write those results directly back to Salesforce—all without exiting your spreadsheet. Now, let’s dive into the process of creating a formula field directly within Salesforce.
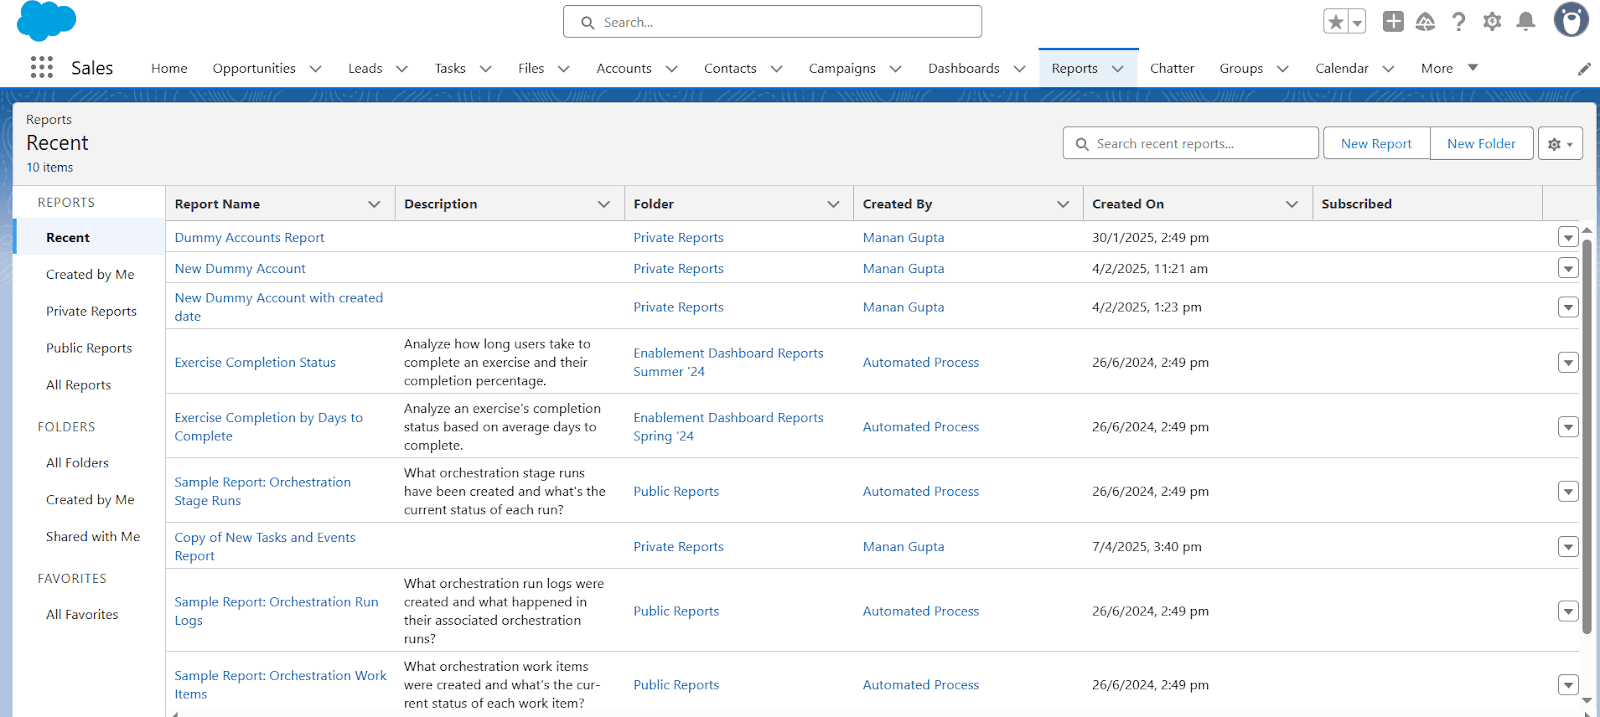
Step 1: Navigate to Report Builder
Log in to your Salesforce account and navigate to the Report tab. Click on “New Report” to enter the Report Builder.
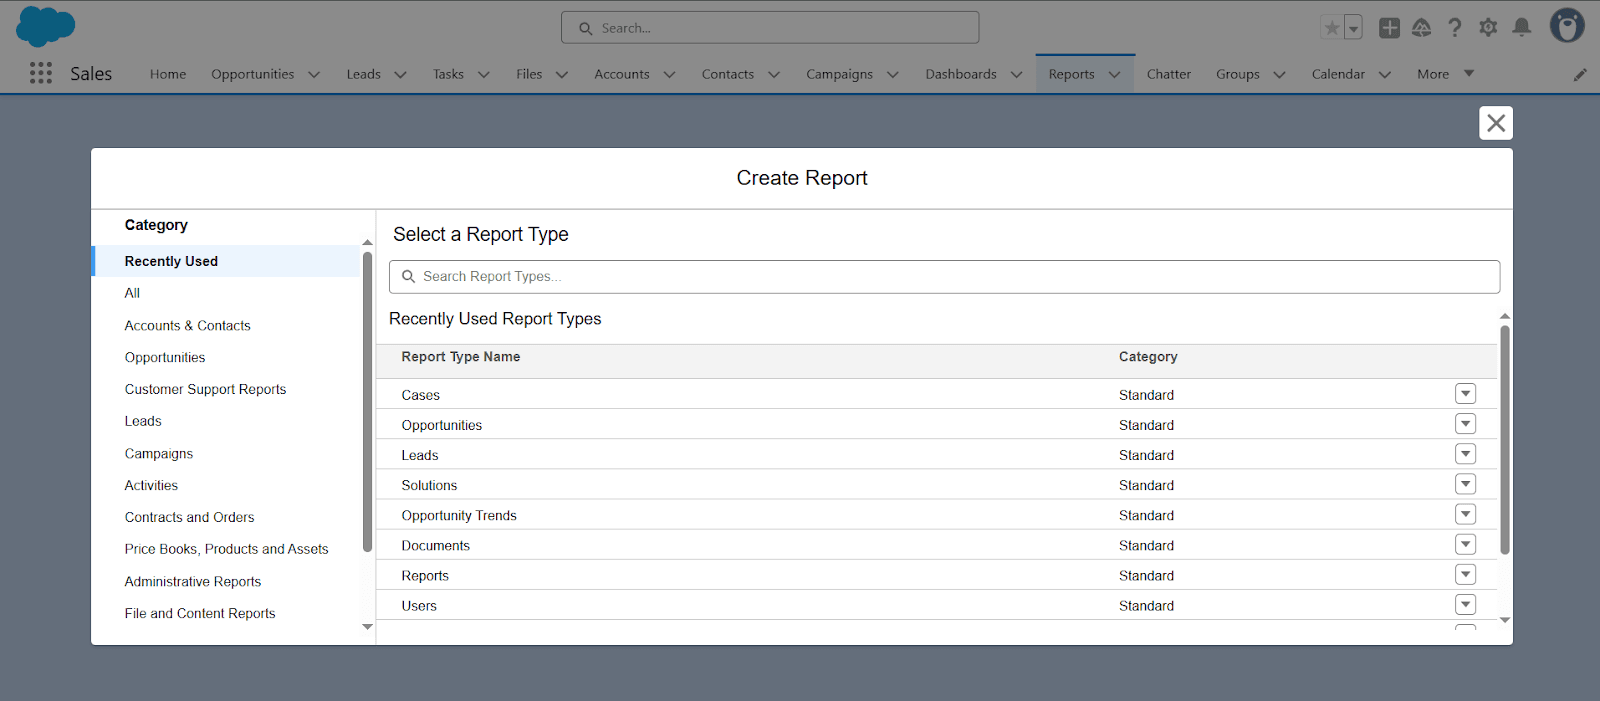
Step 2: Select Report Type
Choose the appropriate report type based on the data you want to analyze. Consider the objects and relationships relevant to your analysis.
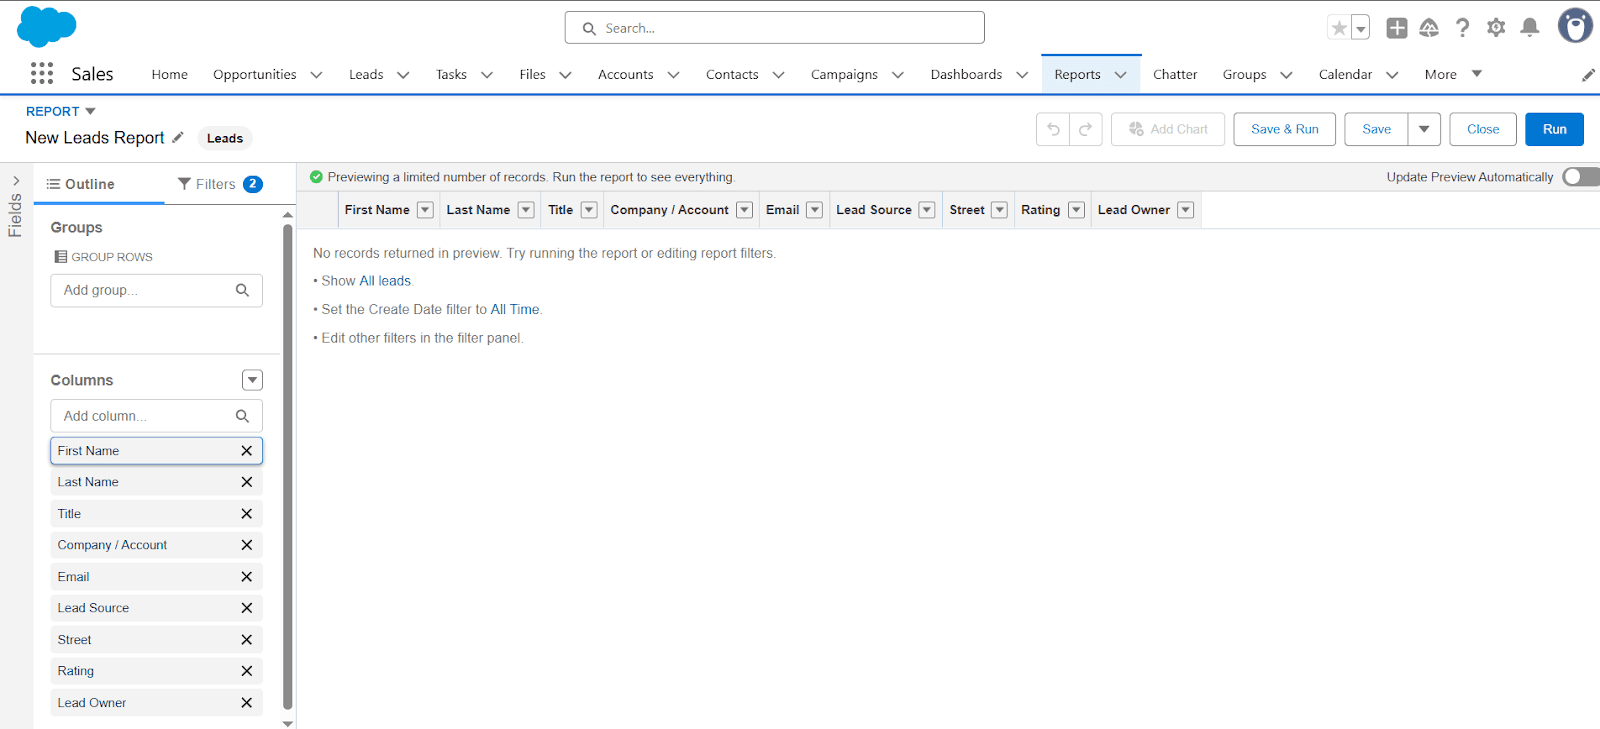
Step 3: Add Fields to Report
Drag and drop the fields you want to include in your report from the left sidebar to the report preview section. This sets the foundation for your analysis.
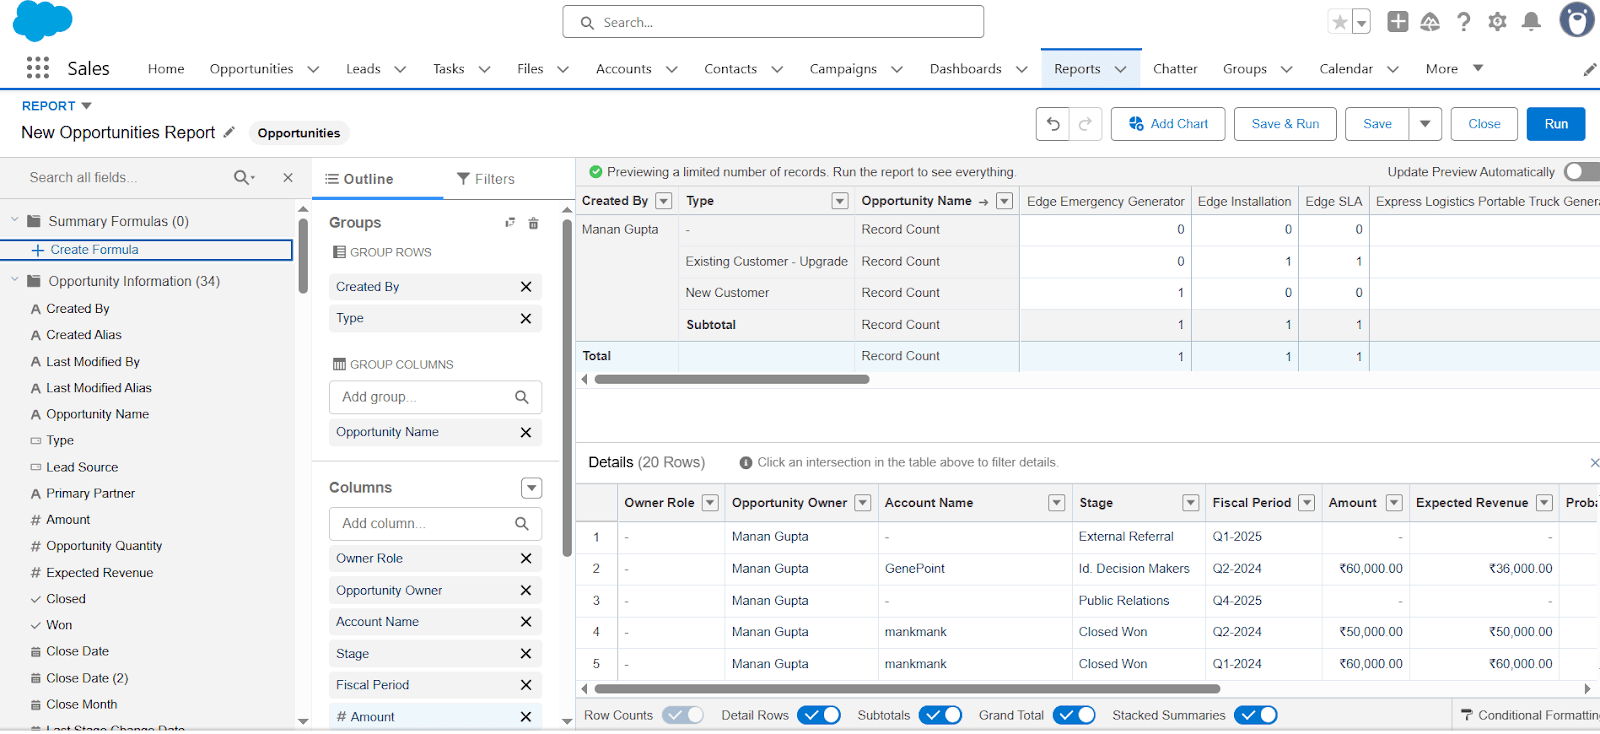
Step 4: Click on “Add Formula”
In the toolbar above the report preview, click on the “Add Formula” button. This opens the formula editor, where you can create your custom formula.
Step 5: Name Your Formula Field
Provide a meaningful name for your formula field. This helps in identifying the purpose of the formula within the report.
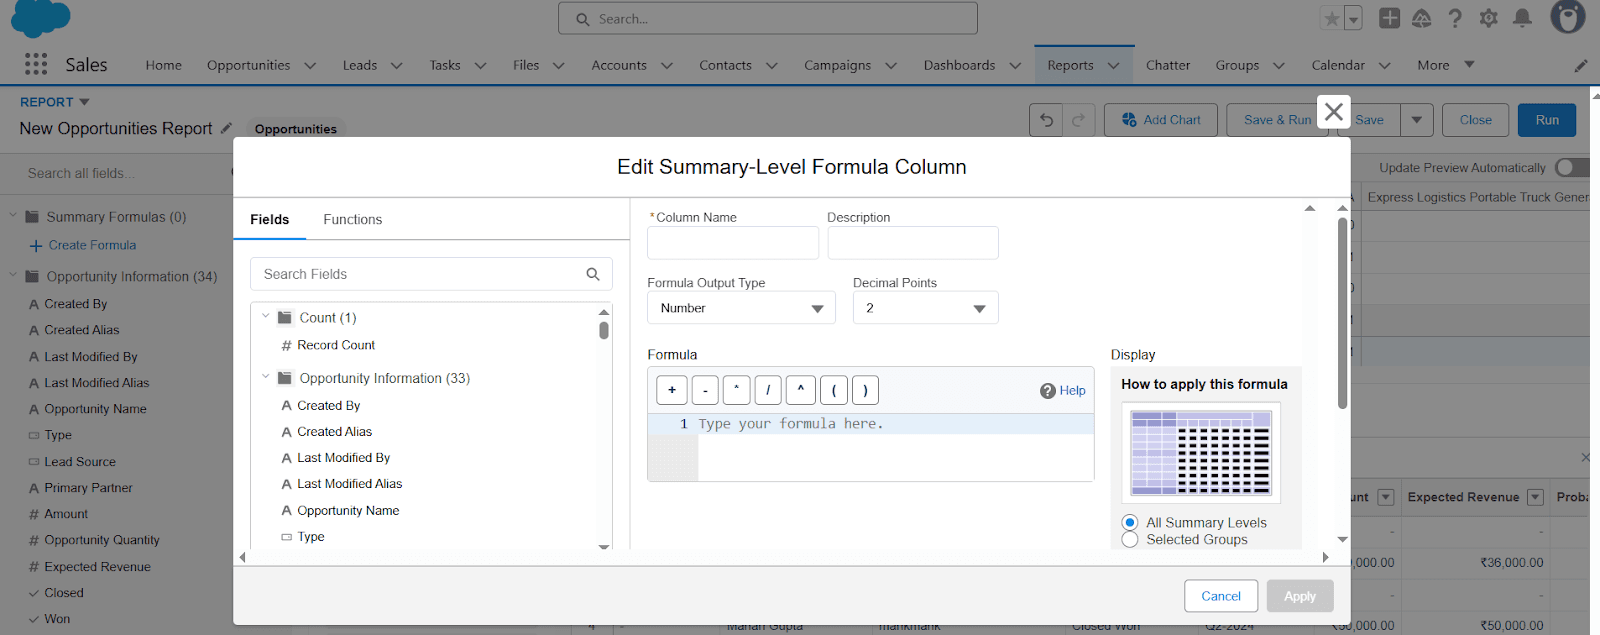
Step 6: Choose Data Type
Select the appropriate data type for your formula field—text, number, currency, date, etc. The data type should align with the nature of the calculation.
Step 7: Build Your Formula
Construct your formula using the available functions and fields.
The formula editor provides real-time syntax checking to help you avoid errors.
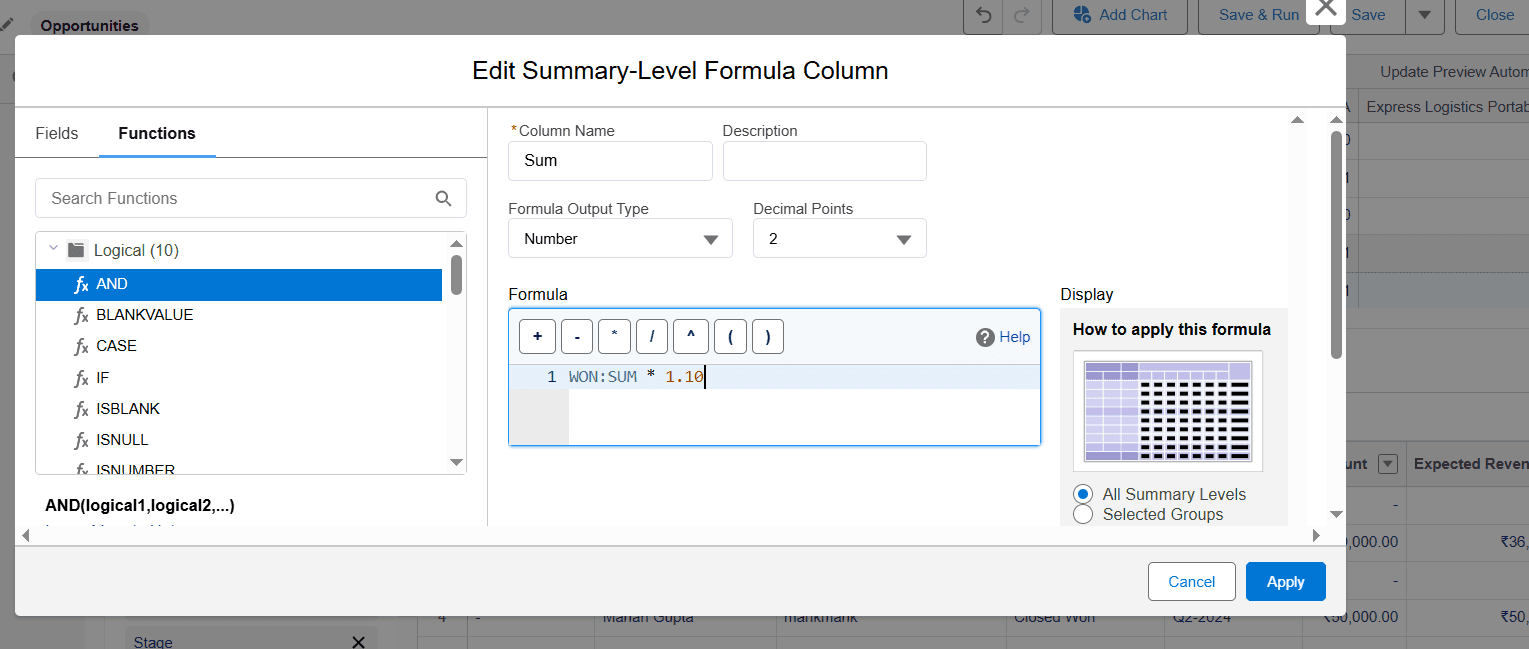
Step 8: Insert Fields and Functions
Utilize the “Insert Field” and “Insert Function” buttons to incorporate existing fields or functions into your formula. This ensures accuracy and simplifies the formula-building process.
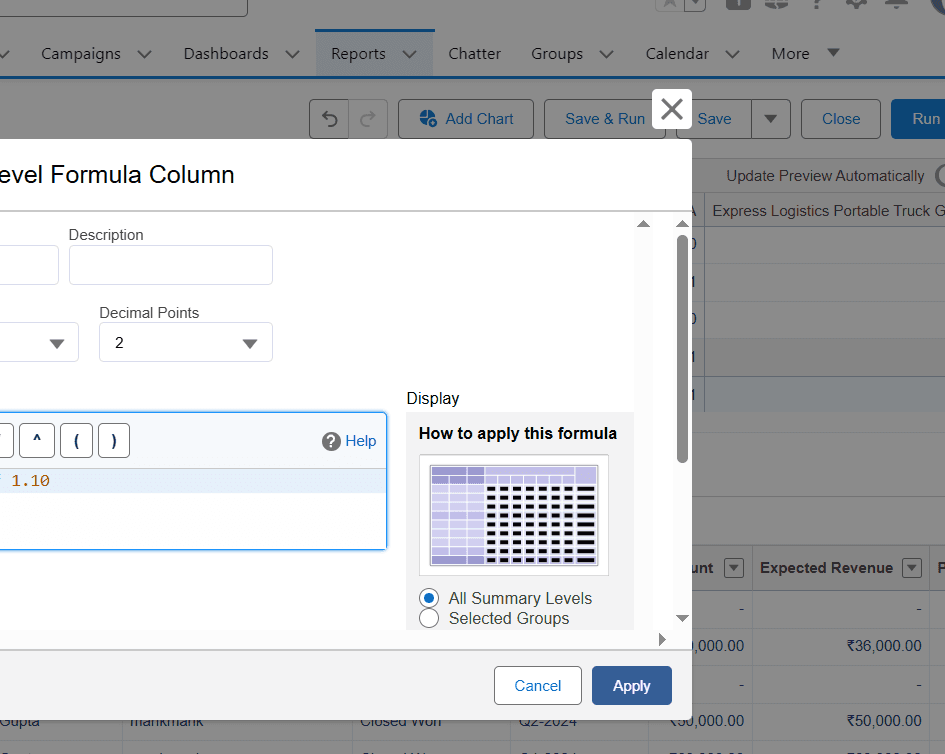
Step 9: Validate and Save
Click on the “Check Syntax” button to validate your formula. Resolve any errors that may appear. Once validated, click “Apply” to save your formula.
Step 10: Preview and Save Report
Preview your report to see the newly added formula field in action. If satisfied, click “Save” to save the report with the formula field.
Best Practices for Creating Formula Fields
Keep It Simple: The simpler your formula, the easier it is to understand and maintain. If you find yourself nesting functions several layers deep, see if you can break it up or simplify the logic.
Descriptive Names: Give your formula fields clear, descriptive names so anyone looking at the report knows exactly what the field is calculating.
Add Descriptions: Use the description field to explain what the formula does - future you (and your teammates) will thank you.
Test Thoroughly: Use sample data and the formula preview feature to test your formulas before rolling them out to everyone.
Mind the Limits: Try not to reference too many fields or use too many functions in one formula. If you hit a wall, consider if a workflow rule or a process builder might be a better fit.
Use API Names: When referencing fields, especially in complex formulas, use the API names to avoid typos and make the formula more robust.
Review Regularly: Periodically check your formula fields to make sure they’re still relevant and performing well, especially if your business processes change.
Conclusion
Adding formula fields in Salesforce empowers you to customize reports to precisely match your business requirements, unlocking deeper insights and tailored analytics. To further elevate your Salesforce experience, consider integrating Superjoin.
This tool not only provides advanced data management and analysis capabilities but also streamlines workflows, ensures real-time data synchronization, and enhances team collaboration by enabling seamless sharing and simultaneous work on shared datasets.
Say Goodbye to Tedious Data Exports! 🚀
Are you tired of the hassle of manually moving data from various tools into Excel? Superjoin has a solution for you.
Superjoin is an Excel add-in that automatically connects your favorite SaaS tools to your spreadsheets. It pulls data directly into Excel, allowing you to create reports that update themselves without any manual work on your part.
Bid farewell to tedious exports and repetitive tasks. With Superjoin, you can add one additional day to your week. Try Superjoin for free or schedule a demo.
Mastering Salesforce formula fields is critical for admins and report builders to boost organizational efficiency. These fields automate calculations, customize data displays, and deliver real-time insights directly in reports, cutting manual work.
To add formula fields, use the report editor’s “Add Formula” option to create calculations with fields, operators, and functions. After naming the field and selecting a data type, validate and save it to generate dynamic values like discounts or cross-object metrics.
For spreadsheet integration, tools like superjoin automate data transfers between Salesforce and Excel/Google Sheets, enabling real-time analysis without manual exports. This bridges reporting gaps, letting teams work in familiar environments while leveraging Salesforce data.
Understanding Formula Fields in Salesforce
Formula fields in Salesforce are basically your personal math and logic wizards. They’re custom fields that automatically calculate values based on other fields or data in your records. You set up the logic once, and Salesforce keeps the field updated for you—no manual math, no copy-pasting, and no risk of someone forgetting to update a number. These fields are read-only, meaning you can’t edit them directly; their values are always calculated on the fly based on the formula you define. You can reference other fields, constants, or even system values like TODAY or NOW, and formulas can handle everything from simple math to complex business logic
Types of Formula Fields
These are the types of formula fields:
Text Formula Fields
Definition: Formula fields that produce text values by applying specific conditions or combining existing text fields.
Use Case: Helpful for creating custom labels, merging multiple text fields, or generating conditional text outputs.
Numeric Formula Fields
Definition: Formula fields designed to perform operations like addition, subtraction, multiplication, or division on numeric data.
Use Case: Perfect for extracting insights from numerical data, calculating margins, or developing custom scoring systems.
Date Formula Fields
Definition: Formula fields that manage date and time calculations, enabling users to adjust date values or compute durations.
Use Case: Ideal for monitoring opportunity aging, calculating SLAs, or establishing project timelines.
Checkbox Formula Fields
Definition: Formula fields that assess conditions and return a true/false value, functioning as dynamic checkboxes.
Use Case: Great for automating criteria evaluations or generating flags based on specific conditions.
Benefits of Using Formula Fields
Real-time Calculations: Values update automatically whenever the referenced fields change, so your reports always show the latest numbers—no need to refresh or recalculate manually.
Consistency: Since the calculation is done the same way every time, you avoid human error and keep your data accurate across all records.
Flexibility: You can use formula fields for just about anything—math, text manipulation, conditional logic, or even pulling info from related records up to 10 levels deep.
Saves Time: Automating calculations means less manual work for you and your team, freeing everyone up to focus on more important stuff.
Better Reporting: Formula fields can be used directly in reports, making it easy to analyze custom metrics without exporting data to Excel or running extra calculations elsewhere.
Preparing to Create a Formula Field
Before using the formula field, you must have the necessary prerequisites and consider key aspects for a successful implementation. These includes:
Prerequisites and Key Considerations
Permissions: You’ll need the right permissions to create or edit reports and formula fields. Usually, this means having at least “Create and Customize Reports” access.
Know Your Data: Understand the structure of your Salesforce objects and which fields you want to reference. This helps you avoid errors and makes your formulas more efficient.
Data Types Matter: Make sure you know what type of data your formula should return (number, text, date, etc.). Mixing up data types is a common source of errors4.
Formula Limits: Salesforce has some limits, like maximum formula size (3,900 characters for syntax, 4,000 bytes when saved), and limits on how many formula fields you can have per object or report1.
Performance: Complex or deeply nested formulas can slow down your reports. Try to keep things as simple as possible and avoid referencing too many fields or using too many functions in a single formula1.
Formula Syntax: Get comfortable with the formula editor and the functions/operators available. Use the “Check Syntax” button to catch mistakes before saving.
Step-by-Step Process for Creating a Formula Field
Incorporating formula fields into Salesforce reports can significantly elevate your data analysis capabilities by enabling dynamic insights and calculations.
Follow this detailed walkthrough to seamlessly add formula fields to your reports, enhanced by Superjoin for real-time synchronization between Salesforce and spreadsheets.
Before proceeding, familiarize yourself with Salesforce’s formula field limitations, such as character restrictions and cross-object reference constraints.
To bypass these limitations, leverage Superjoin's bidirectional data connector, which syncs Salesforce data with Google Sheets or Excel.
This integration allows you to pull live Salesforce data into spreadsheets, apply custom formulas to generate calculated fields, and write those results directly back to Salesforce—all without exiting your spreadsheet. Now, let’s dive into the process of creating a formula field directly within Salesforce.
Step 1: Navigate to Report Builder
Log in to your Salesforce account and navigate to the Report tab. Click on “New Report” to enter the Report Builder.
Step 2: Select Report Type
Choose the appropriate report type based on the data you want to analyze. Consider the objects and relationships relevant to your analysis.
Step 3: Add Fields to Report
Drag and drop the fields you want to include in your report from the left sidebar to the report preview section. This sets the foundation for your analysis.
Step 4: Click on “Add Formula”
In the toolbar above the report preview, click on the “Add Formula” button. This opens the formula editor, where you can create your custom formula.
Step 5: Name Your Formula Field
Provide a meaningful name for your formula field. This helps in identifying the purpose of the formula within the report.
Step 6: Choose Data Type
Select the appropriate data type for your formula field—text, number, currency, date, etc. The data type should align with the nature of the calculation.
Step 7: Build Your Formula
Construct your formula using the available functions and fields.
The formula editor provides real-time syntax checking to help you avoid errors.
Step 8: Insert Fields and Functions
Utilize the “Insert Field” and “Insert Function” buttons to incorporate existing fields or functions into your formula. This ensures accuracy and simplifies the formula-building process.
Step 9: Validate and Save
Click on the “Check Syntax” button to validate your formula. Resolve any errors that may appear. Once validated, click “Apply” to save your formula.
Step 10: Preview and Save Report
Preview your report to see the newly added formula field in action. If satisfied, click “Save” to save the report with the formula field.
Best Practices for Creating Formula Fields
Keep It Simple: The simpler your formula, the easier it is to understand and maintain. If you find yourself nesting functions several layers deep, see if you can break it up or simplify the logic.
Descriptive Names: Give your formula fields clear, descriptive names so anyone looking at the report knows exactly what the field is calculating.
Add Descriptions: Use the description field to explain what the formula does - future you (and your teammates) will thank you.
Test Thoroughly: Use sample data and the formula preview feature to test your formulas before rolling them out to everyone.
Mind the Limits: Try not to reference too many fields or use too many functions in one formula. If you hit a wall, consider if a workflow rule or a process builder might be a better fit.
Use API Names: When referencing fields, especially in complex formulas, use the API names to avoid typos and make the formula more robust.
Review Regularly: Periodically check your formula fields to make sure they’re still relevant and performing well, especially if your business processes change.
Conclusion
Adding formula fields in Salesforce empowers you to customize reports to precisely match your business requirements, unlocking deeper insights and tailored analytics. To further elevate your Salesforce experience, consider integrating Superjoin.
This tool not only provides advanced data management and analysis capabilities but also streamlines workflows, ensures real-time data synchronization, and enhances team collaboration by enabling seamless sharing and simultaneous work on shared datasets.
Say Goodbye to Tedious Data Exports! 🚀
Are you tired of the hassle of manually moving data from various tools into Excel? Superjoin has a solution for you.
Superjoin is an Excel add-in that automatically connects your favorite SaaS tools to your spreadsheets. It pulls data directly into Excel, allowing you to create reports that update themselves without any manual work on your part.
Bid farewell to tedious exports and repetitive tasks. With Superjoin, you can add one additional day to your week. Try Superjoin for free or schedule a demo.
FAQs
What is a formula field in Salesforce reports?
What is a formula field in Salesforce reports?
How do I add a formula field to a Salesforce report?
How do I add a formula field to a Salesforce report?
What are common issues when creating formula fields?
What are common issues when creating formula fields?
Automatic Data Pulls
Visual Data Preview
Set Alerts
other related blogs

Try it now