Google Sheets Tutorial
How to Collapse and Expand Rows in Google Sheets
Simplify your data view in Google Sheets. Learn how to easily collapse and expand rows to keep your spreadsheet organized and manageable.
Table of Contents
Here's a quick step-by-step guide 🔝
Here's a quick step-by-step guide 🔝
Working with large data sets in Google Sheets can quickly become overwhelming. Fortunately, Google Sheets provides a handy feature that allows you to collapse and expand rows, helping you stay organized and focused. This guide covers everything you need to know about collapsing and expanding rows, with simple steps and tips to boost your productivity.
The Benefits of Collapsing Rows
Collapsing rows in Google Sheets offers several advantages:
Improved Readability: By hiding unnecessary details, you can focus on the essential information, making it easier to scan and comprehend your data.
Better Organization: Collapsing sections of your data allows you to create a cleaner, more structured layout, improving overall organization.
Increased Efficiency: With collapsed rows, you can quickly navigate to specific sections without being distracted by irrelevant information.
This feature is especially useful when integrating data from multiple tools, such as importing tasks from Monday to Google Sheets for tracking purposes. Grouping and collapsing rows can help manage and filter tasks by priority or status, making project management more streamlined.
Step-by-Step Guide to Collapsing and Expanding Rows
Grouping Rows
Before you can collapse or expand rows, you need to group them together:
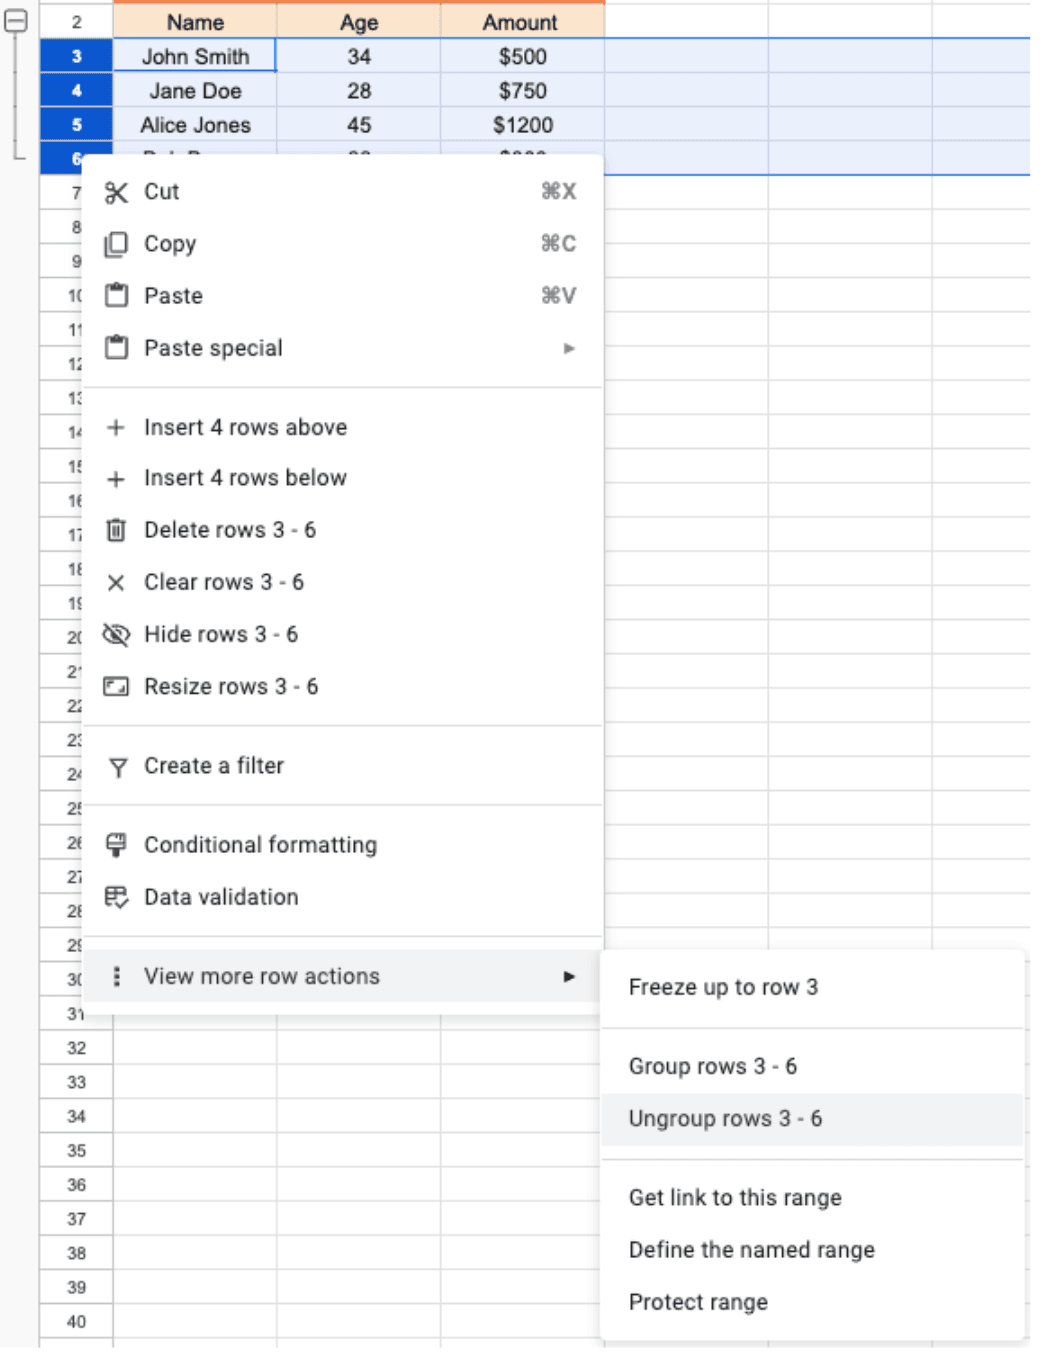
Select the rows you want to group by clicking on their row numbers on the left-hand side of the sheet.
Right-click on the selected rows and choose "Group rows [X-Y]," where X and Y represent the first and last row numbers in your selection.

Collapsing Grouped Rows
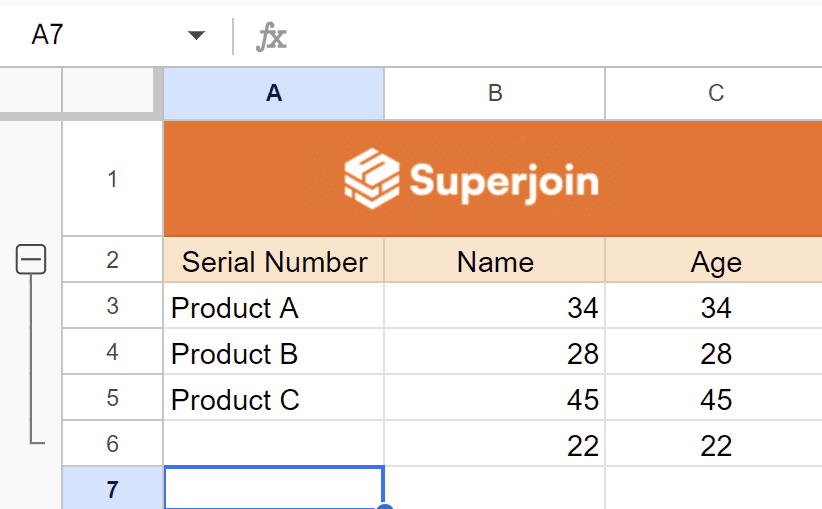
Once you've grouped the rows, you'll see a minus (-) sign to the left of the grouped row:
Click on this minus sign to collapse the grouped rows, hiding the details and leaving only the row headers visible.
Expanding Collapsed Rows
If you need to see the details of the collapsed rows:
Click on the plus (+) sign that appears next to the collapsed group to expand the rows, revealing the hidden data.

Ungrouping Rows
If you no longer need the rows grouped:
Right-click on the grouped rows and select "Ungroup rows.
Additional Methods for Collapsing and Expanding Rows
Using Keyboard Shortcuts
Google Sheets offers keyboard shortcuts for grouping, collapsing, expanding, and ungrouping rows:
Group Rows:
Windows: Alt + Shift + Right Arrow
Mac: Option + Shift + Right Arrow
Ungroup Rows:
Windows: Alt + Shift + Left Arrow
Mac: Option + Shift + Left Arrow
Expand Rows:
Windows: Alt + Shift + Down Arrow
Mac: Option + Shift + Down Arrow
Collapse Rows:
Windows: Alt + Shift + Up Arrow
Mac: Option + Shift + Up Arrow
Hiding Rows
Instead of grouping and collapsing rows, you can also hide rows by selecting them and right-clicking, then choosing "Hide rows." This method doesn't allow for easy expansion, but it can be useful if you only need to hide rows temporarily.
Grouping and Ungrouping Non-Adjacent Rows
If you need to group and collapse non-adjacent rows:
Hold down the Ctrl key (Windows) or Cmd key (Mac) while selecting the rows you want to group.
Follow the same steps as before to group and collapse the selected rows.
Tips for Collapsing Rows Effectively
Organize Data Before Grouping: Ensure your data is well-organized and structured before grouping rows. This will make it easier to collapse and expand specific sections of your data.
Use for Large Data Sets: Collapsing rows is particularly useful when working with large data sets, as it can help you focus on the most important information while hiding unnecessary details.
Combine with Other Features: Collapsing rows can be combined with other Google Sheets features, such as filters and conditional formatting, to enhance your data management capabilities further.
Keep Notes: When collapsing rows, it's a good idea to keep notes or comments about what information is hidden, so you don't forget important details.
Practice and Experiment: The more you practice collapsing and expanding rows, the more comfortable you'll become with the process. Don't be afraid to experiment and find the best approach for your workflow.
Use Superjoin's AI Formula Generator to Generate Formulas
Tools like Superjoin's AI Formula Builder use advanced AI like GPT to generate formulas automatically based on simple prompts. This cutting-edge approach will likely become more popular as AI capabilities improve.
Conclusion
Collapsing and expanding rows in Google Sheets is a simple yet powerful feature that can help you better organize and manage your data. Whether you use the grouping and collapsing functionality, keyboard shortcuts, or the hide rows method, this feature can improve readability and efficiency when working with large data sets. By following the steps and tips outlined in this guide, you'll be able to master the art of collapsing and expanding rows, boosting your productivity and taking your Google Sheets skills to the next level.
Working with large data sets in Google Sheets can quickly become overwhelming. Fortunately, Google Sheets provides a handy feature that allows you to collapse and expand rows, helping you stay organized and focused. This guide covers everything you need to know about collapsing and expanding rows, with simple steps and tips to boost your productivity.
The Benefits of Collapsing Rows
Collapsing rows in Google Sheets offers several advantages:
Improved Readability: By hiding unnecessary details, you can focus on the essential information, making it easier to scan and comprehend your data.
Better Organization: Collapsing sections of your data allows you to create a cleaner, more structured layout, improving overall organization.
Increased Efficiency: With collapsed rows, you can quickly navigate to specific sections without being distracted by irrelevant information.
This feature is especially useful when integrating data from multiple tools, such as importing tasks from Monday to Google Sheets for tracking purposes. Grouping and collapsing rows can help manage and filter tasks by priority or status, making project management more streamlined.
Step-by-Step Guide to Collapsing and Expanding Rows
Grouping Rows
Before you can collapse or expand rows, you need to group them together:
Select the rows you want to group by clicking on their row numbers on the left-hand side of the sheet.
Right-click on the selected rows and choose "Group rows [X-Y]," where X and Y represent the first and last row numbers in your selection.
Collapsing Grouped Rows
Once you've grouped the rows, you'll see a minus (-) sign to the left of the grouped row:
Click on this minus sign to collapse the grouped rows, hiding the details and leaving only the row headers visible.
Expanding Collapsed Rows
If you need to see the details of the collapsed rows:
Click on the plus (+) sign that appears next to the collapsed group to expand the rows, revealing the hidden data.
Ungrouping Rows
If you no longer need the rows grouped:
Right-click on the grouped rows and select "Ungroup rows.
Additional Methods for Collapsing and Expanding Rows
Using Keyboard Shortcuts
Google Sheets offers keyboard shortcuts for grouping, collapsing, expanding, and ungrouping rows:
Group Rows:
Windows: Alt + Shift + Right Arrow
Mac: Option + Shift + Right Arrow
Ungroup Rows:
Windows: Alt + Shift + Left Arrow
Mac: Option + Shift + Left Arrow
Expand Rows:
Windows: Alt + Shift + Down Arrow
Mac: Option + Shift + Down Arrow
Collapse Rows:
Windows: Alt + Shift + Up Arrow
Mac: Option + Shift + Up Arrow
Hiding Rows
Instead of grouping and collapsing rows, you can also hide rows by selecting them and right-clicking, then choosing "Hide rows." This method doesn't allow for easy expansion, but it can be useful if you only need to hide rows temporarily.
Grouping and Ungrouping Non-Adjacent Rows
If you need to group and collapse non-adjacent rows:
Hold down the Ctrl key (Windows) or Cmd key (Mac) while selecting the rows you want to group.
Follow the same steps as before to group and collapse the selected rows.
Tips for Collapsing Rows Effectively
Organize Data Before Grouping: Ensure your data is well-organized and structured before grouping rows. This will make it easier to collapse and expand specific sections of your data.
Use for Large Data Sets: Collapsing rows is particularly useful when working with large data sets, as it can help you focus on the most important information while hiding unnecessary details.
Combine with Other Features: Collapsing rows can be combined with other Google Sheets features, such as filters and conditional formatting, to enhance your data management capabilities further.
Keep Notes: When collapsing rows, it's a good idea to keep notes or comments about what information is hidden, so you don't forget important details.
Practice and Experiment: The more you practice collapsing and expanding rows, the more comfortable you'll become with the process. Don't be afraid to experiment and find the best approach for your workflow.
Use Superjoin's AI Formula Generator to Generate Formulas
Tools like Superjoin's AI Formula Builder use advanced AI like GPT to generate formulas automatically based on simple prompts. This cutting-edge approach will likely become more popular as AI capabilities improve.
Conclusion
Collapsing and expanding rows in Google Sheets is a simple yet powerful feature that can help you better organize and manage your data. Whether you use the grouping and collapsing functionality, keyboard shortcuts, or the hide rows method, this feature can improve readability and efficiency when working with large data sets. By following the steps and tips outlined in this guide, you'll be able to master the art of collapsing and expanding rows, boosting your productivity and taking your Google Sheets skills to the next level.
FAQs
How do I collapse multiple groups of rows in Google Sheets?
How do I collapse multiple groups of rows in Google Sheets?
Are there any limitations to the number of rows I can group in Google Sheets?
Are there any limitations to the number of rows I can group in Google Sheets?
Can I use the collapsing and expanding feature on mobile devices?
Can I use the collapsing and expanding feature on mobile devices?
Automatic Data Pulls
Visual Data Preview
Set Alerts
other related blogs
Try it now