Google Sheets Tutorial
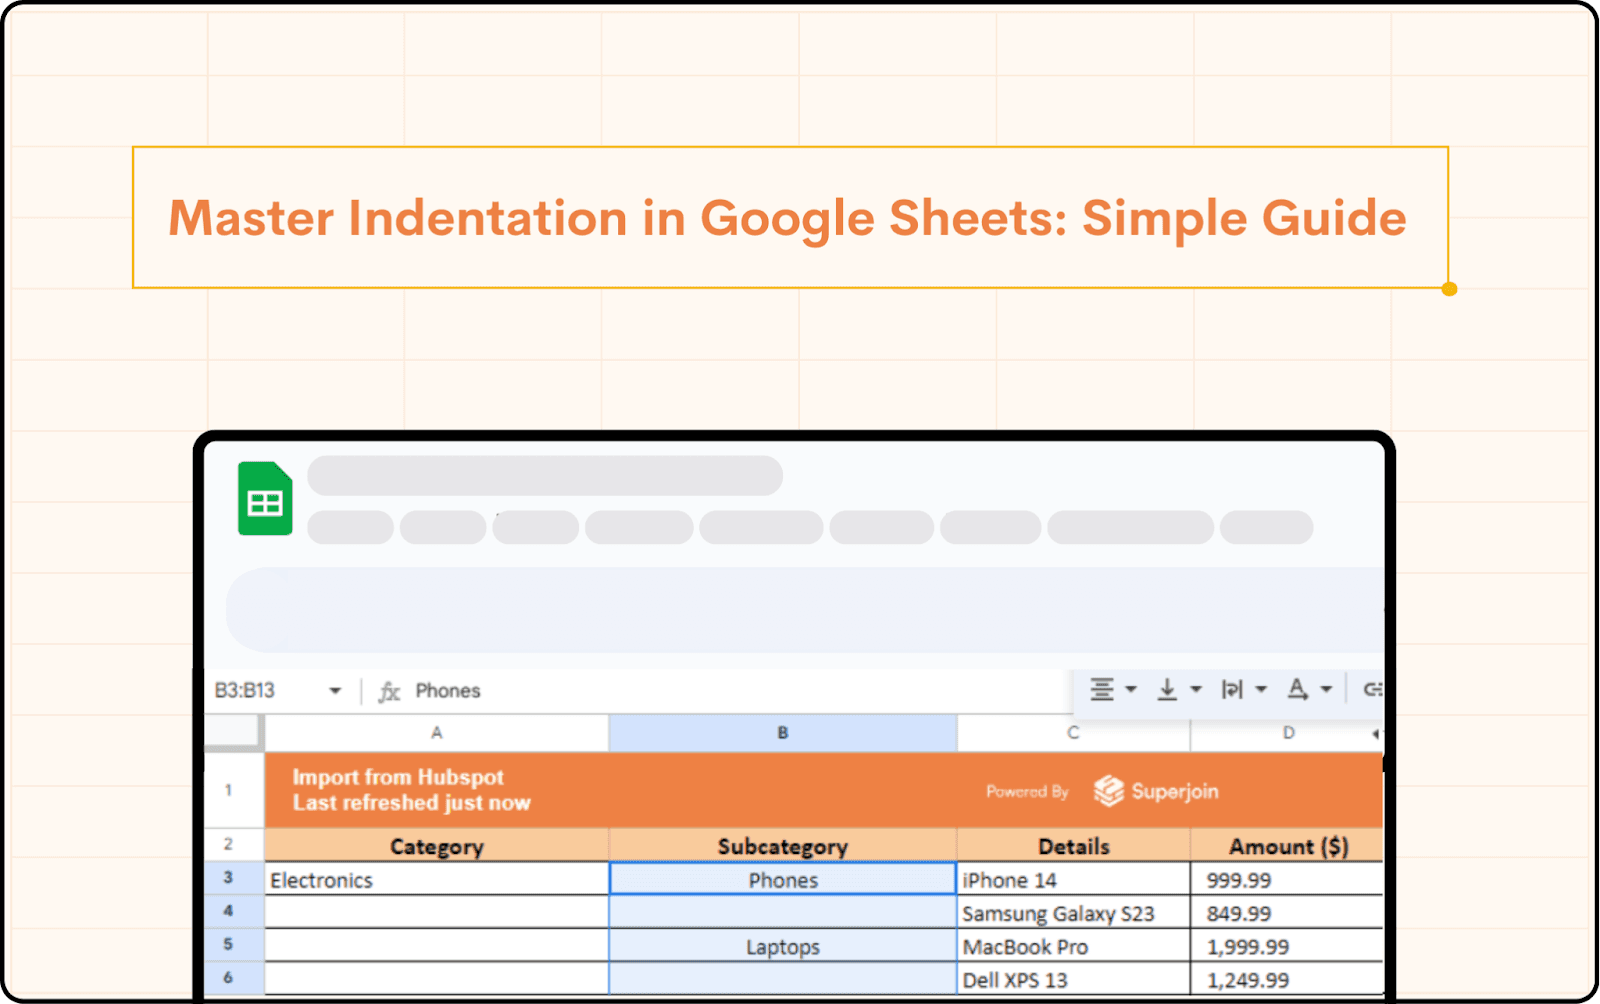
Master Indentation in Google Sheets: Simple Guide
Learn how to indent in Google Sheets with this simple guide. Explore multiple methods to indent in Google Sheets cells for better data organization.


Indentation is an essential formatting tool in any spreadsheet software, including Google Sheets. Whether you're trying to enhance readability, create subcategories, or simply make your data look cleaner, knowing how to indent in Google Sheets is vital. Google Sheets lacks a basic "Indent" button unlike word processors, but there are various ways to get indentation. This tutorial will lead you through several approaches so that you may quickly decide which best fits your situation.
Why Indentation Matters in Google Sheets
Indentation helps create a clear visual hierarchy in your data, making it easier for readers to understand relationships between items. When working with complex data sets, adding an indent can distinguish between main categories and subcategories, enhancing overall data presentation. This is particularly useful when integrating data from various sources, such as Vitally to Google Sheets, where you might need to organize and present data from different dimensions effectively.
Method 1: Using the Space Bar
The most straightforward way to indent in Google Sheets is by using the space bar. This method is simple but requires manual input.
Select the cell where you want to add the indent.
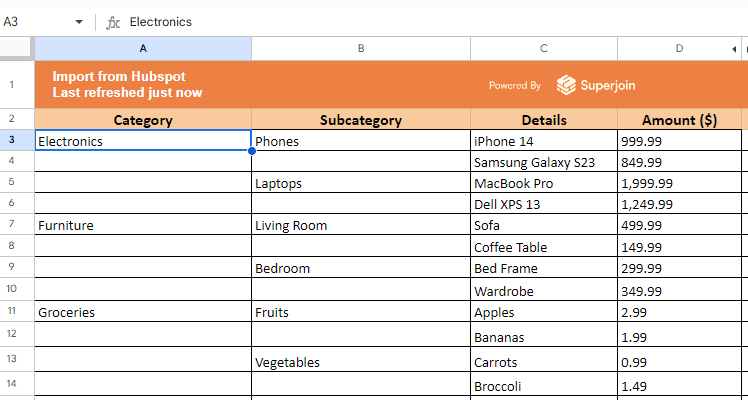
Double-click the cell or press F2 to edit.
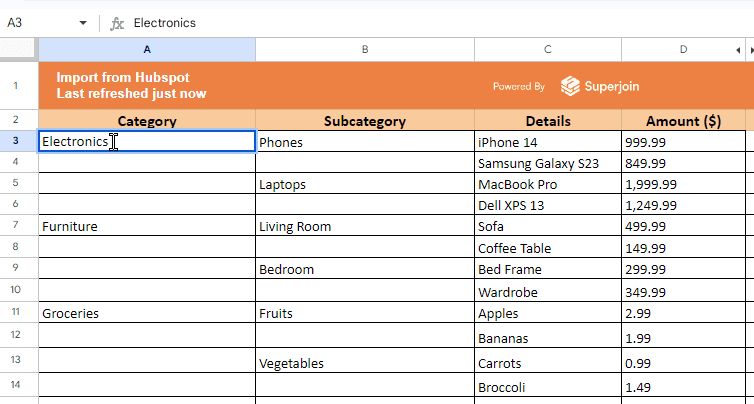
Press the space bar multiple times to create the desired indent.
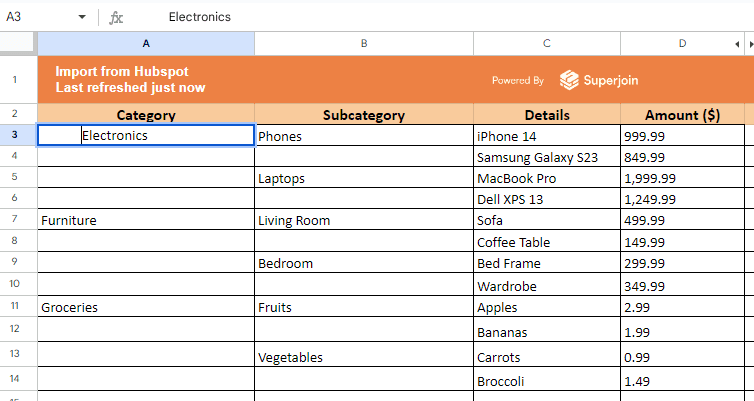
Press Enter to save your changes.
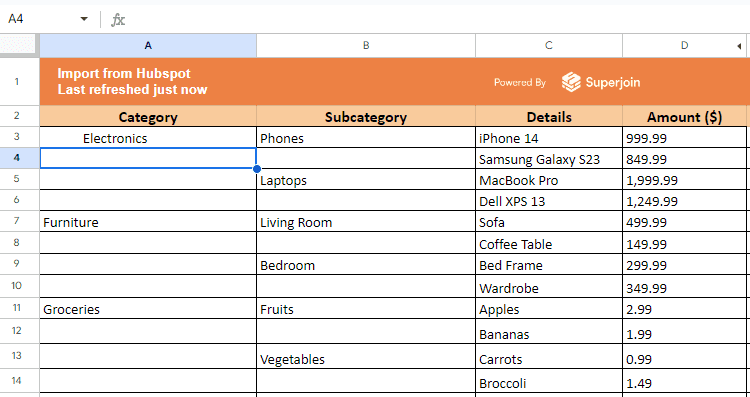
This method works well for quick formatting but can be time-consuming if you need to indent multiple cells.
Method 2: Using the Custom Number Format
Another efficient method to indent in Google Sheets is by using the Custom Number Format option. This method allows you to create a consistent indent across multiple cells.
Select the cells you want to indent.
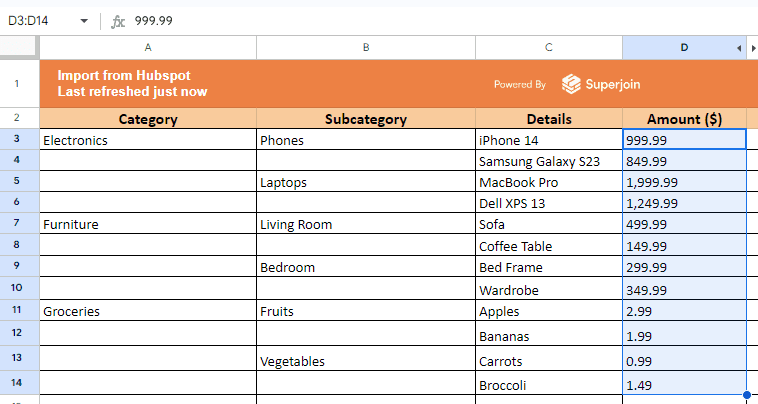
Go to the Format menu and choose Number > More Formats > Custom number format.
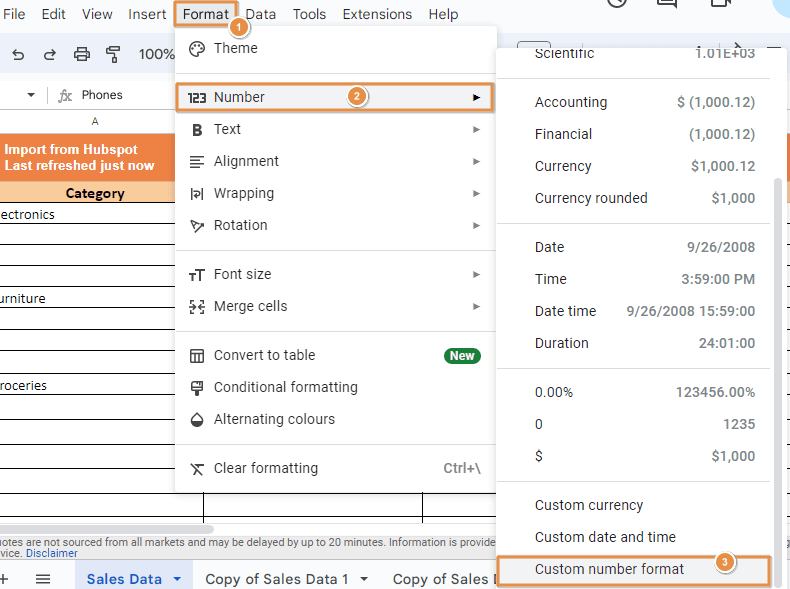
In the Custom number format field, enter " @" (without the quotes) to create an indent.
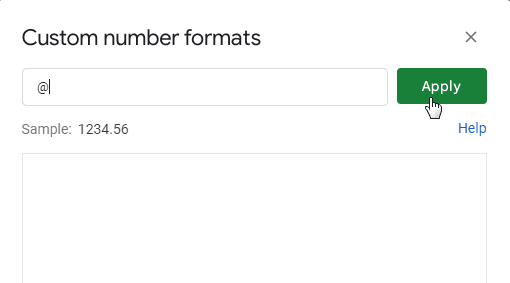
Click Apply to save your changes.
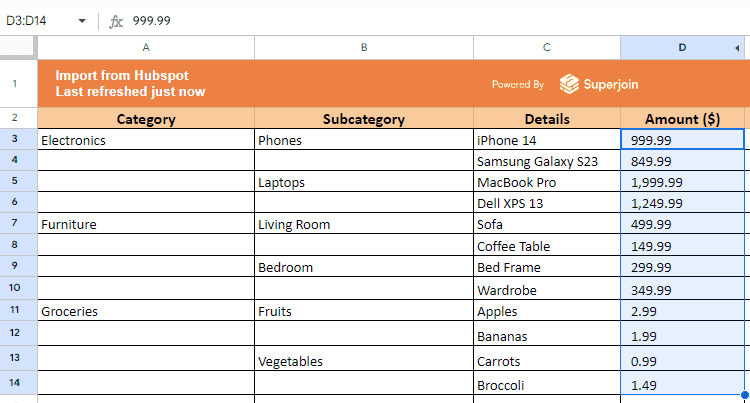
This approach is particularly useful for indenting cells uniformly across a range. It ensures that all selected cells have the same level of indentation, making your data look neat and organized.
Suggested Reads- How to Remove Gridlines in Google Sheets
Method 3: Using Google Apps Script
For those who are more technically inclined, using a Google Apps Script can automate the indentation process. This method is particularly useful if you frequently need to indent on Google Sheets.
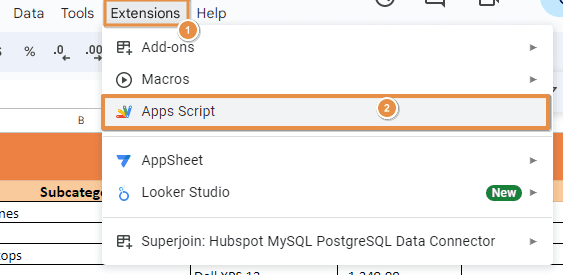
Open your Google Sheet and go to Extensions > Apps Script.
Delete any existing code and paste the following script:
function indentCells() {
var sheet = SpreadsheetApp.getActiveSpreadsheet().getActiveSheet();
var range = sheet.getActiveRange();
var numRows = range.getNumRows();
var numCols = range.getNumColumns();
for (var i = 1; i <= numRows; i++) {
for (var j = 1; j <= numCols; j++) {
var cell = range.getCell(i, j);
var value = cell.getValue();
cell.setValue(" " + value);
}
}
}
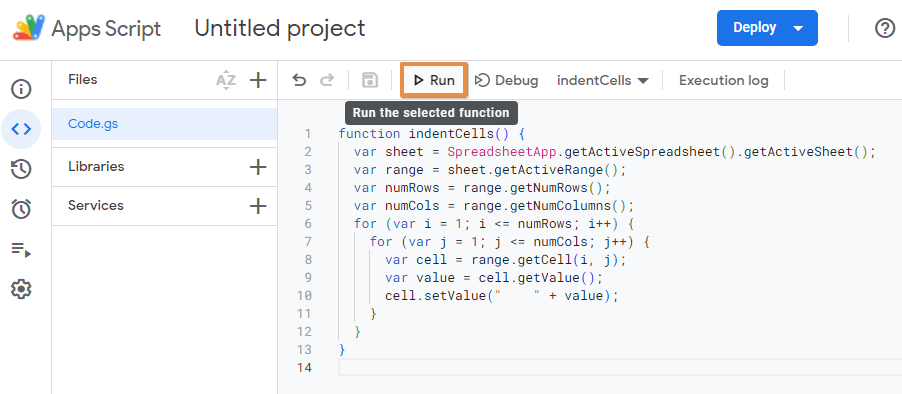
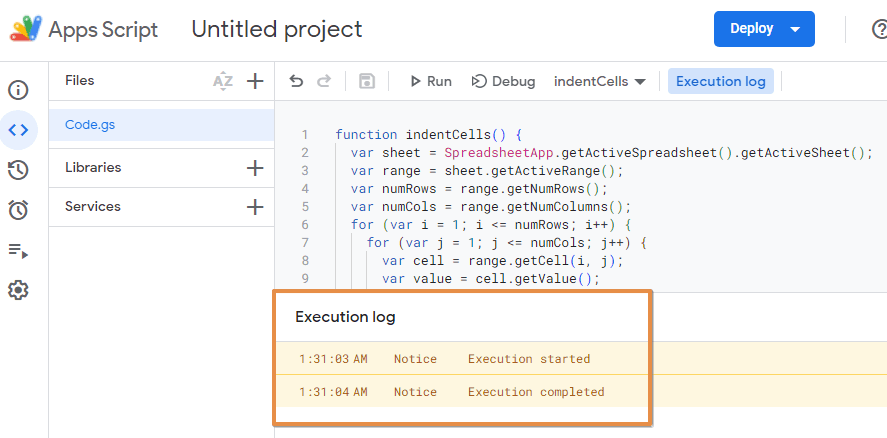
Save the script and run it by selecting the Run button. This will add a four-space indent to the active range of cells.
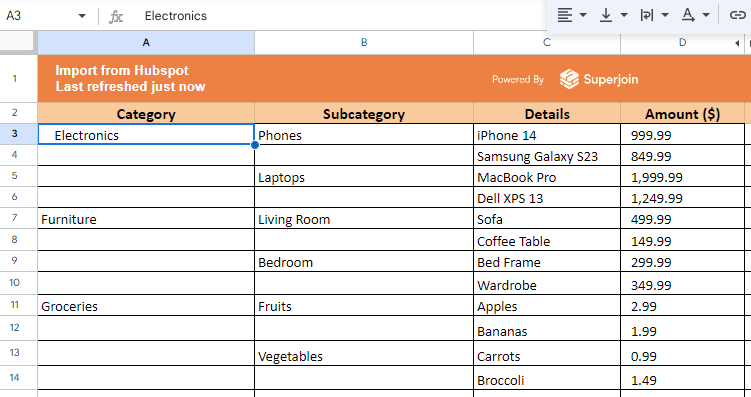
This method is powerful for bulk actions and allows for more customization in the indentation process.
Adjusting Indentation with Text Alignment
While not a direct method of adding google sheets indent in a cell, adjusting the text alignment can enhance the appearance of your data. For example, aligning text to the right or center can create the visual effect of indentation.
Select the cell or range you want to format.
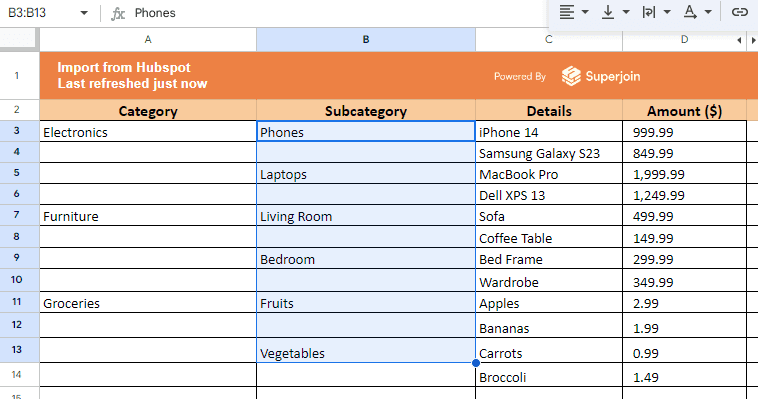
Go to the Format menu and choose Alignment > Left, Center, or Right.
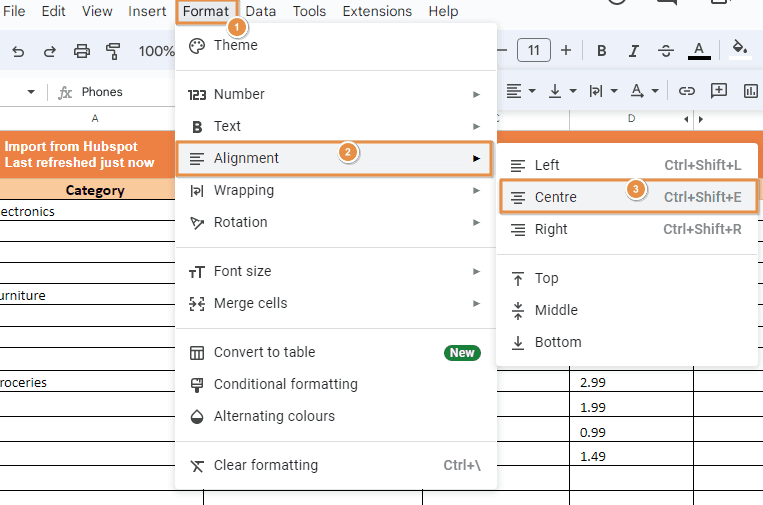
Adjust the alignment until you achieve the desired visual effect.
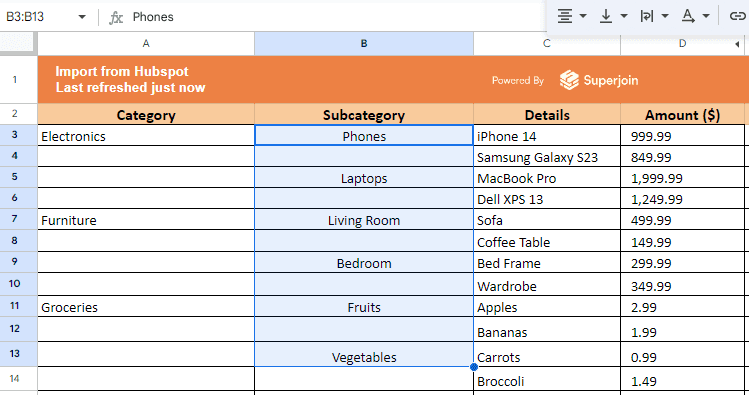
This method is more about creating a visual effect rather than true indentation but can be useful in some scenarios.
Advantages of Indentation in Google Sheets
Improved Readability
Indentation helps in organizing data hierarchically, making it easier for readers to distinguish between main categories and subcategories. For example, when dealing with nested data like product categories and subcategories, indenting the subcategories under their respective main categories improves clarity and comprehension.
Enhanced Data Organization
Indentation allows you to structure your data in a way that reflects its logical relationships. This is particularly useful in scenarios like budget planning, project management, or inventory tracking, where items are grouped under broader headings. By visually grouping related items, you create a clear and intuitive layout.
Professional Presentation
Indentation contributes to a more polished and professional-looking spreadsheet. Whether you're preparing a report for a client, presenting data to colleagues, or sharing a document with stakeholders, well-structured and indented text makes a positive impression.
Increased Efficiency
Using features like Google Apps Script to automate indentation tasks can save time and reduce manual errors. For large datasets, this automation ensures consistency across the entire sheet, making it easier to manage and update.
Better Data Navigation
Indented text helps users navigate large datasets more efficiently. For example, when scrolling through a long list of items, the indentation serves as a visual cue that allows users to quickly locate the main categories and their associated subcategories, improving overall usability.
Conclusion
Indentation in Google Sheets may not be as straightforward as in word processors, but with the methods outlined above, you can easily achieve the desired formatting. Whether you prefer the simplicity of the space bar, the consistency of a custom number format, the automation of a Google Apps Script, or the structure of bullet points, there’s a solution for every need. Mastering how to indent in Google Sheets will not only improve the appearance of your data but also enhance its readability, making your spreadsheets more effective and professional.
Say Goodbye to Tedious Data Exports! 🚀
Are you tired of the hassle of manually moving data from various tools into Google Sheets? Superjoin has a solution for you.
Superjoin is a Google Sheets add-on that automatically connects your favorite SaaS tools to your spreadsheets. It pulls data directly into Google Sheets, allowing you to create reports that update themselves without any manual work on your part.
Indentation is an essential formatting tool in any spreadsheet software, including Google Sheets. Whether you're trying to enhance readability, create subcategories, or simply make your data look cleaner, knowing how to indent in Google Sheets is vital. Google Sheets lacks a basic "Indent" button unlike word processors, but there are various ways to get indentation. This tutorial will lead you through several approaches so that you may quickly decide which best fits your situation.
Why Indentation Matters in Google Sheets
Indentation helps create a clear visual hierarchy in your data, making it easier for readers to understand relationships between items. When working with complex data sets, adding an indent can distinguish between main categories and subcategories, enhancing overall data presentation. This is particularly useful when integrating data from various sources, such as Vitally to Google Sheets, where you might need to organize and present data from different dimensions effectively.
Method 1: Using the Space Bar
The most straightforward way to indent in Google Sheets is by using the space bar. This method is simple but requires manual input.
Select the cell where you want to add the indent.

Double-click the cell or press F2 to edit.

Press the space bar multiple times to create the desired indent.

Press Enter to save your changes.

This method works well for quick formatting but can be time-consuming if you need to indent multiple cells.
Method 2: Using the Custom Number Format
Another efficient method to indent in Google Sheets is by using the Custom Number Format option. This method allows you to create a consistent indent across multiple cells.
Select the cells you want to indent.

Go to the Format menu and choose Number > More Formats > Custom number format.

In the Custom number format field, enter " @" (without the quotes) to create an indent.

Click Apply to save your changes.

This approach is particularly useful for indenting cells uniformly across a range. It ensures that all selected cells have the same level of indentation, making your data look neat and organized.
Suggested Reads- How to Remove Gridlines in Google Sheets
Method 3: Using Google Apps Script
For those who are more technically inclined, using a Google Apps Script can automate the indentation process. This method is particularly useful if you frequently need to indent on Google Sheets.
Open your Google Sheet and go to Extensions > Apps Script.

Delete any existing code and paste the following script:
function indentCells() {
var sheet = SpreadsheetApp.getActiveSpreadsheet().getActiveSheet();
var range = sheet.getActiveRange();
var numRows = range.getNumRows();
var numCols = range.getNumColumns();
for (var i = 1; i <= numRows; i++) {
for (var j = 1; j <= numCols; j++) {
var cell = range.getCell(i, j);
var value = cell.getValue();
cell.setValue(" " + value);
}
}
}


Save the script and run it by selecting the Run button. This will add a four-space indent to the active range of cells.

This method is powerful for bulk actions and allows for more customization in the indentation process.
Adjusting Indentation with Text Alignment
While not a direct method of adding google sheets indent in a cell, adjusting the text alignment can enhance the appearance of your data. For example, aligning text to the right or center can create the visual effect of indentation.
Select the cell or range you want to format.

Go to the Format menu and choose Alignment > Left, Center, or Right.

Adjust the alignment until you achieve the desired visual effect.

This method is more about creating a visual effect rather than true indentation but can be useful in some scenarios.
Advantages of Indentation in Google Sheets
Improved Readability
Indentation helps in organizing data hierarchically, making it easier for readers to distinguish between main categories and subcategories. For example, when dealing with nested data like product categories and subcategories, indenting the subcategories under their respective main categories improves clarity and comprehension.
Enhanced Data Organization
Indentation allows you to structure your data in a way that reflects its logical relationships. This is particularly useful in scenarios like budget planning, project management, or inventory tracking, where items are grouped under broader headings. By visually grouping related items, you create a clear and intuitive layout.
Professional Presentation
Indentation contributes to a more polished and professional-looking spreadsheet. Whether you're preparing a report for a client, presenting data to colleagues, or sharing a document with stakeholders, well-structured and indented text makes a positive impression.
Increased Efficiency
Using features like Google Apps Script to automate indentation tasks can save time and reduce manual errors. For large datasets, this automation ensures consistency across the entire sheet, making it easier to manage and update.
Better Data Navigation
Indented text helps users navigate large datasets more efficiently. For example, when scrolling through a long list of items, the indentation serves as a visual cue that allows users to quickly locate the main categories and their associated subcategories, improving overall usability.
Conclusion
Indentation in Google Sheets may not be as straightforward as in word processors, but with the methods outlined above, you can easily achieve the desired formatting. Whether you prefer the simplicity of the space bar, the consistency of a custom number format, the automation of a Google Apps Script, or the structure of bullet points, there’s a solution for every need. Mastering how to indent in Google Sheets will not only improve the appearance of your data but also enhance its readability, making your spreadsheets more effective and professional.
Say Goodbye to Tedious Data Exports! 🚀
Are you tired of the hassle of manually moving data from various tools into Google Sheets? Superjoin has a solution for you.
Superjoin is a Google Sheets add-on that automatically connects your favorite SaaS tools to your spreadsheets. It pulls data directly into Google Sheets, allowing you to create reports that update themselves without any manual work on your part.
FAQs
Can I create a custom shortcut for indentation in Google Sheets?
Can I create a custom shortcut for indentation in Google Sheets?
Does indentation affect the cell's data?
Does indentation affect the cell's data?
Can I remove indentation easily?
Can I remove indentation easily?
Automatic Data Pulls
Visual Data Preview
Set Alerts
other related blogs
Try it now
