Google Sheets Tutorial
How to Put Borders in Google Sheets
Learn how to add, customize borders in Google Sheets. Enhance readability, highlight key data, and create professional spreadsheets with these tips.
Here's a quick step-by-step guide 🔝
Here's a quick step-by-step guide 🔝
Borders in Google Sheets are essential for improving data organization, readability, and presentation. Whether you're managing financial reports, analyzing project data, or working on complex spreadsheets, borders help highlight critical information and visually separate data points. In this guide, we’ll explore how to add, customize, and troubleshoot borders in Google Sheets effectively.
Let’s explore how to do it step by step!
Why Use Borders in Google Sheets?
Borders create a structured and professional appearance for your data. By applying borders, you can:
Enhance readability by visually separating sections.
Highlight key areas for better analysis.
Improve the overall aesthetic of your spreadsheets.
Adding Basic Borders in Google Sheets
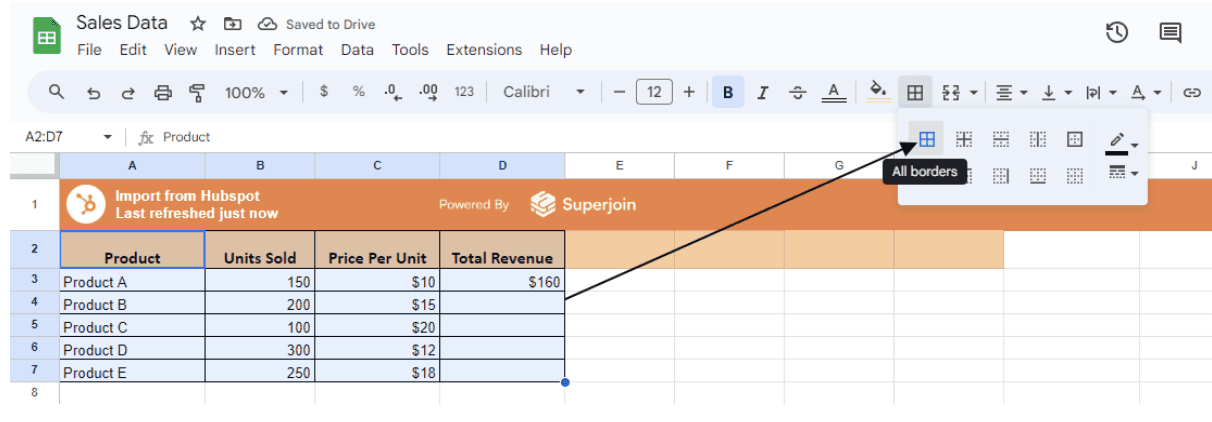
To add borders in Google Sheets, follow these simple steps:
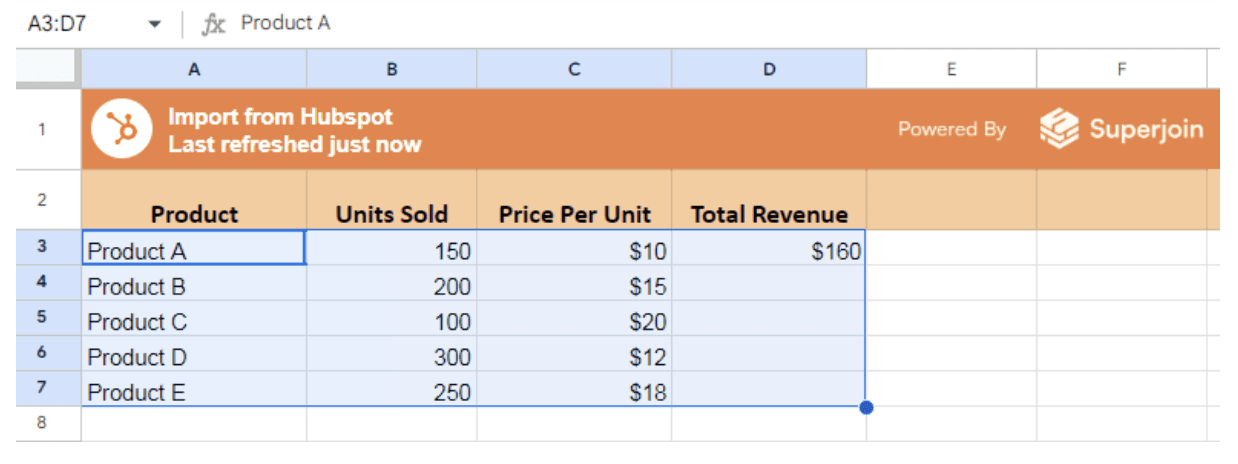
1. Select the Cells: Highlight the cells, rows, or columns where you want to apply borders.
Access the Border Tool:
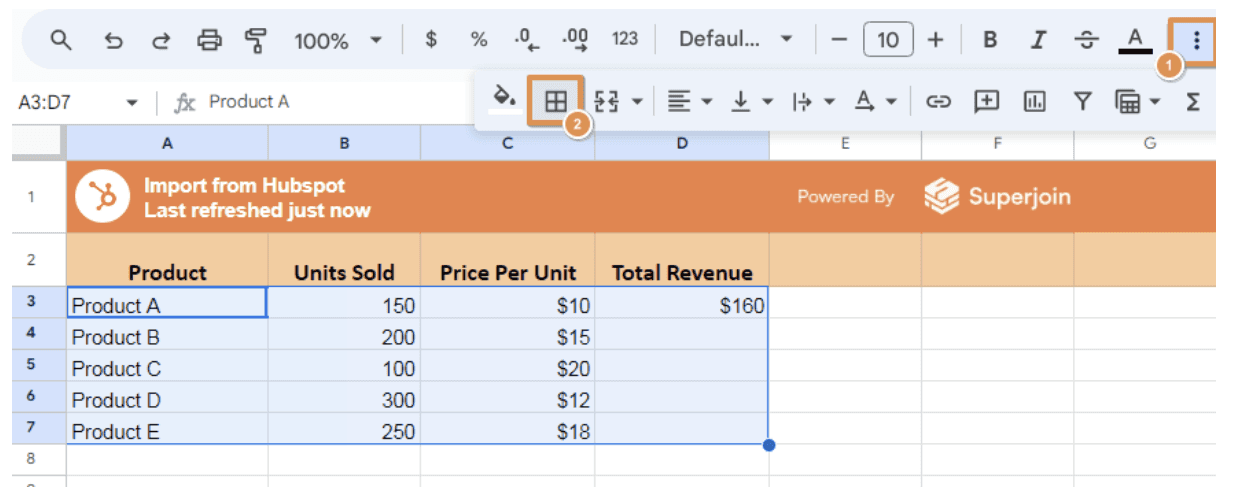
Look for the border icon on the toolbar (a square divided into four parts).
Click the icon to open the border options menu.
Choose the Border Type:
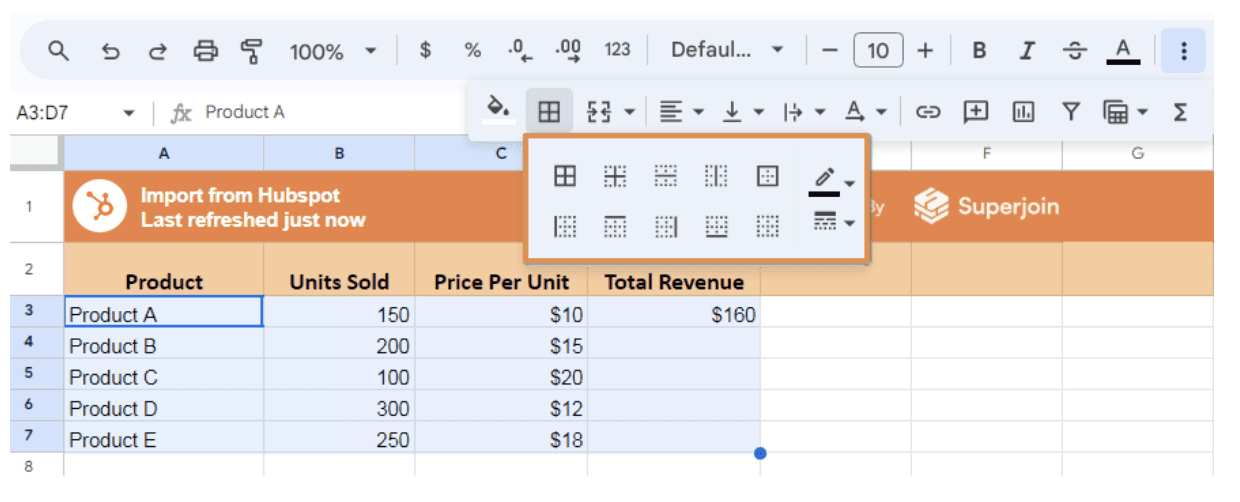
Apply borders around the entire selection or specific sides (top, bottom, left, right).
Add inner borders to divide cells within the range.
Adjust Style and Color:
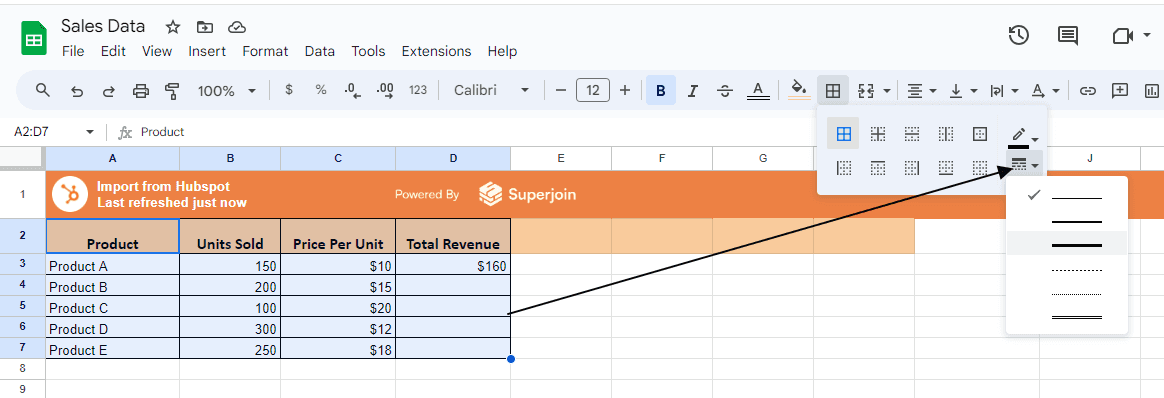
Customize the border appearance by selecting line styles (solid, dashed, or dotted) and colors.
💡 Tip: Adjusting cell sizes before applying borders can improve readability.
Customizing Border Styles for Professional Spreadsheets
Google Sheets offers various customization options to match your specific needs. Here's how to make the most of them:
Change Line Style and Thickness
Choose from solid, dashed, or dotted lines.
Adjust thickness to make borders subtle or prominent.
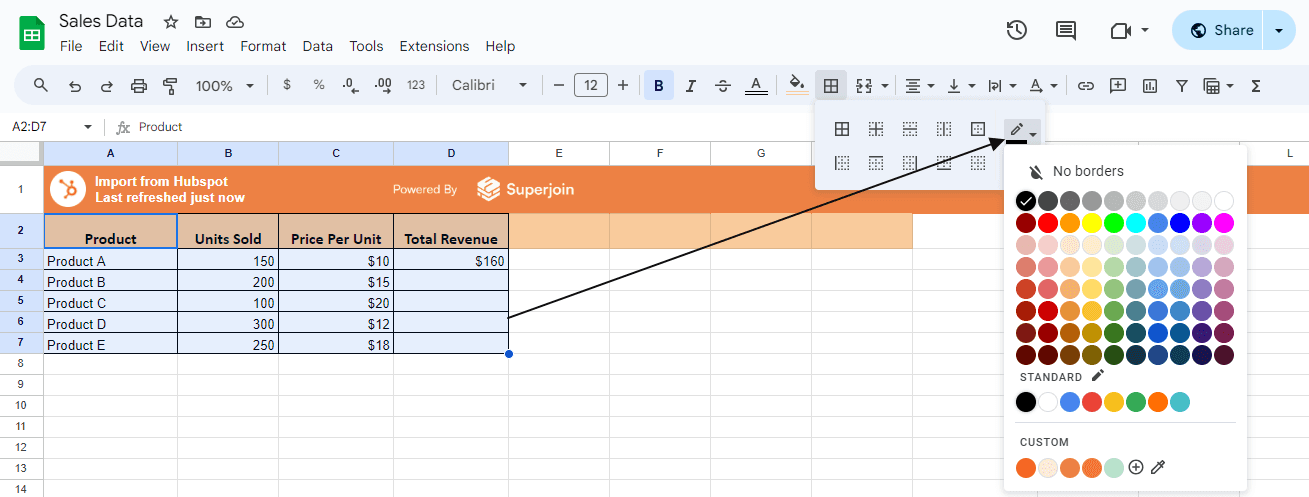
Apply Custom Colors:
Use the color picker in the border menu to select unique colors.
Color-code different sections to enhance data categorization.
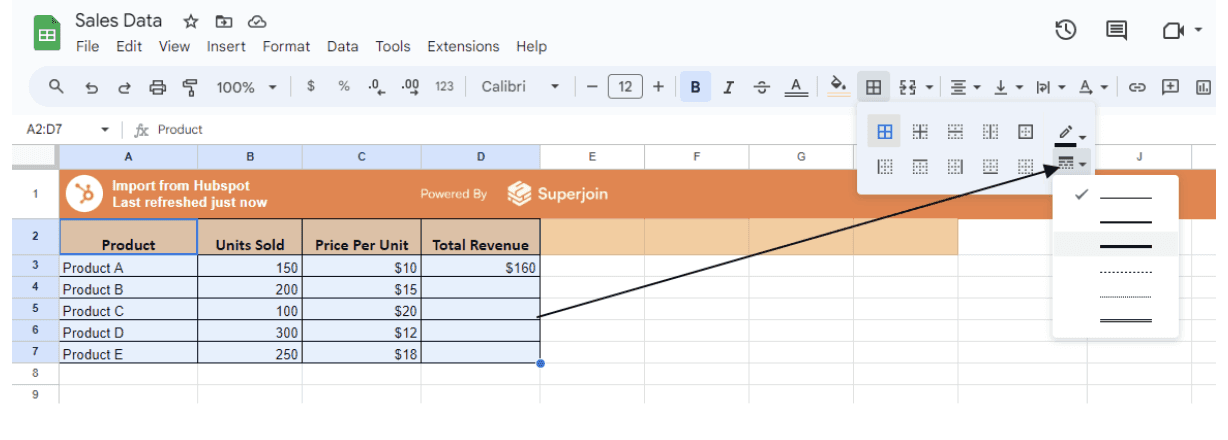
Mix and Match Styles:
Apply distinct styles to different sides of the cells, such as a thick top border and a dashed bottom border.

Advanced Border Techniques and Managing Conflicts
For complex data visualization, combining conditional formatting with borders can make your spreadsheets more dynamic and interactive. Here’s how:
Multiple Rules on the Same Range: Apply different conditional rules to a range. For example, use a green border for values above a target and a red border for those below.

Gradient-Like Borders: Although gradients aren’t directly supported, you can create a similar effect by applying rules with varying border colors based on value ranges.

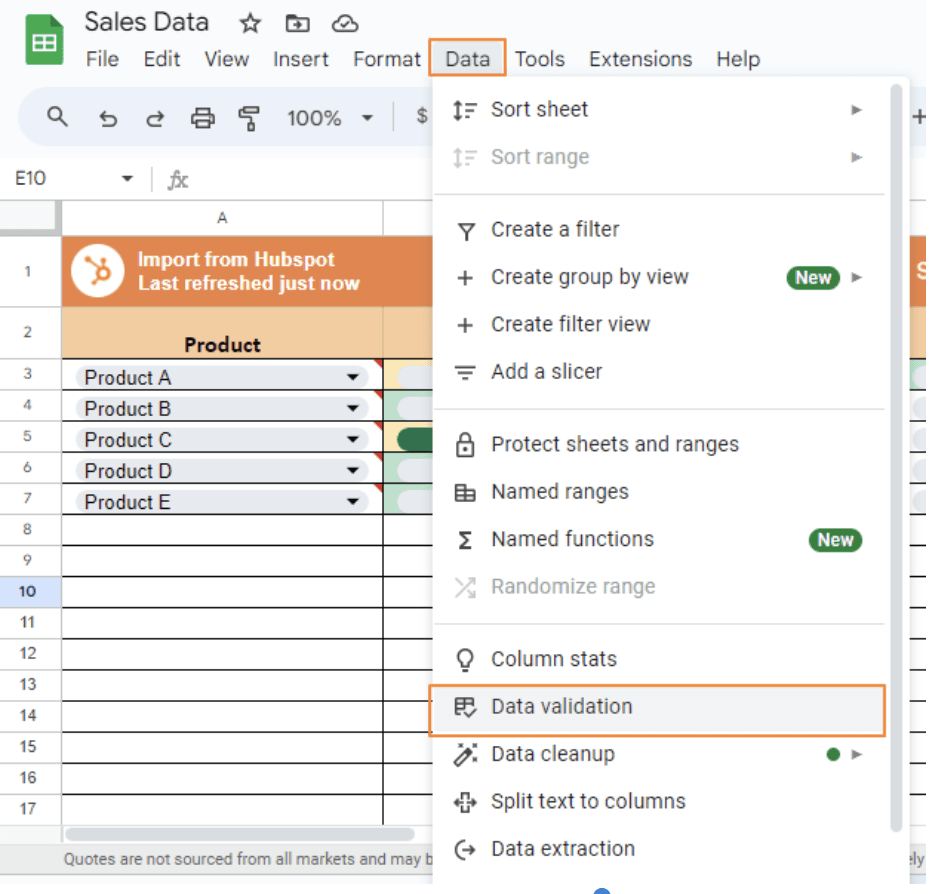
Data Validation with Borders: Use drop-down lists or restrict inputs with data validation, then apply borders based on the chosen values.
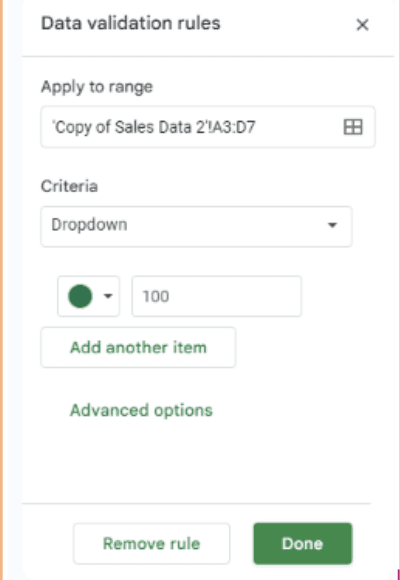

Managing Border Conflicts
When borders overlap or rules conflict, try these solutions:
Prioritize Rules: Conditional formatting applies rules from top to bottom. Adjust the order to resolve conflicts.
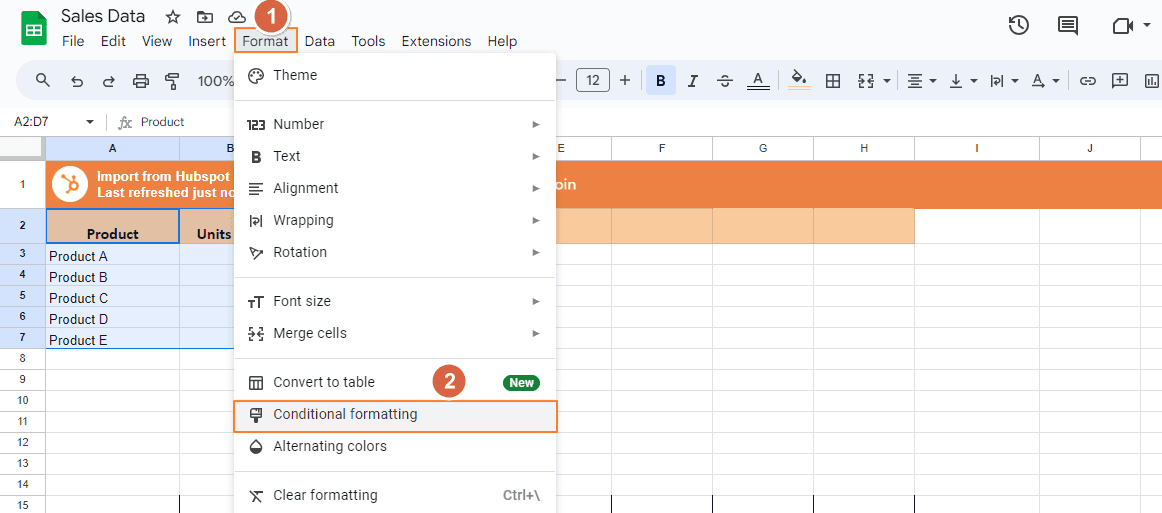
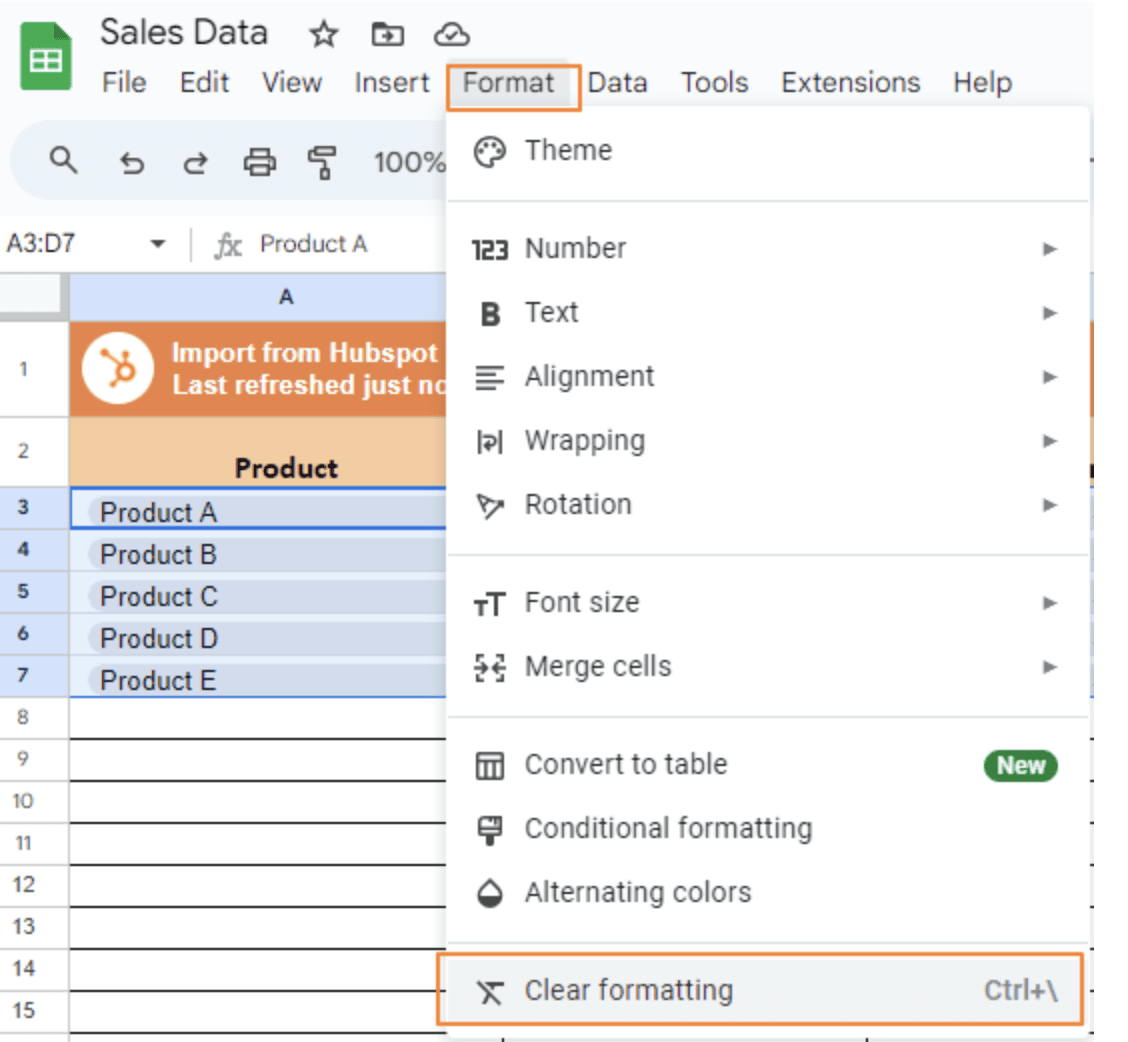
Clear Formatting: Select the cells and go to Format > Clear formatting to reset them.
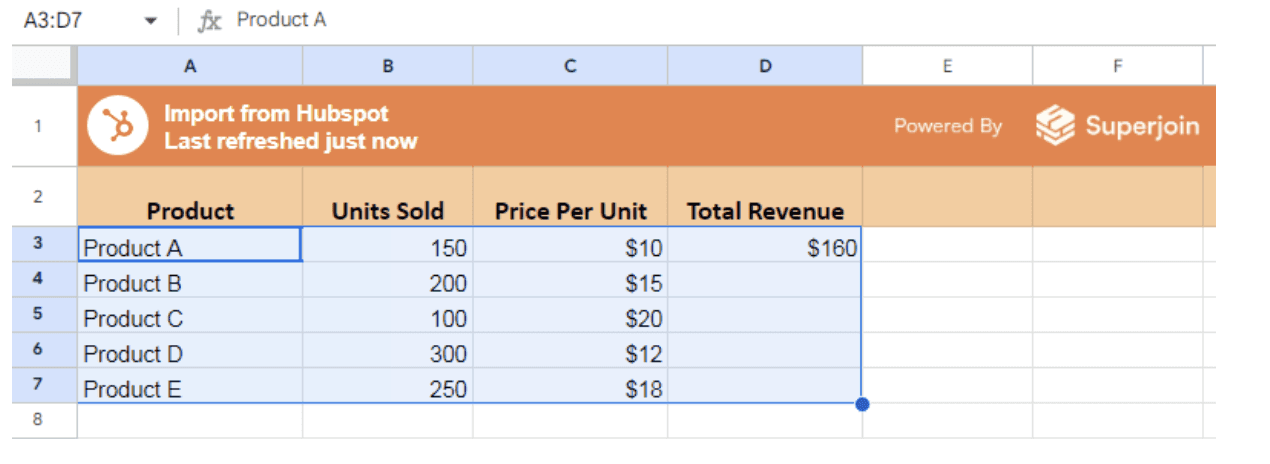
Manual Overrides: Apply borders manually via the toolbar for quick fixes. These will stay until a new rule triggers.
These tips can help you maintain clean and functional spreadsheets while using advanced border techniques.
Conclusion
In conclusion, mastering how to put borders on Google Sheets can significantly improve your spreadsheet’s readability and visual appeal.
Superjoin is a Google Sheets add-on that automatically connects your favorite SaaS tools to your spreadsheets. It pulls data directly into Google Sheets, allowing you to create reports that update themselves without any manual work on your part.
Borders in Google Sheets are essential for improving data organization, readability, and presentation. Whether you're managing financial reports, analyzing project data, or working on complex spreadsheets, borders help highlight critical information and visually separate data points. In this guide, we’ll explore how to add, customize, and troubleshoot borders in Google Sheets effectively.
Let’s explore how to do it step by step!
Why Use Borders in Google Sheets?
Borders create a structured and professional appearance for your data. By applying borders, you can:
Enhance readability by visually separating sections.
Highlight key areas for better analysis.
Improve the overall aesthetic of your spreadsheets.
Adding Basic Borders in Google Sheets
To add borders in Google Sheets, follow these simple steps:
1. Select the Cells: Highlight the cells, rows, or columns where you want to apply borders.

Access the Border Tool:
Look for the border icon on the toolbar (a square divided into four parts).
Click the icon to open the border options menu.

Choose the Border Type:
Apply borders around the entire selection or specific sides (top, bottom, left, right).
Add inner borders to divide cells within the range.

Adjust Style and Color:
Customize the border appearance by selecting line styles (solid, dashed, or dotted) and colors.
💡 Tip: Adjusting cell sizes before applying borders can improve readability.
Customizing Border Styles for Professional Spreadsheets
Google Sheets offers various customization options to match your specific needs. Here's how to make the most of them:
Change Line Style and Thickness
Choose from solid, dashed, or dotted lines.
Adjust thickness to make borders subtle or prominent.

Apply Custom Colors:
Use the color picker in the border menu to select unique colors.
Color-code different sections to enhance data categorization.


Mix and Match Styles:
Apply distinct styles to different sides of the cells, such as a thick top border and a dashed bottom border.

Advanced Border Techniques and Managing Conflicts
For complex data visualization, combining conditional formatting with borders can make your spreadsheets more dynamic and interactive. Here’s how:
Multiple Rules on the Same Range: Apply different conditional rules to a range. For example, use a green border for values above a target and a red border for those below.

Gradient-Like Borders: Although gradients aren’t directly supported, you can create a similar effect by applying rules with varying border colors based on value ranges.

Data Validation with Borders: Use drop-down lists or restrict inputs with data validation, then apply borders based on the chosen values.


Managing Border Conflicts
When borders overlap or rules conflict, try these solutions:
Prioritize Rules: Conditional formatting applies rules from top to bottom. Adjust the order to resolve conflicts.

Clear Formatting: Select the cells and go to Format > Clear formatting to reset them.


Manual Overrides: Apply borders manually via the toolbar for quick fixes. These will stay until a new rule triggers.

These tips can help you maintain clean and functional spreadsheets while using advanced border techniques.
Conclusion
In conclusion, mastering how to put borders on Google Sheets can significantly improve your spreadsheet’s readability and visual appeal.
Superjoin is a Google Sheets add-on that automatically connects your favorite SaaS tools to your spreadsheets. It pulls data directly into Google Sheets, allowing you to create reports that update themselves without any manual work on your part.
FAQs
How do I add borders in Google Sheets?
How do I add borders in Google Sheets?
How do I add a border in a spreadsheet?
How do I add a border in a spreadsheet?
How do I add a frame in Google Sheets?
How do I add a frame in Google Sheets?
Automatic Data Pulls
Visual Data Preview
Set Alerts
other related blogs
Try it now
