HubSpot Tutorial
How to Connect Pipedrive to HubSpot: 1-Min Interactive Guide 2024
Discover the easy steps to connect Pipedrive to HubSpot seamlessly and boost your sales efficiency. Learn how to integrate these powerful tools today!
Table of Contents
Here's a quick step-by-step guide 🔝
Here's a quick step-by-step guide 🔝
Seamlessly connect your sales pipeline in Pipedrive with HubSpot’s CRM for better insights and streamlined workflows. Superjoin makes it effortless!
Why Connect Pipedrive to HubSpot?
Are you spending too much time manually transferring data between platforms?
Before diving into how to connect Pipedrive to HubSpot using Superjoin, let's take a moment to understand why this integration is essential. When you connect these two platforms, you can:
Sync contact data seamlessly between your sales and marketing teams.
Automate lead tracking from the top of the funnel to closed deals.
Gain better insights into both pipeline performance and customer engagement.
With this integration, you’ll unify your customer journey, reduce manual errors, and have real-time access to sales and marketing data.
Method 1: Connecting Pipedrive to HubSpot Using Superjoin
Step-by-Step Guide:
Install Superjoin on Google Sheets
Open Google Sheets, navigate to the Extensions tab, and select Add-ons > Get add-ons.
In the Google Workspace Marketplace, search for Superjoin. Follow the prompts to install and grant necessary permissions.
Launch Superjoin from Extensions > Superjoin > Launch.
Alternatively, install Superjoin on Microsoft Excel
Open this link, click on Get it now.
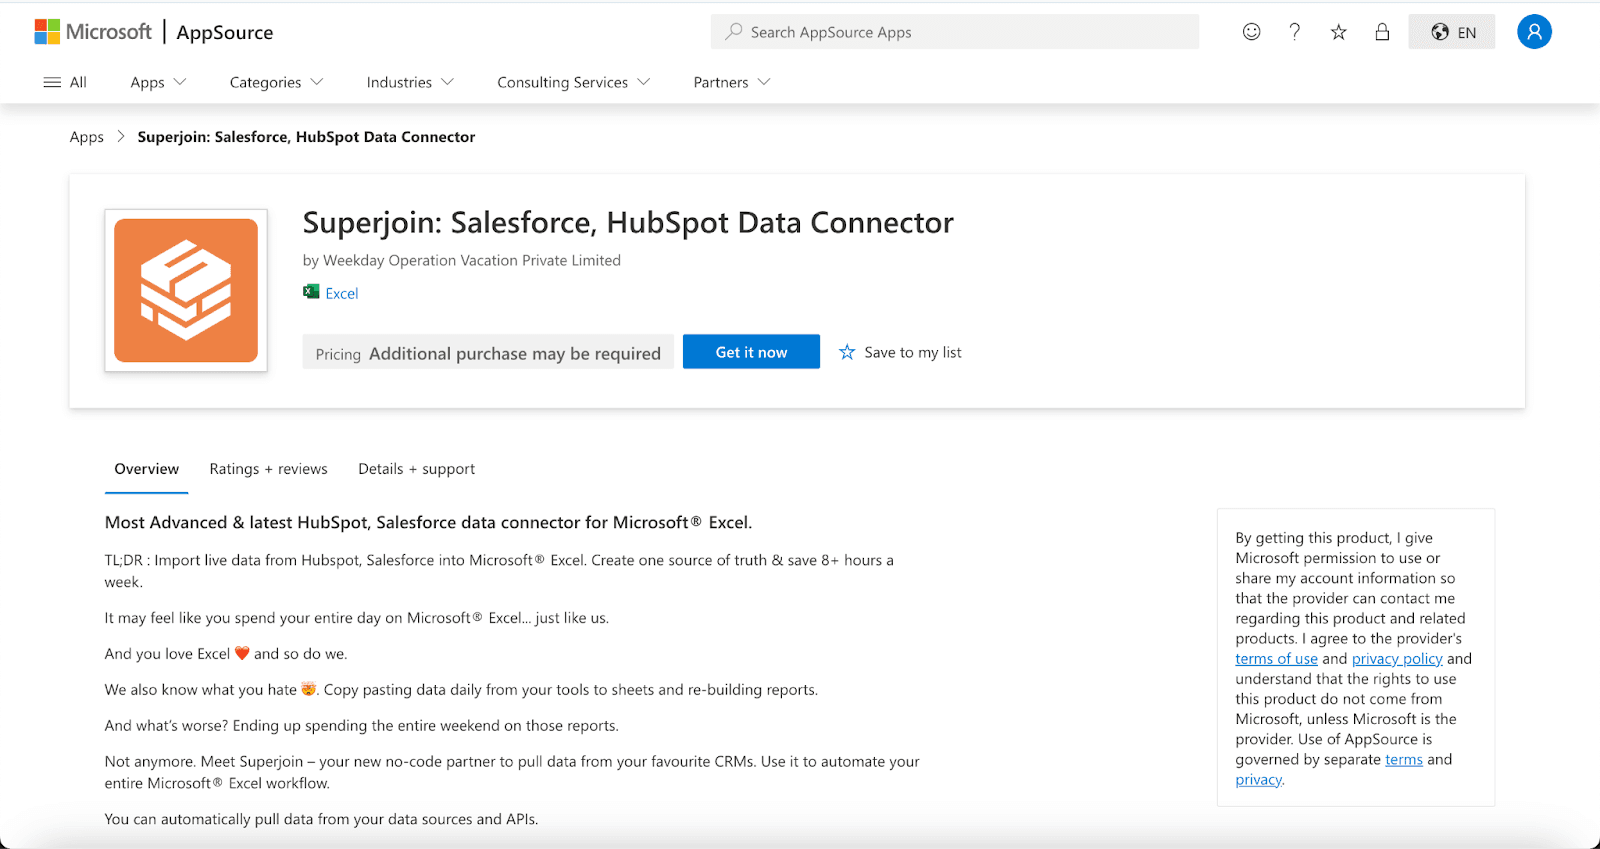
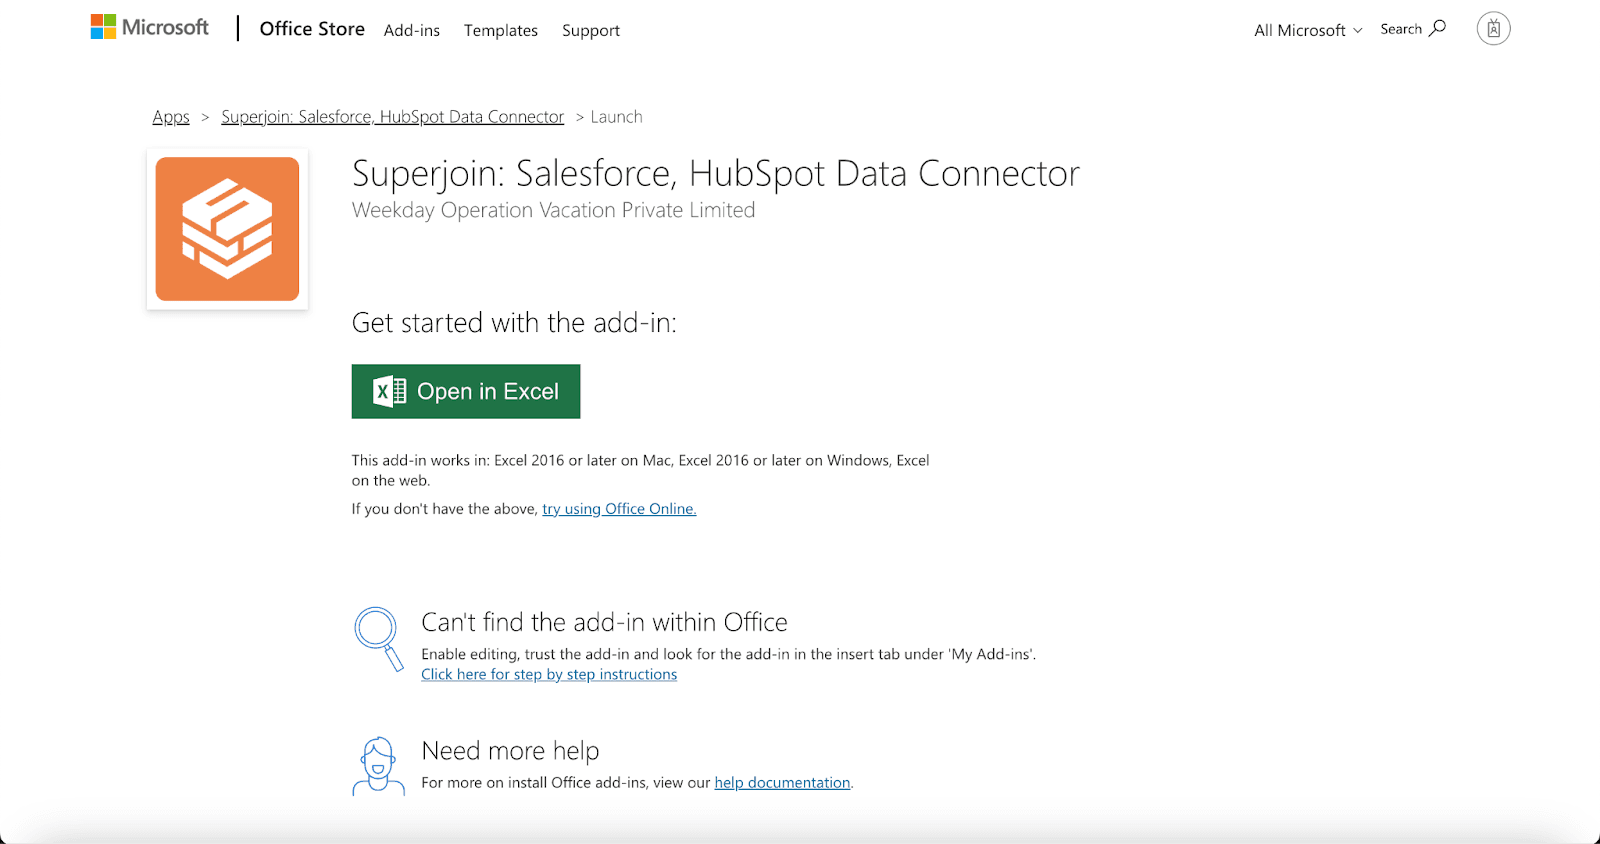
Once installed, click on Open in Excel or Try using it online (for Excel online).
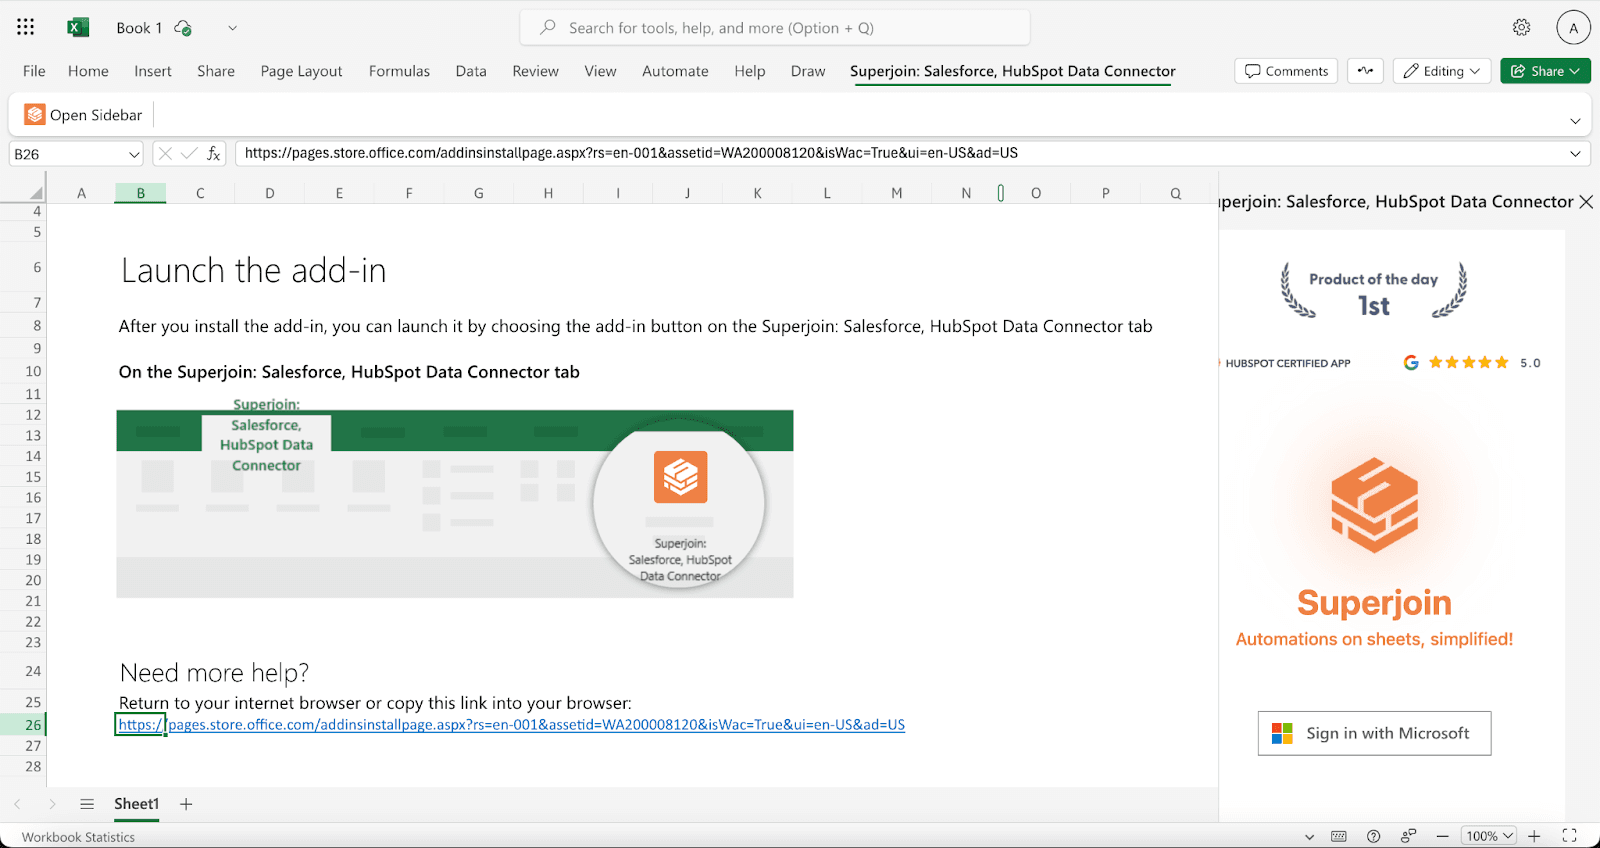
Launch Superjoin by opening the add-in and clicking on Open Sidebar. Login with your Microsoft account to start using Superjoin.
Connect and Import Data from Pipedrive
From Sources and choose Pipedrive.
Authenticate your Pipedrive account.
Select the data to import, such as Contacts, Deals, or Activities, and configure filters as necessary.
Your Pipedrive data will now appear in Google Sheets.
Export Data to HubSpot
In the Superjoin sidebar, navigate to sources, choose Hubspot as your source — click Export
Choose the sheet and header row containing the data to export.
Select the HubSpot Object (e.g., Contacts, Deals) and the type of action: Update, Insert or Delete.
Map the fields from your Pipedrive data to the corresponding HubSpot fields. You can use the auto-map feature or manually configure field mappings.
Benefits of Using Superjoin for Pipedrive to HubSpot Integration
Superjoin provides several benefits when integrating Pipedrive with HubSpot:
No Coding Required: Easily sync data without any technical expertise.
Granular Control: Choose specific metrics and data points to sync from Pipedrive to HubSpot.
Flexible Mapping: Customize how fields map between platforms, with automatic or manual options.
Real-Time Updates: Keep both systems in sync with the latest data.
Easy to Use: Superjoin’s intuitive interface makes the integration simple, even for non-technical users.
Method 2: Native HubSpot-Pipedrive Integration
HubSpot offers a native integration through its marketplace, providing a direct way to sync Pipedrive data with HubSpot.
Step-by-Step Guide:
Navigate to HubSpot’s App Marketplace
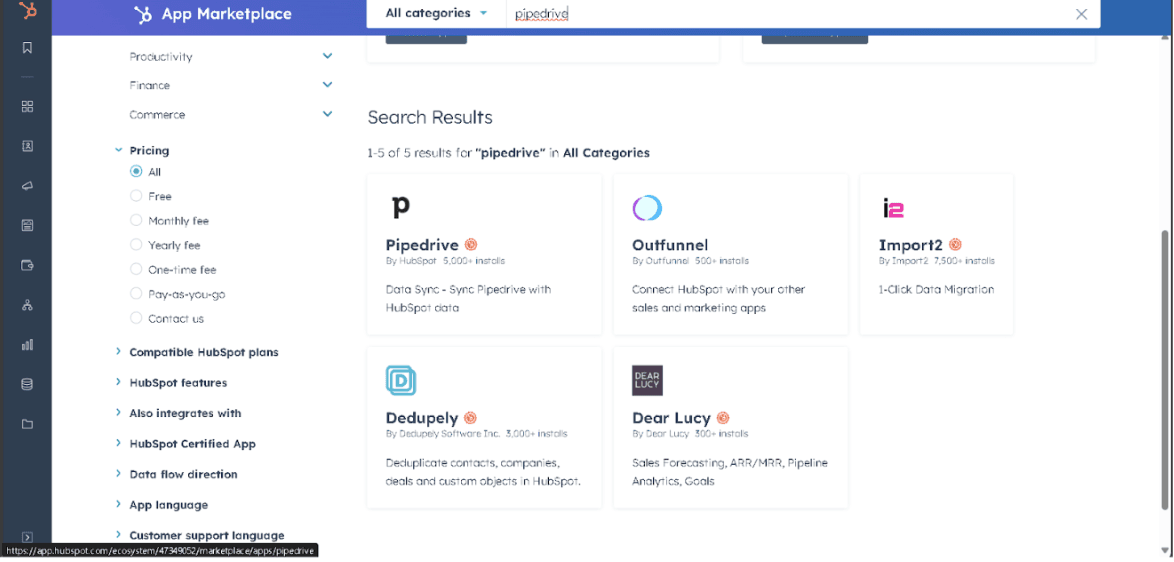
In HubSpot, go to the App Marketplace and search for Pipedrive.
Install Pipedrive Integration
Select the Pipedrive-HubSpot integration and follow the prompts to install it.
Connect Pipedrive to HubSpot
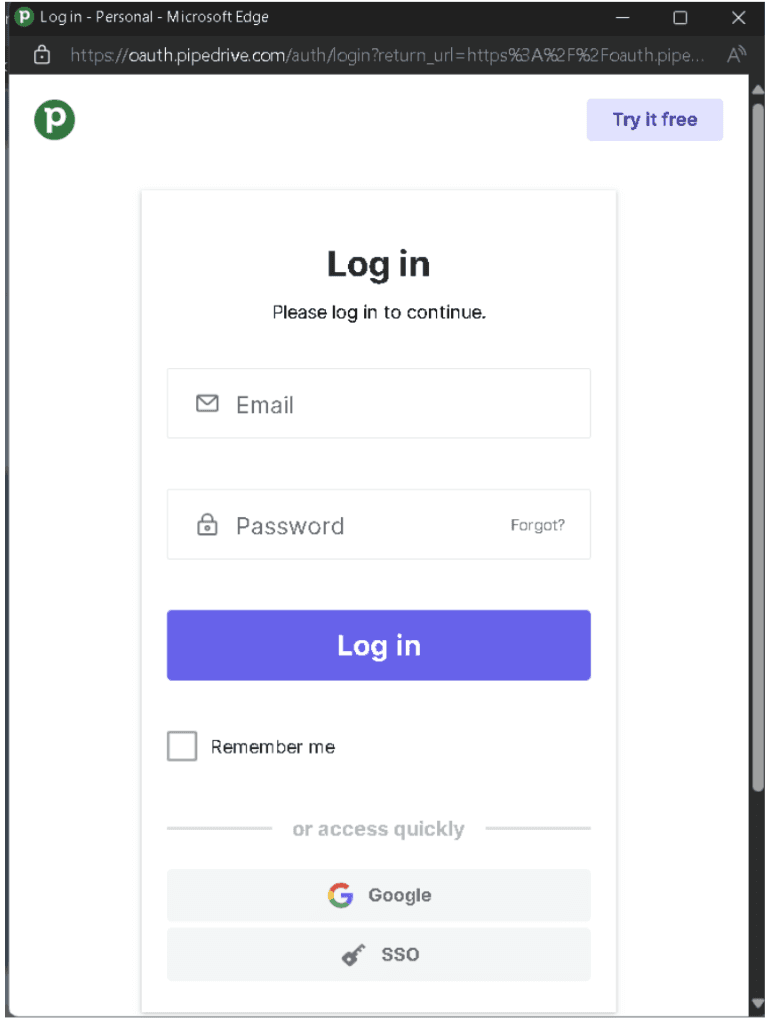
Log in to your Pipedrive account and authorize the integration.
Set up rules for syncing data such as contacts, deals, and activities.
Sync Data
After connecting, HubSpot will begin pulling data from Pipedrive. You can view your sales pipeline and associated activities directly within HubSpot.
Pros:
Simple Setup: Easy to configure without needing additional tools.
Centralized Data: Sales and marketing data are synced in HubSpot, providing a full customer view.
Minimal Configuration: Pre-built sync rules for most common use cases.
Cons:
Limited Customization: Not as flexible as some third-party integrations.
Basic Syncing Options: You may not be able to select specific fields or customize the data sync deeply.
Cost Implications: Larger amounts of data may increase HubSpot usage costs.
Delay in Data Sync: Data may not always sync in real time, leading to delays.
Method 3: Using Zapier to Connect Pipedrive to HubSpot
Zapier provides a no-code solution for automating workflows between Pipedrive and HubSpot. By creating “Zaps,” you can automate data syncs.
Step-by-Step Guide:
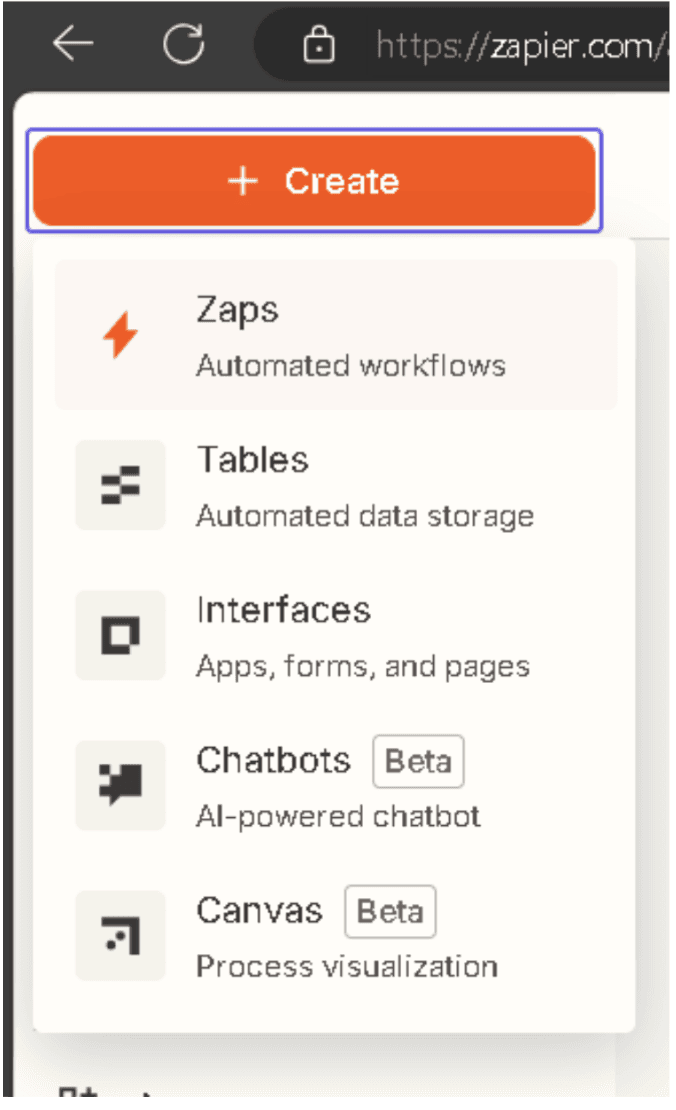
Create a Zapier Account
If you don’t have a Zapier account, sign up at Zapier.com and log in to your dashboard.
Create a New Zap
Click Create Zap and choose Pipedrive as the trigger app.
Set the Trigger
Select a trigger event like “New Deal” or “New Contact.” This event will start the workflow.

Authenticate your Pipedrive account and set any filters or specific criteria for triggering the Zap.
Connect HubSpot
Choose HubSpot as the action app. Select an event such as Create or Update Contact or Create Deal.
Authenticate your HubSpot account and map Pipedrive data to the appropriate HubSpot fields.

Test and Publish the Zap
Test the Zap to ensure everything works correctly, then activate it.
Pros:
Custom Workflows: Zapier allows for highly customizable workflows between Pipedrive and HubSpot.
No Coding Needed: You can create sophisticated automations without any technical expertise.
Flexible Data Mapping: You can control exactly what data syncs between Pipedrive and HubSpot.
Cons:
Delay in Syncing: Zapier workflows may not sync in real-time, depending on your Zapier plan.
Limited Free Plan: Costs may increase as you use more complex workflows.
Feature Limitations: Some advanced features may require a higher Zapier plan or another tool.
Conclusion
Integrating Pipedrive with HubSpot is an excellent way to align your sales and marketing data, streamline processes, and gain valuable insights. With Superjoin, you’ll be able to automate workflows, reduce manual tasks, and better track your customer interactions.
By integrating these platforms, you can:
Create seamless workflows between sales and marketing.
Sync contacts and deals across platforms.
Improve your customer data for targeted outreach and follow-ups.
Get started today and unlock the full potential of your Pipedrive and HubSpot integration!
Seamlessly connect your sales pipeline in Pipedrive with HubSpot’s CRM for better insights and streamlined workflows. Superjoin makes it effortless!
Why Connect Pipedrive to HubSpot?
Are you spending too much time manually transferring data between platforms?
Before diving into how to connect Pipedrive to HubSpot using Superjoin, let's take a moment to understand why this integration is essential. When you connect these two platforms, you can:
Sync contact data seamlessly between your sales and marketing teams.
Automate lead tracking from the top of the funnel to closed deals.
Gain better insights into both pipeline performance and customer engagement.
With this integration, you’ll unify your customer journey, reduce manual errors, and have real-time access to sales and marketing data.
Method 1: Connecting Pipedrive to HubSpot Using Superjoin
Step-by-Step Guide:
Install Superjoin on Google Sheets
Open Google Sheets, navigate to the Extensions tab, and select Add-ons > Get add-ons.
In the Google Workspace Marketplace, search for Superjoin. Follow the prompts to install and grant necessary permissions.
Launch Superjoin from Extensions > Superjoin > Launch.
Alternatively, install Superjoin on Microsoft Excel
Open this link, click on Get it now.
Once installed, click on Open in Excel or Try using it online (for Excel online).
Launch Superjoin by opening the add-in and clicking on Open Sidebar. Login with your Microsoft account to start using Superjoin.
Connect and Import Data from Pipedrive
From Sources and choose Pipedrive.
Authenticate your Pipedrive account.
Select the data to import, such as Contacts, Deals, or Activities, and configure filters as necessary.
Your Pipedrive data will now appear in Google Sheets.
Export Data to HubSpot
In the Superjoin sidebar, navigate to sources, choose Hubspot as your source — click Export
Choose the sheet and header row containing the data to export.
Select the HubSpot Object (e.g., Contacts, Deals) and the type of action: Update, Insert or Delete.
Map the fields from your Pipedrive data to the corresponding HubSpot fields. You can use the auto-map feature or manually configure field mappings.
Benefits of Using Superjoin for Pipedrive to HubSpot Integration
Superjoin provides several benefits when integrating Pipedrive with HubSpot:
No Coding Required: Easily sync data without any technical expertise.
Granular Control: Choose specific metrics and data points to sync from Pipedrive to HubSpot.
Flexible Mapping: Customize how fields map between platforms, with automatic or manual options.
Real-Time Updates: Keep both systems in sync with the latest data.
Easy to Use: Superjoin’s intuitive interface makes the integration simple, even for non-technical users.
Method 2: Native HubSpot-Pipedrive Integration
HubSpot offers a native integration through its marketplace, providing a direct way to sync Pipedrive data with HubSpot.
Step-by-Step Guide:
Navigate to HubSpot’s App Marketplace
In HubSpot, go to the App Marketplace and search for Pipedrive.
Install Pipedrive Integration
Select the Pipedrive-HubSpot integration and follow the prompts to install it.
Connect Pipedrive to HubSpot
Log in to your Pipedrive account and authorize the integration.
Set up rules for syncing data such as contacts, deals, and activities.
Sync Data
After connecting, HubSpot will begin pulling data from Pipedrive. You can view your sales pipeline and associated activities directly within HubSpot.
Pros:
Simple Setup: Easy to configure without needing additional tools.
Centralized Data: Sales and marketing data are synced in HubSpot, providing a full customer view.
Minimal Configuration: Pre-built sync rules for most common use cases.
Cons:
Limited Customization: Not as flexible as some third-party integrations.
Basic Syncing Options: You may not be able to select specific fields or customize the data sync deeply.
Cost Implications: Larger amounts of data may increase HubSpot usage costs.
Delay in Data Sync: Data may not always sync in real time, leading to delays.
Method 3: Using Zapier to Connect Pipedrive to HubSpot
Zapier provides a no-code solution for automating workflows between Pipedrive and HubSpot. By creating “Zaps,” you can automate data syncs.
Step-by-Step Guide:
Create a Zapier Account
If you don’t have a Zapier account, sign up at Zapier.com and log in to your dashboard.
Create a New Zap
Click Create Zap and choose Pipedrive as the trigger app.
Set the Trigger
Select a trigger event like “New Deal” or “New Contact.” This event will start the workflow.
Authenticate your Pipedrive account and set any filters or specific criteria for triggering the Zap.
Connect HubSpot
Choose HubSpot as the action app. Select an event such as Create or Update Contact or Create Deal.
Authenticate your HubSpot account and map Pipedrive data to the appropriate HubSpot fields.
Test and Publish the Zap
Test the Zap to ensure everything works correctly, then activate it.
Pros:
Custom Workflows: Zapier allows for highly customizable workflows between Pipedrive and HubSpot.
No Coding Needed: You can create sophisticated automations without any technical expertise.
Flexible Data Mapping: You can control exactly what data syncs between Pipedrive and HubSpot.
Cons:
Delay in Syncing: Zapier workflows may not sync in real-time, depending on your Zapier plan.
Limited Free Plan: Costs may increase as you use more complex workflows.
Feature Limitations: Some advanced features may require a higher Zapier plan or another tool.
Conclusion
Integrating Pipedrive with HubSpot is an excellent way to align your sales and marketing data, streamline processes, and gain valuable insights. With Superjoin, you’ll be able to automate workflows, reduce manual tasks, and better track your customer interactions.
By integrating these platforms, you can:
Create seamless workflows between sales and marketing.
Sync contacts and deals across platforms.
Improve your customer data for targeted outreach and follow-ups.
Get started today and unlock the full potential of your Pipedrive and HubSpot integration!
FAQs
Why should I connect Pipedrive with HubSpot?
Why should I connect Pipedrive with HubSpot?
What are the benefits of using Superjoin for this integration?
What are the benefits of using Superjoin for this integration?
How does integrating Pipedrive with HubSpot improve my workflow?
How does integrating Pipedrive with HubSpot improve my workflow?
Automatic Data Pulls
Visual Data Preview
Set Alerts
other related blogs


Try it now