HubSpot Tutorial
How to Connect Snowflake to HubSpot: 1-Min Interactive Guide
Follow our interactive guide to sync data, enhance reporting, and unlock deeper customer insights for better decision-making.
Table of Contents
Here's a quick step-by-step guide 🔝
Here's a quick step-by-step guide 🔝
Integrate Snowflake with HubSpot to streamline your data analytics and CRM operations. Learn how to seamlessly sync your data for improved business insights and operations.
Why Connect Snowflake to HubSpot?
Integrating Snowflake with HubSpot allows you to:
Enhance Data Analysis: Combine CRM data from HubSpot with large datasets stored in Snowflake for more comprehensive analysis.
Automate Data Sync: Ensure that your CRM data is always up-to-date with the latest information from your data warehouse.
Improve Reporting: Use Snowflake’s powerful analytics capabilities to generate detailed reports and insights based on HubSpot data.
Connecting these platforms helps you leverage your data more effectively and make better-informed business decisions.
Method 1: Connecting Snowflake to HubSpot Using Superjoin
Step-by-Step Guide:
Install Superjoin on Google Sheets
Open Google Sheets and navigate to the Extensions tab. Select Add-ons > Get add-ons.
Search for Superjoin in the Google Workspace Marketplace, install it, and grant necessary permissions.
Launch Superjoin from Extensions > Superjoin > Launch.
Alternatively, install Superjoin on Microsoft Excel
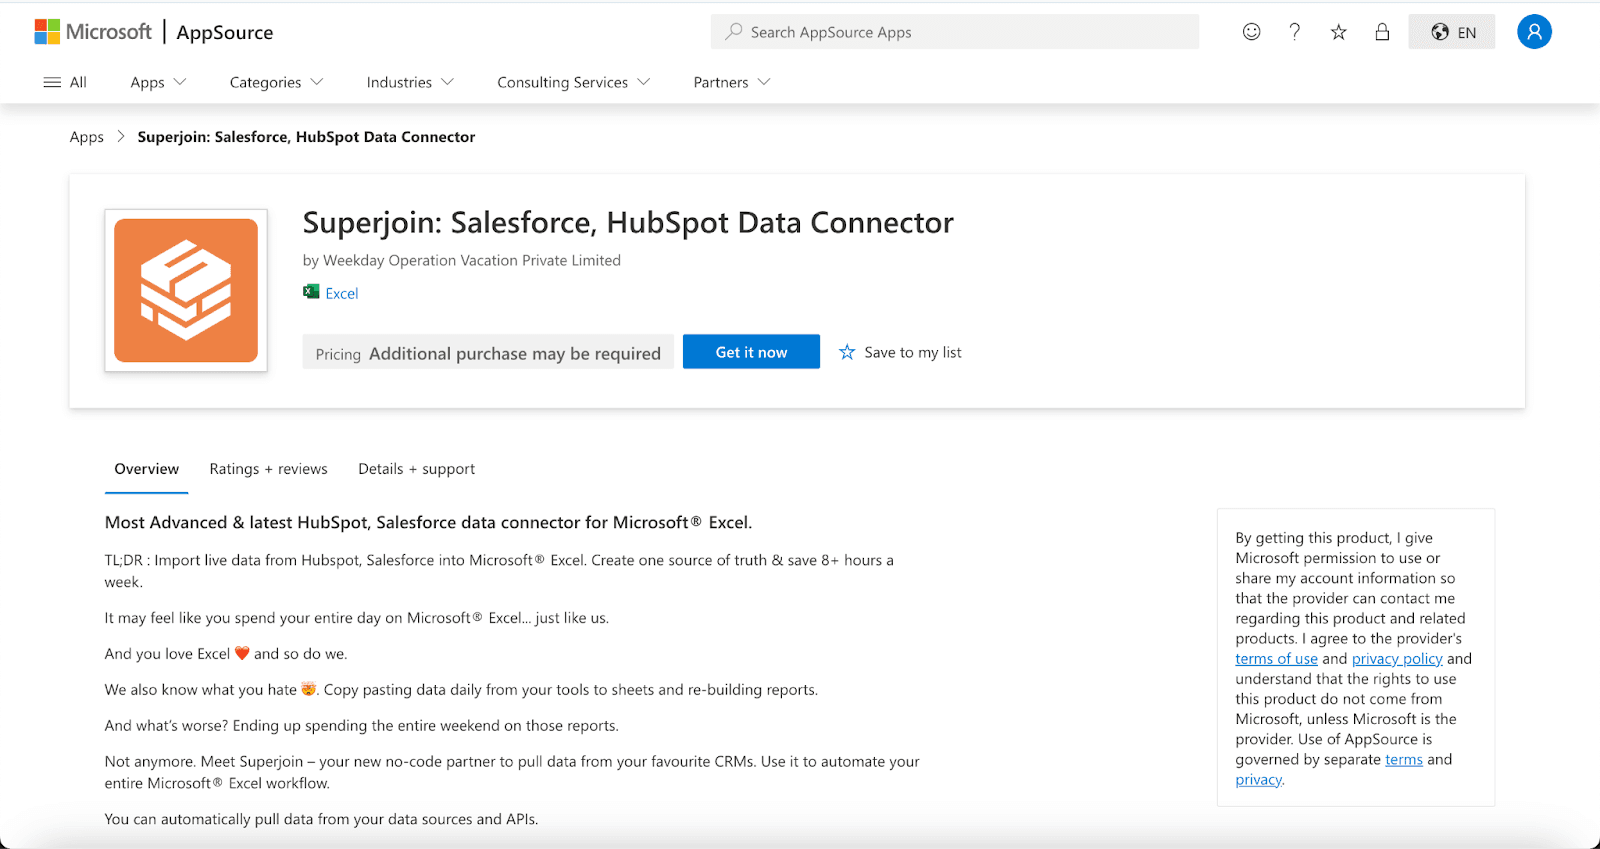
Open this link, click on Get it now.
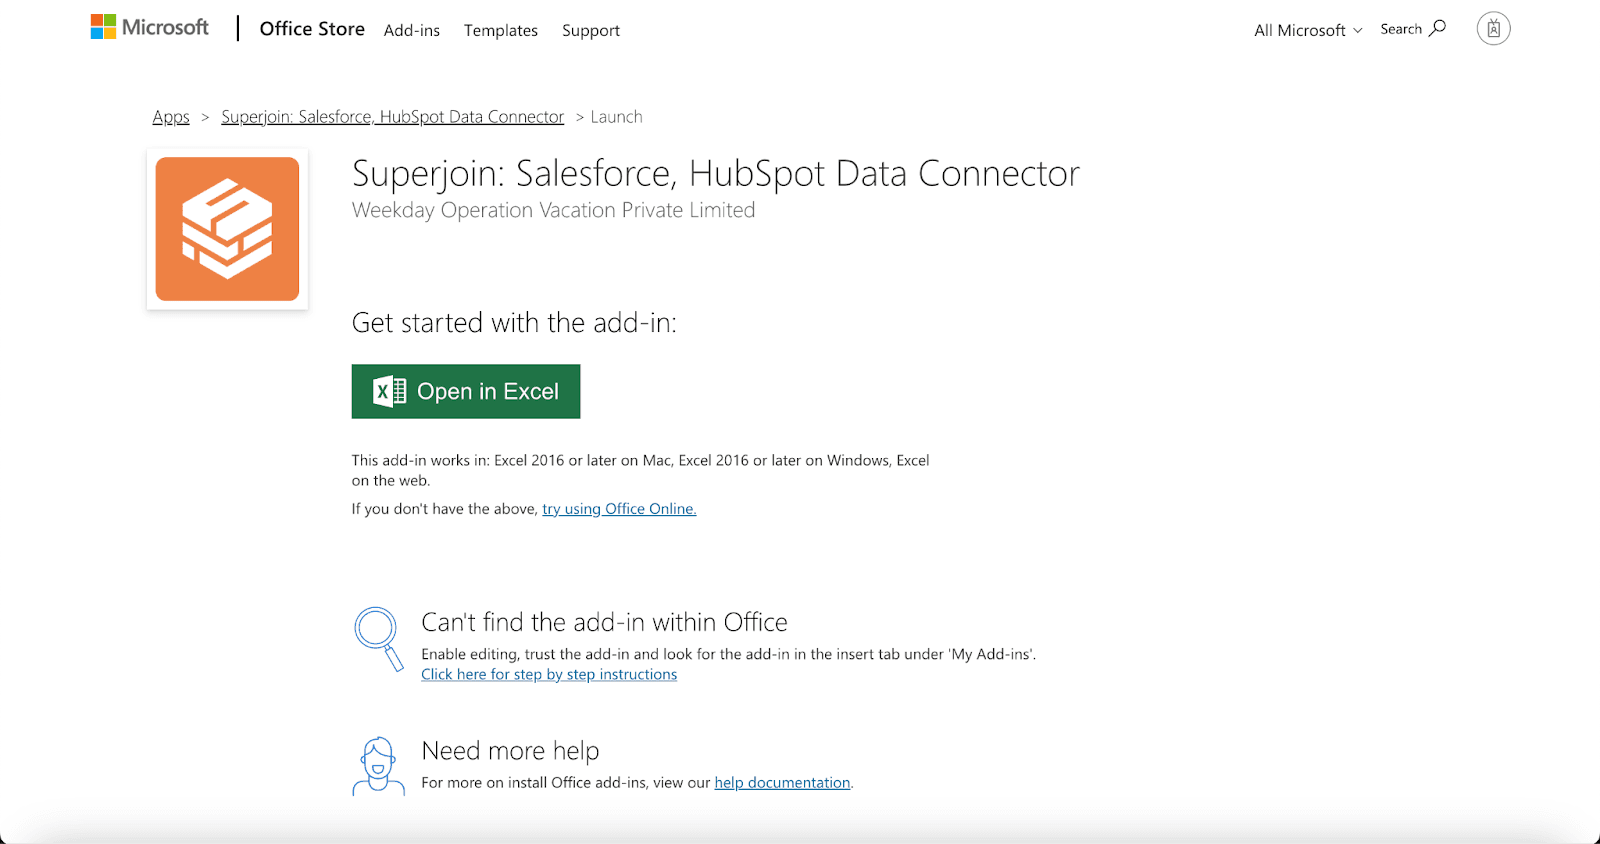
Once installed, click on Open in Excel or Try using it online (for Excel online).
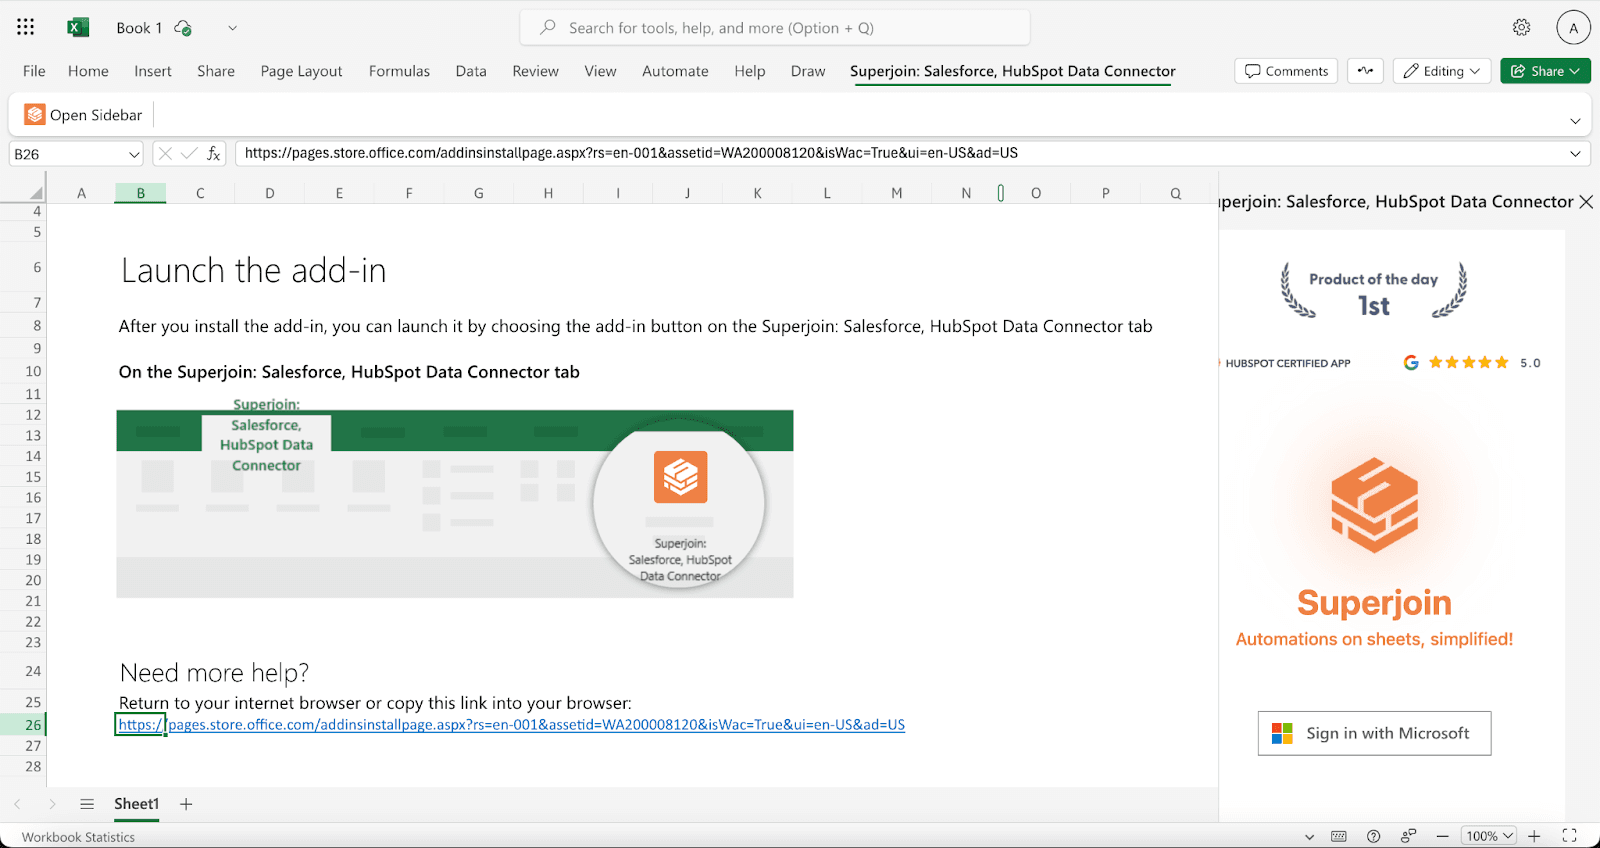
Launch Superjoin by opening the add-in and clicking on Open Sidebar. Login with your Microsoft account to start using Superjoin.
Connect and Import Data from Snowflake
In the Superjoin sidebar, select Sources and choose Snowflake.
Authenticate your Snowflake account by following the prompts.
Choose the tables and fields you want to import from Snowflake, such as customer data, sales metrics, or any other relevant information. Configure any necessary filters and click Import. Your Snowflake data will populate in Google Sheets.
Export Data to HubSpot
In the Superjoin sidebar, navigate to sources, choose Hubspot as your source — click Export
Choose the sheet and header row containing the data to export.
Select the HubSpot Object (e.g., Contacts, Deals) and the type of action: Update, Insert or Delete.
Map the fields from Google Sheets to corresponding fields in HubSpot. Superjoin will auto-map fields or allow you to map them manually.
Complete the export to sync your Snowflake data with HubSpot.
Benefits of Using Superjoin for Snowflake-HubSpot Integration
Superjoin offers several advantages for syncing Snowflake and HubSpot:
No Coding Required: Integrate Snowflake with HubSpot without needing technical expertise.
Customizable Data Import/Export: Select precisely which data to import and how to map it to HubSpot.
Smooth Data Flow: Utilize Google Sheets as an intermediary for accurate and efficient data transfer.
Real-Time Updates: Keep HubSpot updated with the latest data from Snowflake.
Superjoin simplifies the integration process, making it easy to manage and sync your Snowflake and HubSpot data.
Method 2: How to Connect Snowflake to HubSpot Using Fivetran
Fivetran is a fully managed ETL (Extract, Transform, Load) tool that helps automate data pipelines. It simplifies syncing data from Snowflake to HubSpot, ensuring your data is always up-to-date.
Step-by-Step Guide:
Create a Fivetran Account
Sign up for a Fivetran account. If you already have an account, simply log in.
Set Up the Snowflake Connector in Fivetran
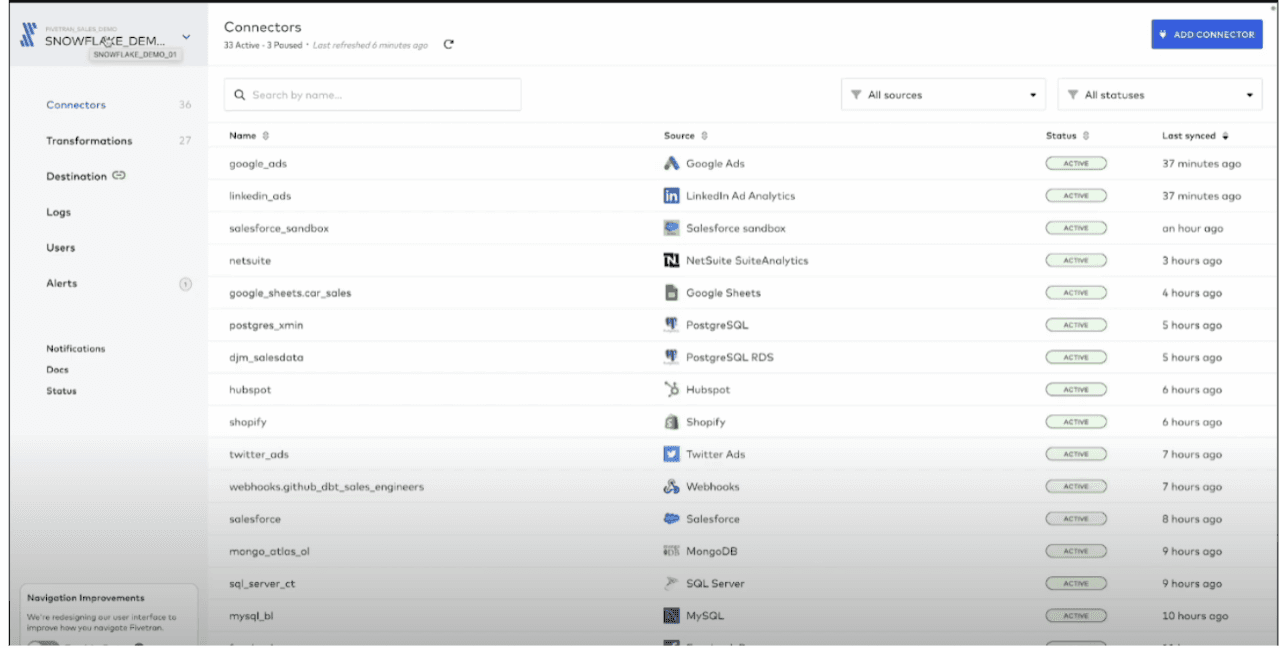
From the Fivetran dashboard, click Add Connector.
Search for "Snowflake" and select it.
Enter the required credentials, including the Snowflake account, username, password, and warehouse details.
Authorize Fivetran to access your Snowflake data.
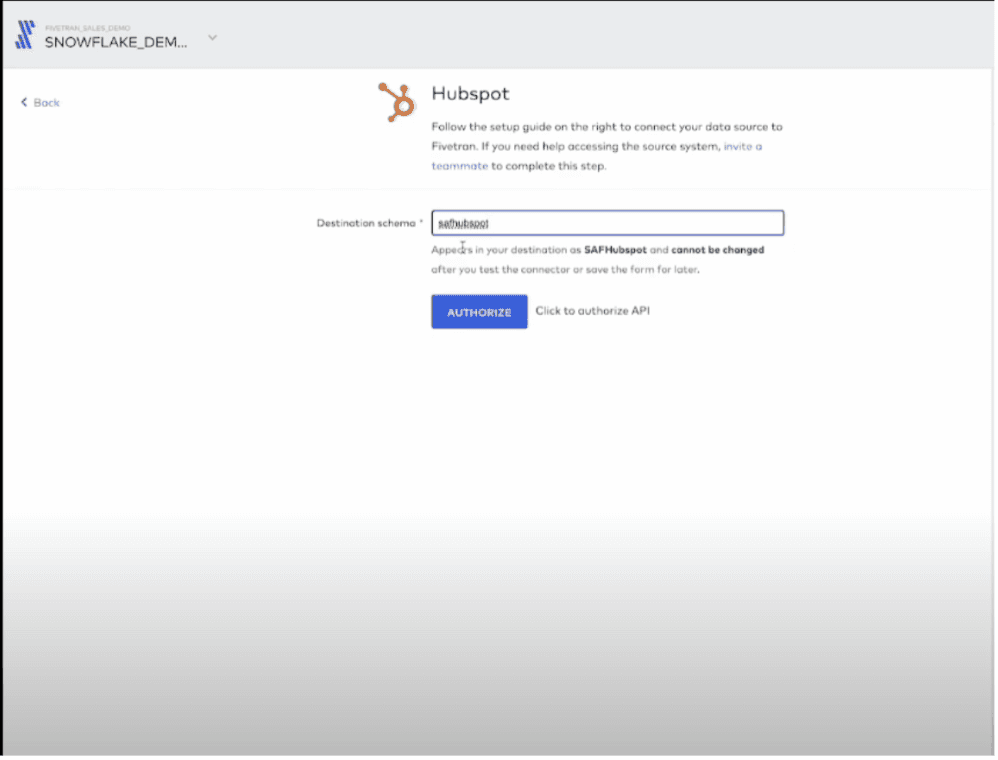
Set Up the HubSpot Destination in Fivetran
Add a new destination in Fivetran by selecting "HubSpot."
Connect your HubSpot account by entering your credentials.
Authorize Fivetran to push data into HubSpot CRM.
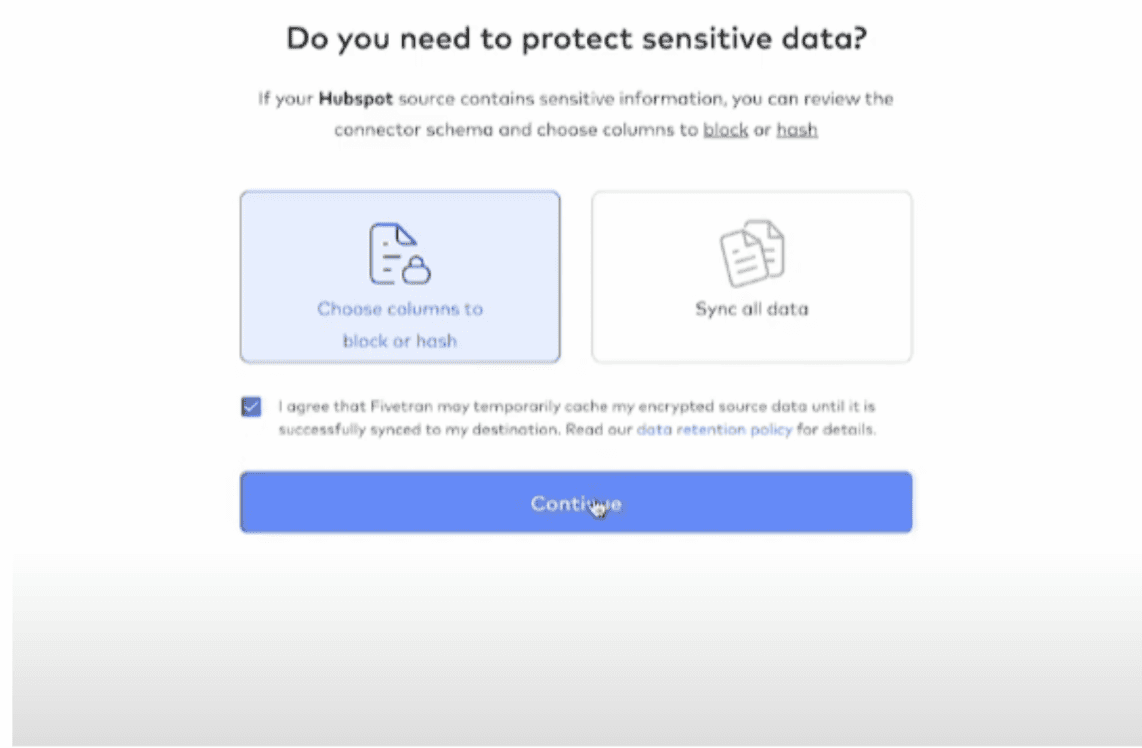
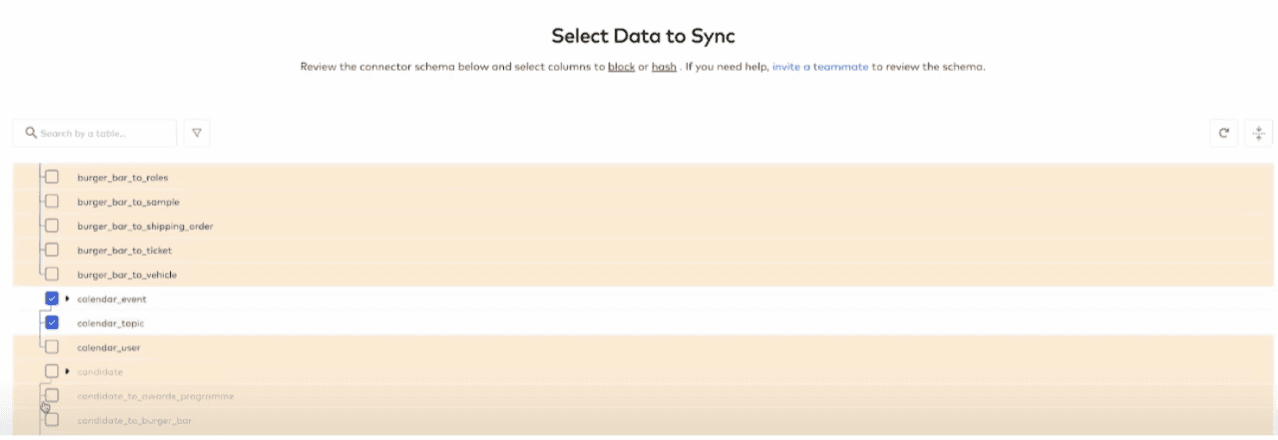
Configure Data Sync
Choose the specific Snowflake tables or data sets you want to sync with HubSpot.
Set a sync schedule that fits your needs (e.g., hourly, daily).
5. Data Mapping
In Fivetran, map the data fields from Snowflake to HubSpot objects like Contacts, Deals, or Custom Properties.
Review and confirm the mapping.
Start Syncing
Once everything is set up, start the data sync.
Fivetran will now automatically update HubSpot with Snowflake data at the intervals you specified.
Pros:
Automated Data Sync: Fivetran handles data syncing automatically, so you don’t need to worry about manual exports.
Scalability: Easily scalable for large datasets across Snowflake and HubSpot.
Minimal Maintenance: Fivetran monitors and fixes any syncing issues.
Cons:
Cost: Fivetran's pricing can be high depending on the volume of data you sync.
Less Customization: Fivetran has pre-set data syncs and may not offer extensive customization.
Third-Party Dependency: You rely on Fivetran’s service stability and support
Method 3: Manual Integration Using CSV Export/Import
If you prefer a hands-on approach, you can manually integrate Snowflake with HubSpot using CSV files.
Step-by-Step Guide:
Export Data from Snowflake
Use Snowflake’s SQL queries or data export tools to export the relevant data in CSV format.
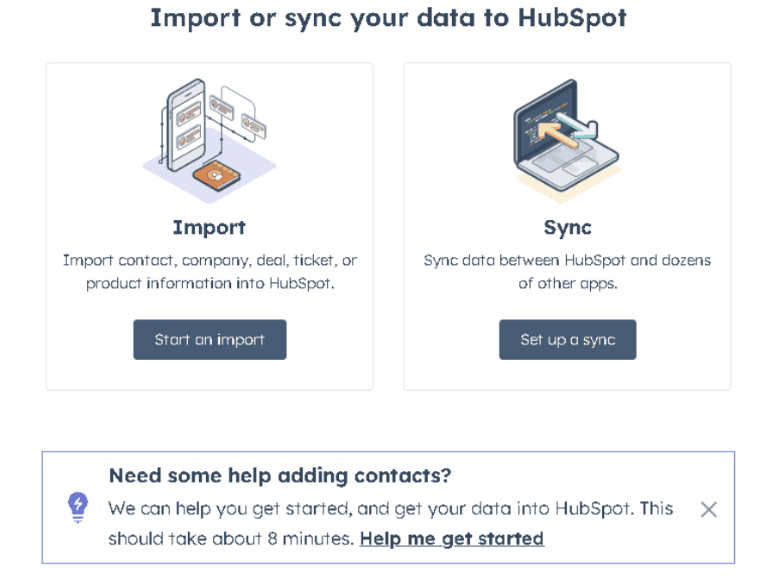
Import Data into HubSpot
Log in to your HubSpot account and navigate to the Import section.
Upload the CSV file containing your Snowflake data.
Map the CSV columns to HubSpot properties and complete the import.
Pros:
No Additional Costs: No need for extra tools or subscriptions.
Full Control: Complete control over the data import/export process.
Cons:
Manual Effort: Requires manual handling of data exports and imports.
No Real-Time Sync: Data must be regularly exported and imported, which can be time-consuming.
Conclusion
Integrating Snowflake with HubSpot can significantly enhance your data management and analytics capabilities. Using Superjoin you can:
Combine large datasets with CRM data for deeper insights
Automate data updates and workflows
Improve reporting and decision-making
Start integrating today to make the most of your Snowflake and HubSpot data!
Integrate Snowflake with HubSpot to streamline your data analytics and CRM operations. Learn how to seamlessly sync your data for improved business insights and operations.
Why Connect Snowflake to HubSpot?
Integrating Snowflake with HubSpot allows you to:
Enhance Data Analysis: Combine CRM data from HubSpot with large datasets stored in Snowflake for more comprehensive analysis.
Automate Data Sync: Ensure that your CRM data is always up-to-date with the latest information from your data warehouse.
Improve Reporting: Use Snowflake’s powerful analytics capabilities to generate detailed reports and insights based on HubSpot data.
Connecting these platforms helps you leverage your data more effectively and make better-informed business decisions.
Method 1: Connecting Snowflake to HubSpot Using Superjoin
Step-by-Step Guide:
Install Superjoin on Google Sheets
Open Google Sheets and navigate to the Extensions tab. Select Add-ons > Get add-ons.
Search for Superjoin in the Google Workspace Marketplace, install it, and grant necessary permissions.
Launch Superjoin from Extensions > Superjoin > Launch.
Alternatively, install Superjoin on Microsoft Excel
Open this link, click on Get it now.
Once installed, click on Open in Excel or Try using it online (for Excel online).
Launch Superjoin by opening the add-in and clicking on Open Sidebar. Login with your Microsoft account to start using Superjoin.
Connect and Import Data from Snowflake
In the Superjoin sidebar, select Sources and choose Snowflake.
Authenticate your Snowflake account by following the prompts.
Choose the tables and fields you want to import from Snowflake, such as customer data, sales metrics, or any other relevant information. Configure any necessary filters and click Import. Your Snowflake data will populate in Google Sheets.
Export Data to HubSpot
In the Superjoin sidebar, navigate to sources, choose Hubspot as your source — click Export
Choose the sheet and header row containing the data to export.
Select the HubSpot Object (e.g., Contacts, Deals) and the type of action: Update, Insert or Delete.
Map the fields from Google Sheets to corresponding fields in HubSpot. Superjoin will auto-map fields or allow you to map them manually.
Complete the export to sync your Snowflake data with HubSpot.
Benefits of Using Superjoin for Snowflake-HubSpot Integration
Superjoin offers several advantages for syncing Snowflake and HubSpot:
No Coding Required: Integrate Snowflake with HubSpot without needing technical expertise.
Customizable Data Import/Export: Select precisely which data to import and how to map it to HubSpot.
Smooth Data Flow: Utilize Google Sheets as an intermediary for accurate and efficient data transfer.
Real-Time Updates: Keep HubSpot updated with the latest data from Snowflake.
Superjoin simplifies the integration process, making it easy to manage and sync your Snowflake and HubSpot data.
Method 2: How to Connect Snowflake to HubSpot Using Fivetran
Fivetran is a fully managed ETL (Extract, Transform, Load) tool that helps automate data pipelines. It simplifies syncing data from Snowflake to HubSpot, ensuring your data is always up-to-date.
Step-by-Step Guide:
Create a Fivetran Account
Sign up for a Fivetran account. If you already have an account, simply log in.
Set Up the Snowflake Connector in Fivetran
From the Fivetran dashboard, click Add Connector.
Search for "Snowflake" and select it.
Enter the required credentials, including the Snowflake account, username, password, and warehouse details.
Authorize Fivetran to access your Snowflake data.
Set Up the HubSpot Destination in Fivetran
Add a new destination in Fivetran by selecting "HubSpot."
Connect your HubSpot account by entering your credentials.
Authorize Fivetran to push data into HubSpot CRM.
Configure Data Sync
Choose the specific Snowflake tables or data sets you want to sync with HubSpot.
Set a sync schedule that fits your needs (e.g., hourly, daily).
5. Data Mapping
In Fivetran, map the data fields from Snowflake to HubSpot objects like Contacts, Deals, or Custom Properties.
Review and confirm the mapping.
Start Syncing
Once everything is set up, start the data sync.
Fivetran will now automatically update HubSpot with Snowflake data at the intervals you specified.
Pros:
Automated Data Sync: Fivetran handles data syncing automatically, so you don’t need to worry about manual exports.
Scalability: Easily scalable for large datasets across Snowflake and HubSpot.
Minimal Maintenance: Fivetran monitors and fixes any syncing issues.
Cons:
Cost: Fivetran's pricing can be high depending on the volume of data you sync.
Less Customization: Fivetran has pre-set data syncs and may not offer extensive customization.
Third-Party Dependency: You rely on Fivetran’s service stability and support
Method 3: Manual Integration Using CSV Export/Import
If you prefer a hands-on approach, you can manually integrate Snowflake with HubSpot using CSV files.
Step-by-Step Guide:
Export Data from Snowflake
Use Snowflake’s SQL queries or data export tools to export the relevant data in CSV format.
Import Data into HubSpot
Log in to your HubSpot account and navigate to the Import section.
Upload the CSV file containing your Snowflake data.
Map the CSV columns to HubSpot properties and complete the import.
Pros:
No Additional Costs: No need for extra tools or subscriptions.
Full Control: Complete control over the data import/export process.
Cons:
Manual Effort: Requires manual handling of data exports and imports.
No Real-Time Sync: Data must be regularly exported and imported, which can be time-consuming.
Conclusion
Integrating Snowflake with HubSpot can significantly enhance your data management and analytics capabilities. Using Superjoin you can:
Combine large datasets with CRM data for deeper insights
Automate data updates and workflows
Improve reporting and decision-making
Start integrating today to make the most of your Snowflake and HubSpot data!
FAQs
Why integrate Snowflake with HubSpot?
Why integrate Snowflake with HubSpot?
Can I integrate Snowflake with HubSpot without coding?
Can I integrate Snowflake with HubSpot without coding?
Is manual integration possible?
Is manual integration possible?
Automatic Data Pulls
Visual Data Preview
Set Alerts
other related blogs


Try it now