HubSpot Tutorial
How to Connect Stripe to HubSpot: 1-Min Interactive Guide
Dive into our 1-min interactive guide to automate billing, sync payment data, and enhance your CRM for smarter customer management.
Table of Contents
Here's a quick step-by-step guide 🔝
Here's a quick step-by-step guide 🔝
Integrate Stripe with HubSpot to streamline your payment and CRM workflows. Learn how to sync your payment data seamlessly and improve your marketing efforts.
Why Connect Stripe to HubSpot?
Integrating Stripe with HubSpot allows you to:
Track Payment Data: View payment and transaction details directly within HubSpot.
Automate Follow-Ups: Set up automated workflows based on payment events, like sending thank you emails or initiating customer onboarding.
Enhance Customer Insights: Combine payment data with CRM information to better understand customer behavior and preferences.
This integration helps you streamline financial processes and improve customer interactions, making your business operations more efficient.
Method 1: Connecting Stripe to HubSpot Using Superjoin
Step-by-Step Guide:
Install Superjoin on Google Sheets
Open Google Sheets and navigate to the Extensions tab. Select Add-ons > Get add-ons.
Search for Superjoin in the Google Workspace Marketplace, install it, and grant necessary permissions.
Launch Superjoin from Extensions > Superjoin > Launch.
Alternatively, install Superjoin on Microsoft Excel
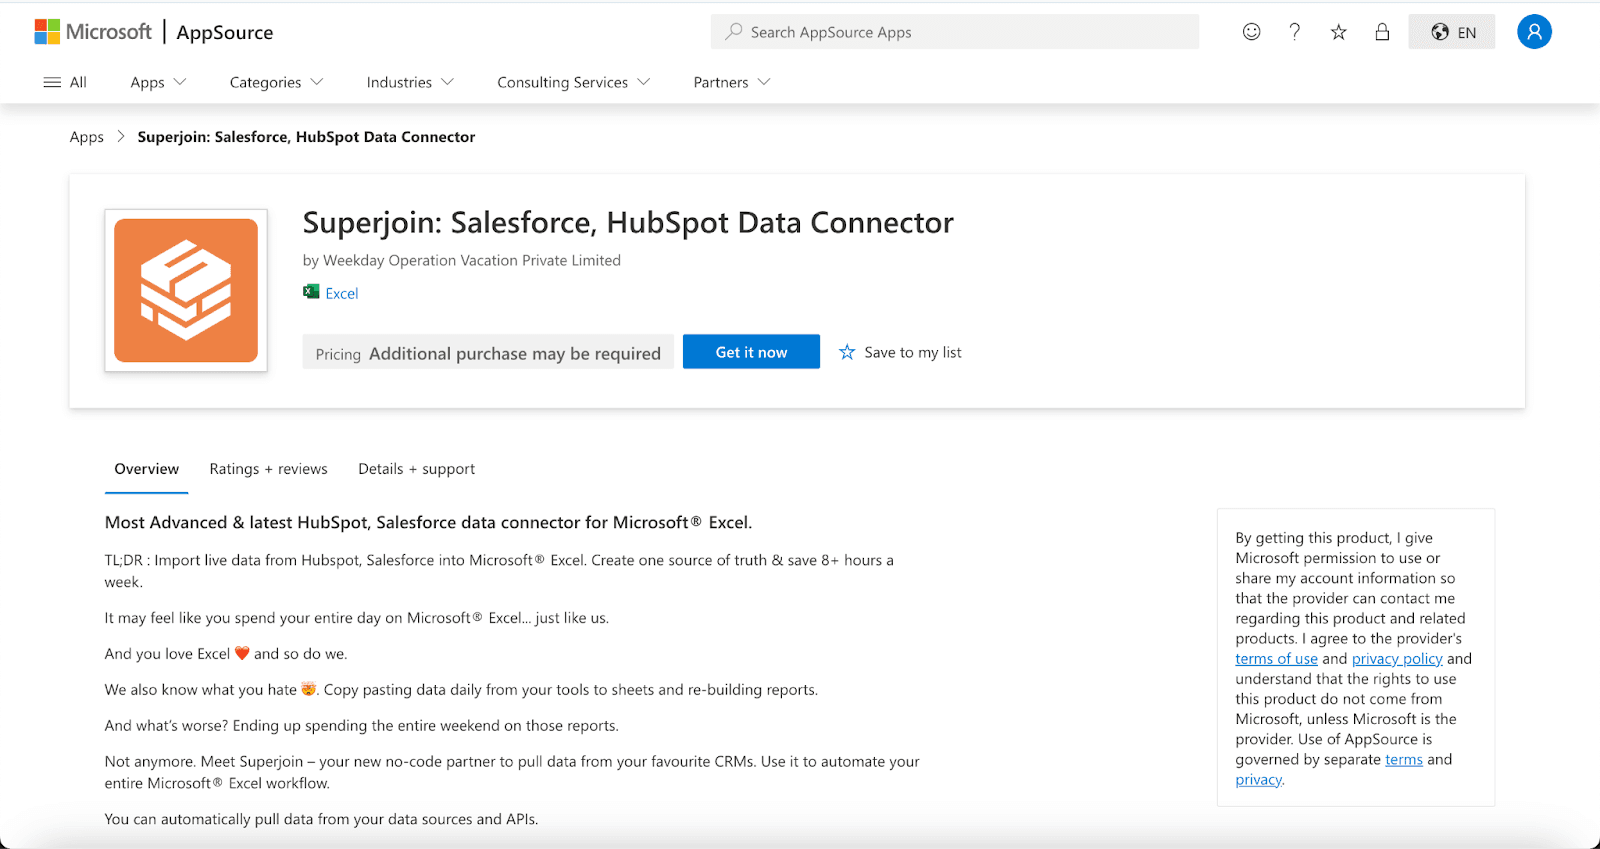
Open this link, click on Get it now.
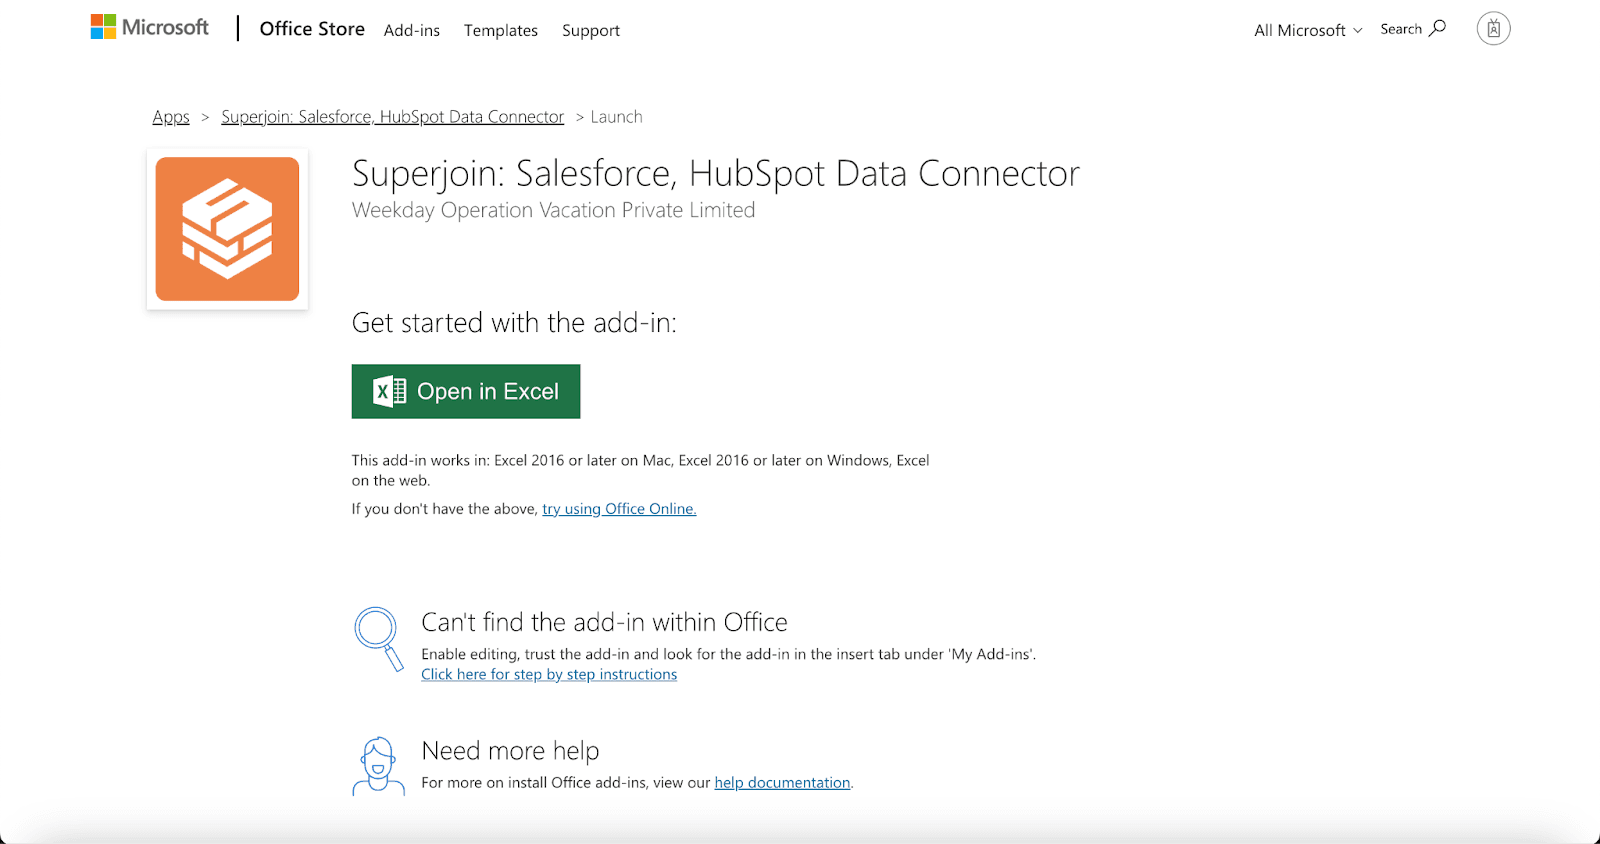
Once installed, click on Open in Excel or Try using it online (for Excel online).
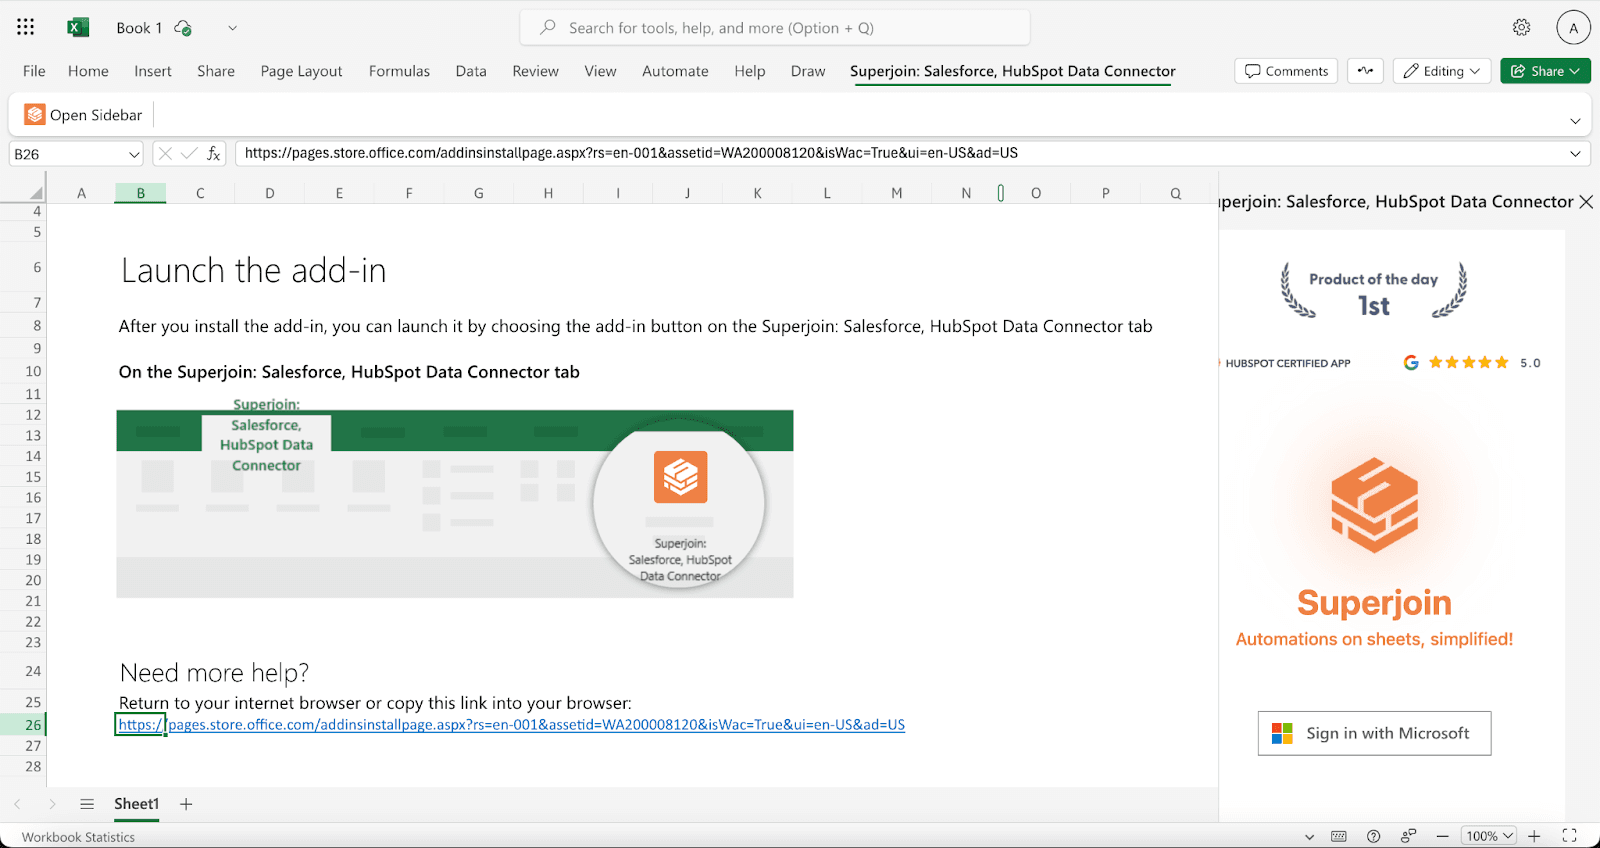
Launch Superjoin by opening the add-in and clicking on Open Sidebar. Login with your Microsoft account to start using Superjoin.
Connect and Import Data from Stripe
In the Superjoin sidebar, select Sources and choose Stripe.
Authenticate your Stripe account by following the prompts.
Choose the data you want to import, such as transactions, customers, or subscriptions. Configure any necessary filters and click Import. Your Stripe data will populate in Google Sheets.
Export Data to HubSpot
In the Superjoin sidebar, navigate to sources, choose Hubspot as your source — click Export
Choose the sheet and header row containing the data to export.
Select the HubSpot Object (e.g., Contacts, Deals) and the type of action: Update, Insert or Delete.
Map the fields from Google Sheets to corresponding fields in HubSpot. Superjoin will auto-map fields or allow you to map them manually.
Complete the export to sync your Stripe data with HubSpot.
Benefits of Using Superjoin for Stripe-HubSpot Integration
Superjoin offers several advantages for syncing Stripe and HubSpot:
No Coding Required: Easily integrate Stripe with HubSpot without any technical expertise.
Customizable Data Import/Export: Select exactly what data to import from Stripe and how to map it to HubSpot.
Smooth Data Flow: Use Google Sheets as an intermediary to ensure accurate and efficient data transfer.
Real-Time Updates: Keep your HubSpot CRM updated with the latest payment data from Stripe.
Superjoin simplifies the integration process, making it easy to manage and sync your payment and CRM data.
Method 2: Connecting Stripe to HubSpot Using Zapier
Zapier is a popular automation tool that allows you to connect Stripe to HubSpot without any coding. By using Zapier, you can automate the process of sending data between Stripe and HubSpot, such as creating or updating contacts when payments are made.
Step-by-Step Guide:
Create a Zapier Account
Go to Zapier and sign up for a free account, or log in if you already have an account.
Create a New Zap
In your Zapier dashboard, click Create Zap.
For the Trigger App, search for and select Stripe.

Set the Trigger
In the Stripe app section, choose a trigger event. For example, you can choose New Charge or New Customer to trigger the Zap when a payment is made or a customer is added.
Click Continue and authenticate your Stripe account by logging in and granting access to Zapier.

Set the Action in HubSpot
For the Action App, search for and select HubSpot.
Choose the action event, such as Create or Update Contact. This means Zapier will create a new contact in HubSpot or update an existing one when a new charge or customer is registered in Stripe.

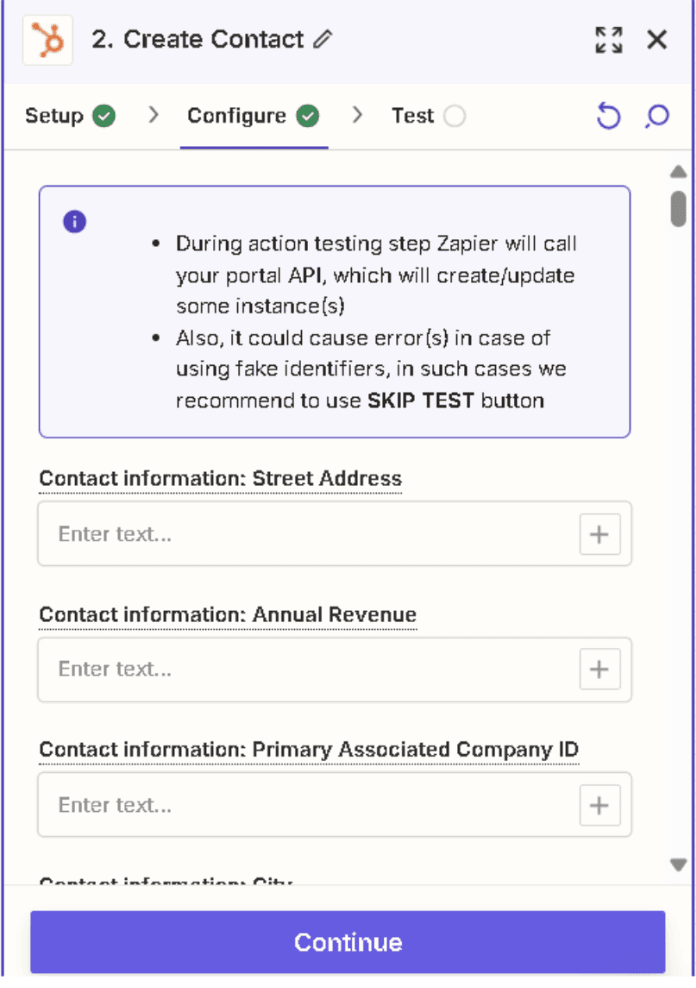
Map Stripe Data to HubSpot Fields
Map the relevant Stripe data (e.g., customer email, name, payment amount) to corresponding fields in HubSpot (e.g., Contact Email, Name, or Deal Amount).
This step ensures that the data from Stripe is properly stored in HubSpot.
Test the Zap
Zapier will prompt you to test the integration to ensure everything is set up correctly. You can create a test payment in Stripe and check if the data appears in HubSpot as expected.
Turn on the Zap
Once the test is successful, click Turn on Zap. This will activate the automation, and from now on, every time a new payment is made in Stripe, the data will be sent to HubSpot.
Pros:
No Coding Required: Easy to set up without technical expertise.
Automated Data Sync: Stripe payments are automatically synced to HubSpot.
Customizable: You can choose specific data to transfer and automate various workflows.
Cons:
Limited Features: Lacks advanced features compared to native or custom integrations.
Zapier Costs: Depending on the number of Zaps and tasks, Zapier can become costly.
Sync Delay: There may be slight delays in data syncing between Stripe and HubSpot.
Method 3: Manual Integration via CSV Import/Export
If you prefer a more hands-on approach, you can manually integrate Stripe with HubSpot using CSV files.
Step-by-Step Guide:
Export Data from Stripe
Log in to your Stripe account and navigate to the data export section.
Export the data you need, such as transactions or customer information, in CSV format.
Import Data into HubSpot
Log in to your HubSpot account and go to the Import section.
Upload the CSV file containing your Stripe data.
Map the CSV columns to HubSpot properties and complete the import.
Pros:
No Extra Costs: No need for additional tools or subscriptions.
Direct Control: Full control over the data being imported and exported.
Cons:
Manual Effort: Requires manual handling of data exports and imports.
Data Sync: No real-time updates; you must regularly repeat the process.
Conclusion
Integrating Stripe with HubSpot can greatly enhance your financial and CRM workflows. Using Superjoin, syncing these platforms will help you:
Manage payment data more effectively
Automate follow-ups and improve customer interactions
Gain deeper insights into your financial and CRM data
Start integrating today to streamline your processes and boost your business efficiency!
Integrate Stripe with HubSpot to streamline your payment and CRM workflows. Learn how to sync your payment data seamlessly and improve your marketing efforts.
Why Connect Stripe to HubSpot?
Integrating Stripe with HubSpot allows you to:
Track Payment Data: View payment and transaction details directly within HubSpot.
Automate Follow-Ups: Set up automated workflows based on payment events, like sending thank you emails or initiating customer onboarding.
Enhance Customer Insights: Combine payment data with CRM information to better understand customer behavior and preferences.
This integration helps you streamline financial processes and improve customer interactions, making your business operations more efficient.
Method 1: Connecting Stripe to HubSpot Using Superjoin
Step-by-Step Guide:
Install Superjoin on Google Sheets
Open Google Sheets and navigate to the Extensions tab. Select Add-ons > Get add-ons.
Search for Superjoin in the Google Workspace Marketplace, install it, and grant necessary permissions.
Launch Superjoin from Extensions > Superjoin > Launch.
Alternatively, install Superjoin on Microsoft Excel
Open this link, click on Get it now.
Once installed, click on Open in Excel or Try using it online (for Excel online).
Launch Superjoin by opening the add-in and clicking on Open Sidebar. Login with your Microsoft account to start using Superjoin.
Connect and Import Data from Stripe
In the Superjoin sidebar, select Sources and choose Stripe.
Authenticate your Stripe account by following the prompts.
Choose the data you want to import, such as transactions, customers, or subscriptions. Configure any necessary filters and click Import. Your Stripe data will populate in Google Sheets.
Export Data to HubSpot
In the Superjoin sidebar, navigate to sources, choose Hubspot as your source — click Export
Choose the sheet and header row containing the data to export.
Select the HubSpot Object (e.g., Contacts, Deals) and the type of action: Update, Insert or Delete.
Map the fields from Google Sheets to corresponding fields in HubSpot. Superjoin will auto-map fields or allow you to map them manually.
Complete the export to sync your Stripe data with HubSpot.
Benefits of Using Superjoin for Stripe-HubSpot Integration
Superjoin offers several advantages for syncing Stripe and HubSpot:
No Coding Required: Easily integrate Stripe with HubSpot without any technical expertise.
Customizable Data Import/Export: Select exactly what data to import from Stripe and how to map it to HubSpot.
Smooth Data Flow: Use Google Sheets as an intermediary to ensure accurate and efficient data transfer.
Real-Time Updates: Keep your HubSpot CRM updated with the latest payment data from Stripe.
Superjoin simplifies the integration process, making it easy to manage and sync your payment and CRM data.
Method 2: Connecting Stripe to HubSpot Using Zapier
Zapier is a popular automation tool that allows you to connect Stripe to HubSpot without any coding. By using Zapier, you can automate the process of sending data between Stripe and HubSpot, such as creating or updating contacts when payments are made.
Step-by-Step Guide:
Create a Zapier Account
Go to Zapier and sign up for a free account, or log in if you already have an account.
Create a New Zap
In your Zapier dashboard, click Create Zap.
For the Trigger App, search for and select Stripe.
Set the Trigger
In the Stripe app section, choose a trigger event. For example, you can choose New Charge or New Customer to trigger the Zap when a payment is made or a customer is added.
Click Continue and authenticate your Stripe account by logging in and granting access to Zapier.
Set the Action in HubSpot
For the Action App, search for and select HubSpot.
Choose the action event, such as Create or Update Contact. This means Zapier will create a new contact in HubSpot or update an existing one when a new charge or customer is registered in Stripe.
Map Stripe Data to HubSpot Fields
Map the relevant Stripe data (e.g., customer email, name, payment amount) to corresponding fields in HubSpot (e.g., Contact Email, Name, or Deal Amount).
This step ensures that the data from Stripe is properly stored in HubSpot.
Test the Zap
Zapier will prompt you to test the integration to ensure everything is set up correctly. You can create a test payment in Stripe and check if the data appears in HubSpot as expected.
Turn on the Zap
Once the test is successful, click Turn on Zap. This will activate the automation, and from now on, every time a new payment is made in Stripe, the data will be sent to HubSpot.
Pros:
No Coding Required: Easy to set up without technical expertise.
Automated Data Sync: Stripe payments are automatically synced to HubSpot.
Customizable: You can choose specific data to transfer and automate various workflows.
Cons:
Limited Features: Lacks advanced features compared to native or custom integrations.
Zapier Costs: Depending on the number of Zaps and tasks, Zapier can become costly.
Sync Delay: There may be slight delays in data syncing between Stripe and HubSpot.
Method 3: Manual Integration via CSV Import/Export
If you prefer a more hands-on approach, you can manually integrate Stripe with HubSpot using CSV files.
Step-by-Step Guide:
Export Data from Stripe
Log in to your Stripe account and navigate to the data export section.
Export the data you need, such as transactions or customer information, in CSV format.
Import Data into HubSpot
Log in to your HubSpot account and go to the Import section.
Upload the CSV file containing your Stripe data.
Map the CSV columns to HubSpot properties and complete the import.
Pros:
No Extra Costs: No need for additional tools or subscriptions.
Direct Control: Full control over the data being imported and exported.
Cons:
Manual Effort: Requires manual handling of data exports and imports.
Data Sync: No real-time updates; you must regularly repeat the process.
Conclusion
Integrating Stripe with HubSpot can greatly enhance your financial and CRM workflows. Using Superjoin, syncing these platforms will help you:
Manage payment data more effectively
Automate follow-ups and improve customer interactions
Gain deeper insights into your financial and CRM data
Start integrating today to streamline your processes and boost your business efficiency!
FAQs
Why integrate Stripe with HubSpot?
Why integrate Stripe with HubSpot?
Can I integrate without coding?
Can I integrate without coding?
What are Zapier’s limitations?
What are Zapier’s limitations?
Automatic Data Pulls
Visual Data Preview
Set Alerts
other related blogs


Try it now