Microsoft Excel Tutorial
How to Delete Row in Microsoft Excel: A Step-by-Step Guide
Learn how to delete rows in Microsoft Excel with this step-by-step guide. Discover methods for single, multiple, and shortcut deletions to organise data.
Table of Contents
Speaking from experience we know that dealing with a spreadsheet involves constant modification as you work with the data. It could require adding new data to the table, and occasionally it will entail clearing out the table by eliminating unnecessary or dead entries. To stay organized and be effective at work, you must understand how to remove rows in Excel.
Understanding how to effectively remove rows is essential whether you're handling data from sources like Recurly and need to connect it with Excel or are just organizing your current data.
For example, in order to preserve clarity and relevance while syncing financial data from Recurly to Excel, you may need to eliminate outdated transaction records or subscription data. Your spreadsheet will stay clear, focused, and represent the most recent and relevant data if you know how to delete rows correctly.
Regardless of the data sources you're dealing with, this guide will help you grasp the best ways to delete rows so that your Excel sheet stays streamlined and tidy.
Different Methods for Deleting Rows in Excel
Method 1: Deleting a Single Row
In case you want to delete a single row, Excel provides the easiest way for that.
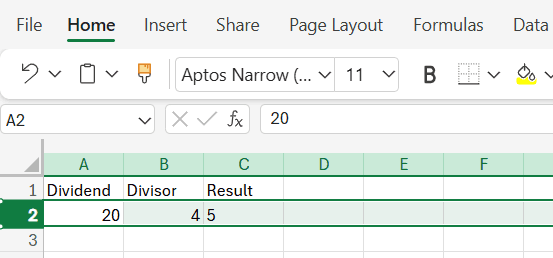
1. Select the row you want to delete
2. Right-Click: Once the row is selected, right-click to open the context menu.
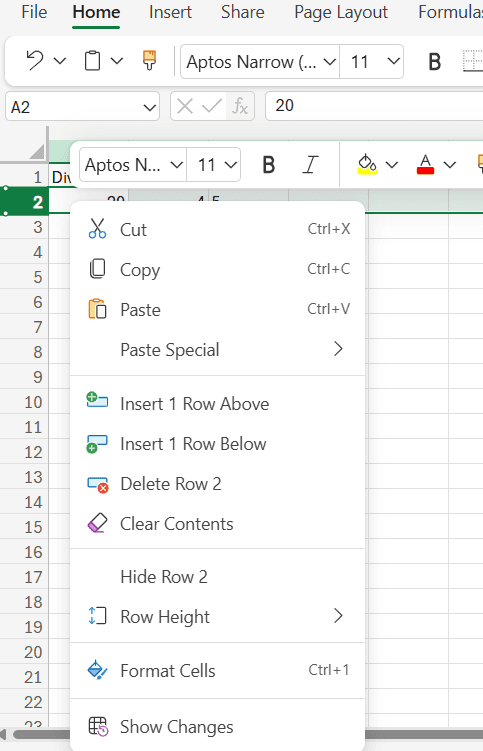
3. Delete Row: From the menu, choose "Delete row." The row will be removed, and the rows below will shift up to fill the gap.
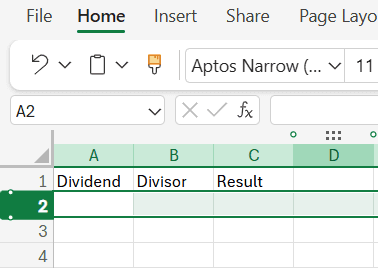
The row will be deleted.
Method 2: Deleting Multiple Rows
Sometimes, you may need to remove several rows at once. Here's how to delete multiple rows in one go:
1. Select the Rows: Click and drag your cursor over the row numbers to highlight multiple rows, or hold the "ctrl" key while selecting individual rows.

2. Right-Click: With the rows selected, right-click to open the context menu.
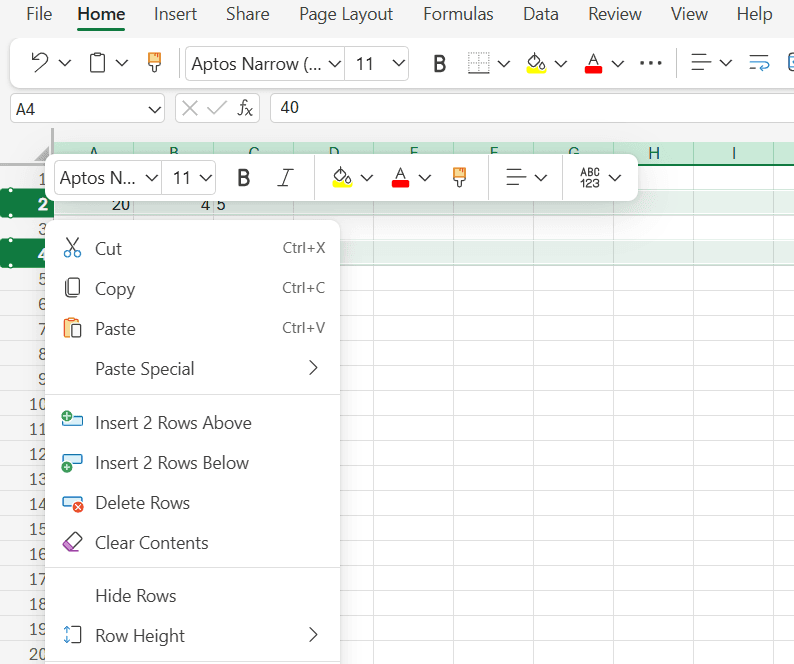
3. Delete Rows: Choose "Delete rows" from the menu.
All selected rows will be removed simultaneously, and the adjacent rows will take their place.
This method is efficient when cleaning up large datasets or dynamic dashboards in Excel, as it allows you to delete multiple rows in a single action.
Best Practices for Deleting Rows
It's crucial to keep in mind that removing rows in Excel is an irrevocable action. Take into account the following advice to prevent inadvertently erasing crucial data:
Backup Your Data: Make a duplicate of your spreadsheet before making any big changes. You can then recover your data if necessary.
Use Undo: You can rapidly reverse the deletion of a row if you happen to do so by hitting Ctrl + Z (Windows) or Cmd + Z (Mac).
Watch Out for Formulas: Formulas that reference rows may be impacted if those rows are deleted. After deletion, be sure to review any affected formulas.
Conclusion
Deleting rows in Excel is a simple yet powerful tool for managing your data effectively. Whether you need to remove a single row or clean up a large dataset, knowing how to delete a row on Excel ensures that your spreadsheets remain organized and relevant.
Say Goodbye to Tedious Data Exports! 🚀
Are you tired of the hassle of manually moving data from various tools into Excel? Superjoin has a solution for you.
Superjoin is an Excel add-in that automatically connects your favorite SaaS tools to your spreadsheets. It pulls data directly into Excel, allowing you to create reports that update themselves without any manual work on your part.
Bid farewell to tedious exports and repetitive tasks. With Superjoin, you can add one additional day to your week. Try Superjoin for free or schedule a demo.
Speaking from experience we know that dealing with a spreadsheet involves constant modification as you work with the data. It could require adding new data to the table, and occasionally it will entail clearing out the table by eliminating unnecessary or dead entries. To stay organized and be effective at work, you must understand how to remove rows in Excel.
Understanding how to effectively remove rows is essential whether you're handling data from sources like Recurly and need to connect it with Excel or are just organizing your current data.
For example, in order to preserve clarity and relevance while syncing financial data from Recurly to Excel, you may need to eliminate outdated transaction records or subscription data. Your spreadsheet will stay clear, focused, and represent the most recent and relevant data if you know how to delete rows correctly.
Regardless of the data sources you're dealing with, this guide will help you grasp the best ways to delete rows so that your Excel sheet stays streamlined and tidy.
Different Methods for Deleting Rows in Excel
Method 1: Deleting a Single Row
In case you want to delete a single row, Excel provides the easiest way for that.
1. Select the row you want to delete
2. Right-Click: Once the row is selected, right-click to open the context menu.
3. Delete Row: From the menu, choose "Delete row." The row will be removed, and the rows below will shift up to fill the gap.
The row will be deleted.
Method 2: Deleting Multiple Rows
Sometimes, you may need to remove several rows at once. Here's how to delete multiple rows in one go:
1. Select the Rows: Click and drag your cursor over the row numbers to highlight multiple rows, or hold the "ctrl" key while selecting individual rows.
2. Right-Click: With the rows selected, right-click to open the context menu.
3. Delete Rows: Choose "Delete rows" from the menu.
All selected rows will be removed simultaneously, and the adjacent rows will take their place.
This method is efficient when cleaning up large datasets or dynamic dashboards in Excel, as it allows you to delete multiple rows in a single action.
Best Practices for Deleting Rows
It's crucial to keep in mind that removing rows in Excel is an irrevocable action. Take into account the following advice to prevent inadvertently erasing crucial data:
Backup Your Data: Make a duplicate of your spreadsheet before making any big changes. You can then recover your data if necessary.
Use Undo: You can rapidly reverse the deletion of a row if you happen to do so by hitting Ctrl + Z (Windows) or Cmd + Z (Mac).
Watch Out for Formulas: Formulas that reference rows may be impacted if those rows are deleted. After deletion, be sure to review any affected formulas.
Conclusion
Deleting rows in Excel is a simple yet powerful tool for managing your data effectively. Whether you need to remove a single row or clean up a large dataset, knowing how to delete a row on Excel ensures that your spreadsheets remain organized and relevant.
Say Goodbye to Tedious Data Exports! 🚀
Are you tired of the hassle of manually moving data from various tools into Excel? Superjoin has a solution for you.
Superjoin is an Excel add-in that automatically connects your favorite SaaS tools to your spreadsheets. It pulls data directly into Excel, allowing you to create reports that update themselves without any manual work on your part.
Bid farewell to tedious exports and repetitive tasks. With Superjoin, you can add one additional day to your week. Try Superjoin for free or schedule a demo.
FAQs
Can I recover a row after deleting it in Excel?
Can I recover a row after deleting it in Excel?
How do I delete alternate rows in Excel?
How do I delete alternate rows in Excel?
Is there a way to delete rows that contain specific text in Excel?
Is there a way to delete rows that contain specific text in Excel?
Automatic Data Pulls
Visual Data Preview
Set Alerts
other related blogs

Try it now