Product
How to Integrate Recurly to Google Sheets
Integrate Recurly with Google Sheets effortlessly and streamline your subscription billing data management and enhance your analysis capabilities.


Integrating Recurly with Google Sheets can revolutionize how you manage and analyze your subscription billing data. By seamlessly bringing Recurly's comprehensive billing and subscription information into Google Sheets, you gain the ability to create custom reports, perform in-depth data analysis, and share insights across your team effortlessly.
This integration is crucial for businesses looking to streamline their financial operations, monitor customer trends, and make data-driven decisions.
Superjoin makes this process incredibly easy and efficient, even for users without technical expertise, ensuring your data workflow is smooth and automated.
Best Ways to Connect Recurly to Google Sheets
Method 1: Using Superjoin
Superjoin provides the fastest and easiest way to connect Recurly to Google Sheets without any technical know-how or complex setup processes. Here’s how it works:
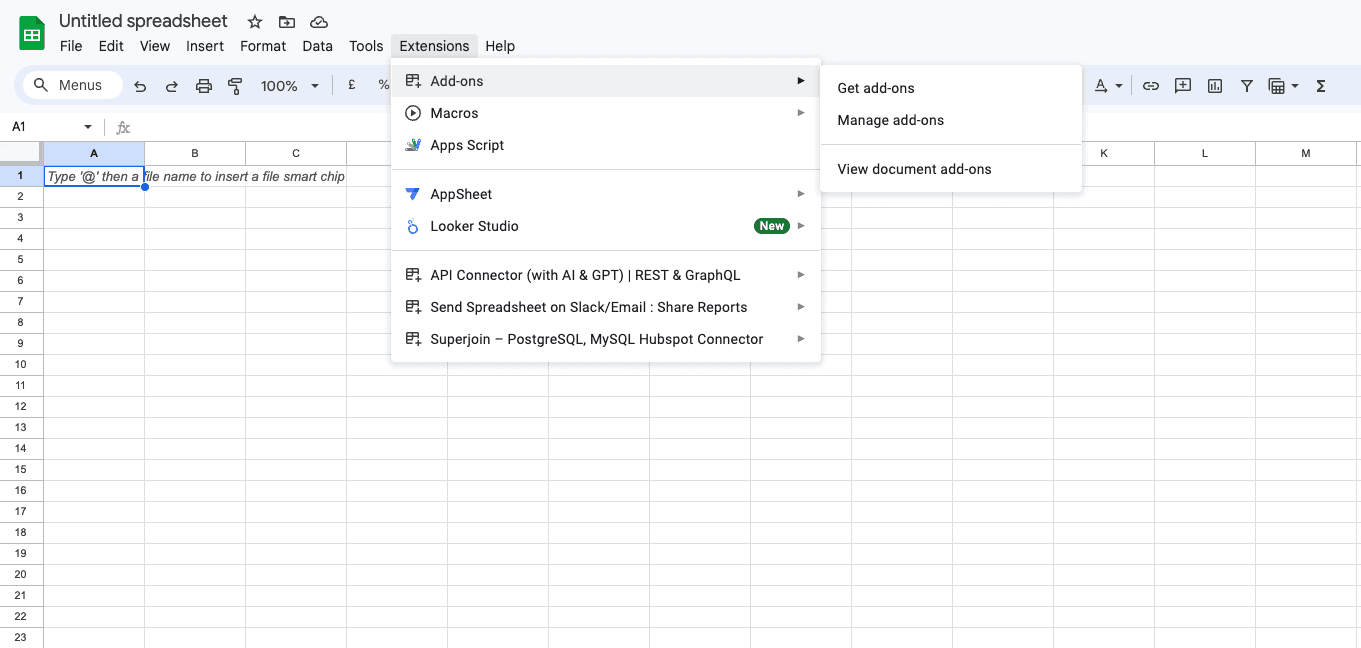
Navigate to “Add-ons” and select “Get add-ons”.
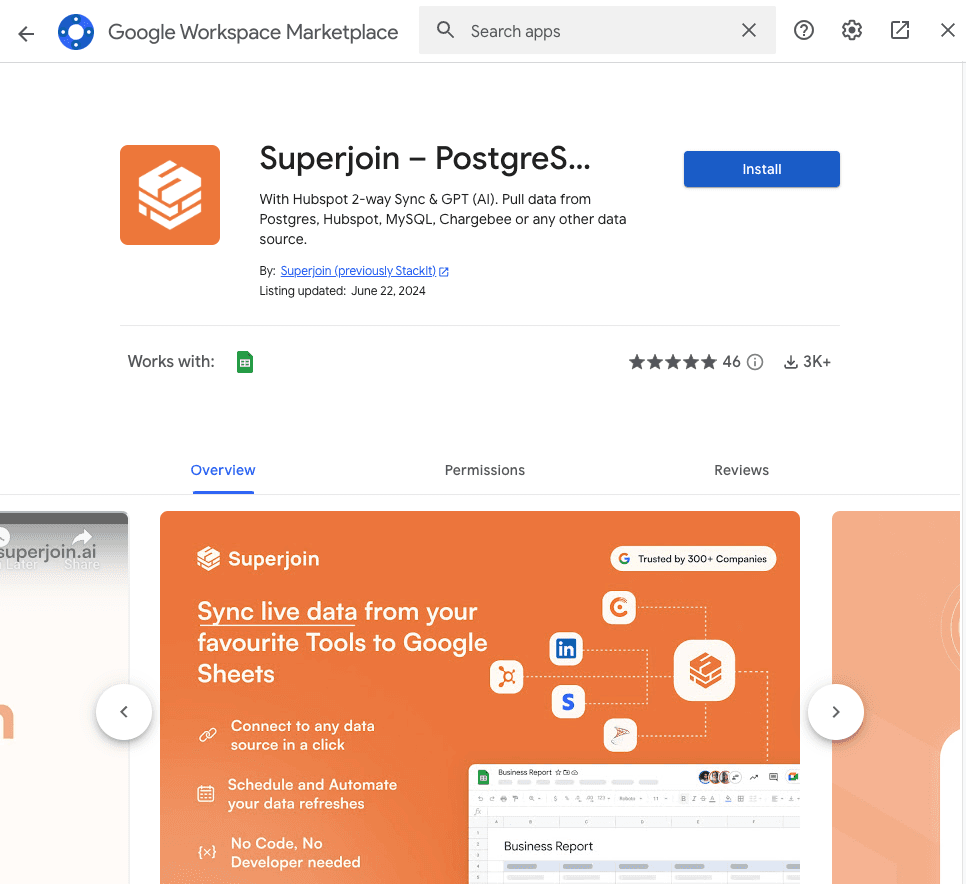
Search for “Superjoin” and click “Install”.
Open Superjoin from the Extensions menu.
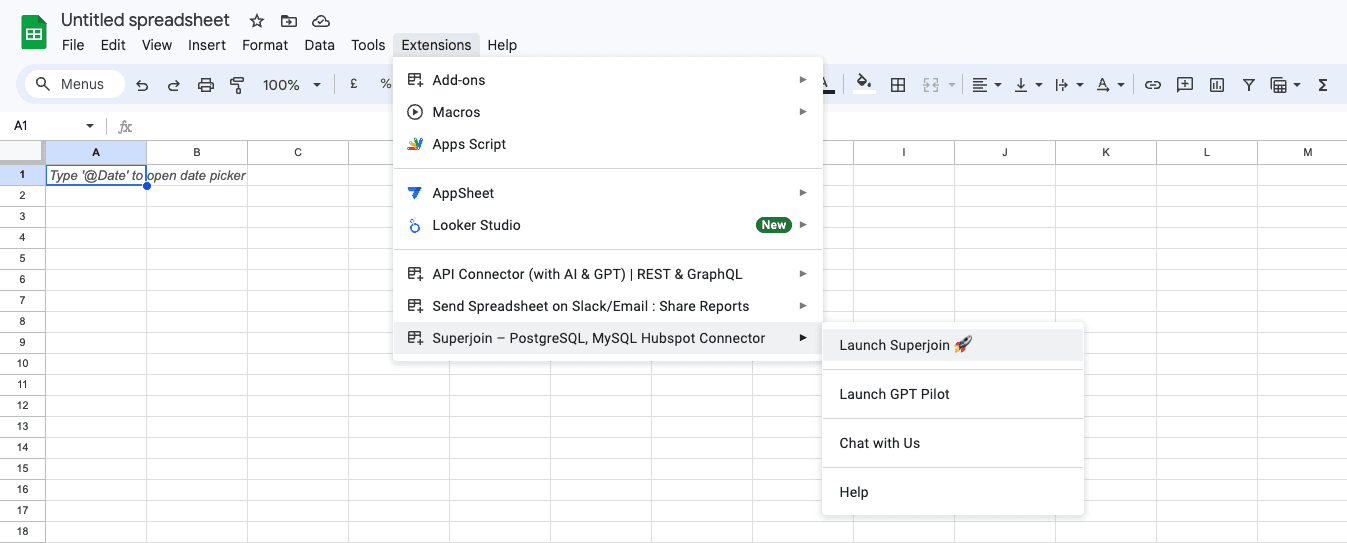
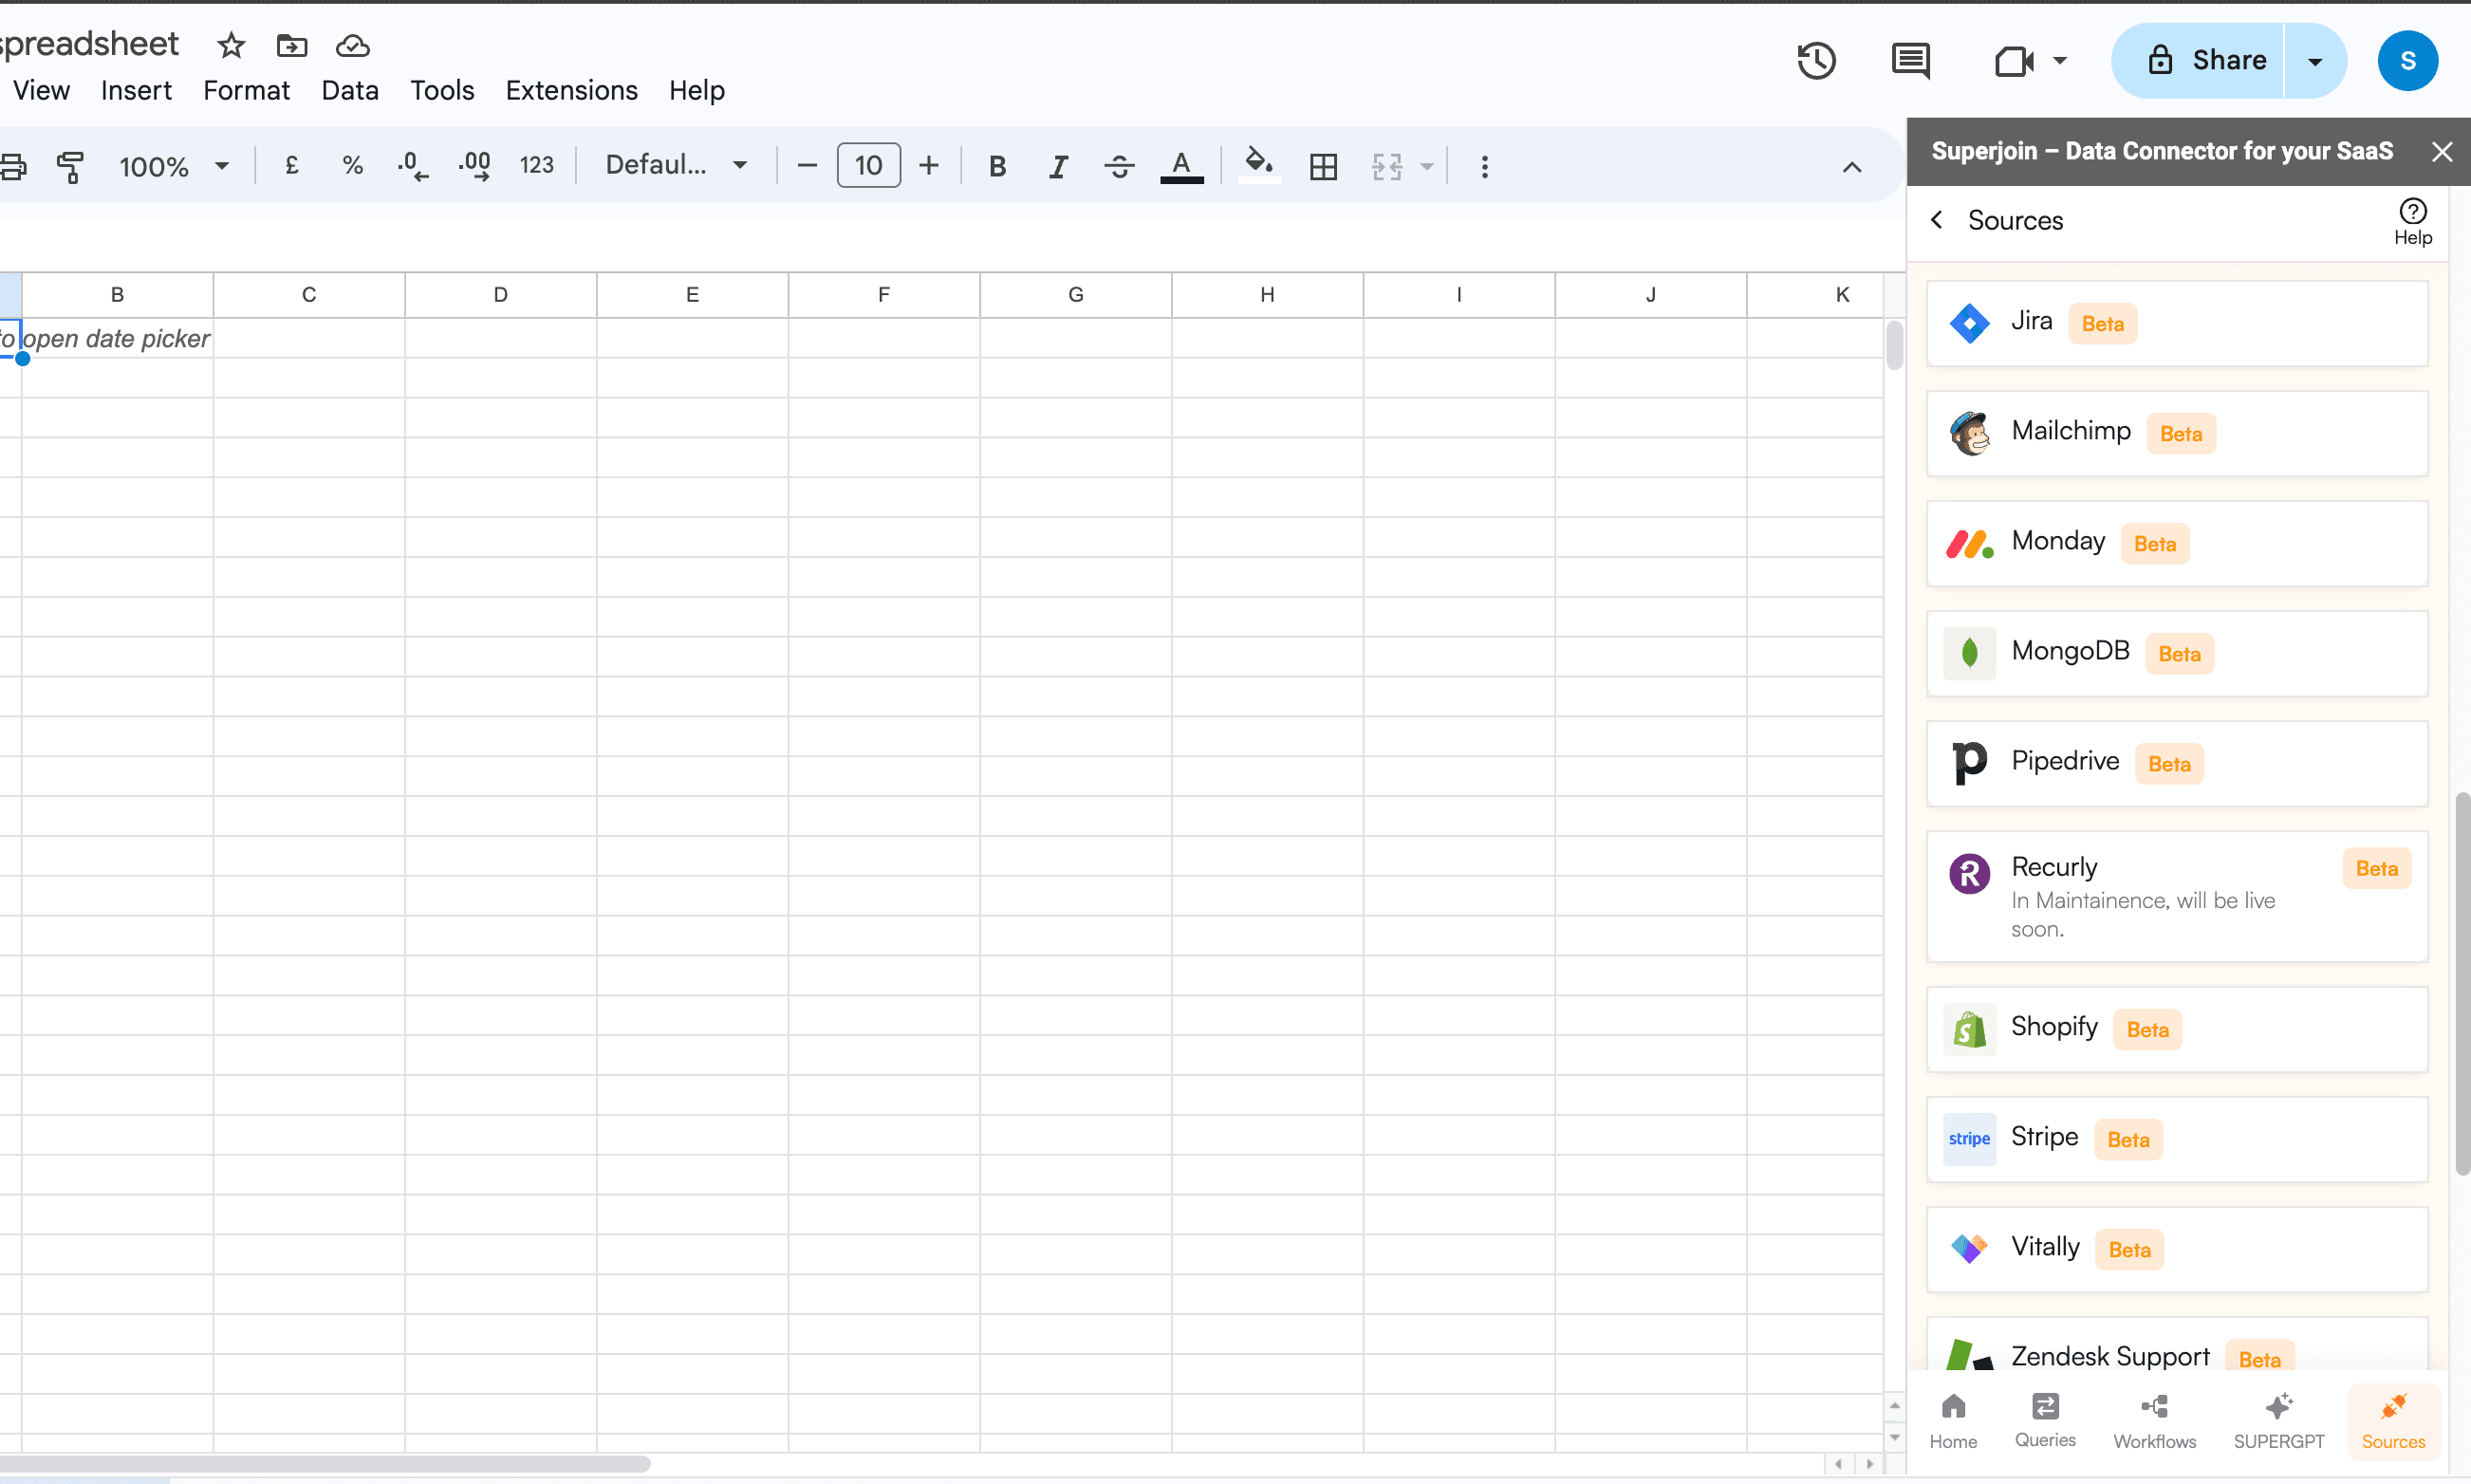
Click on “Sources” on the Superjoin homepage and click on " Connect New Source" and then choose Recurly.
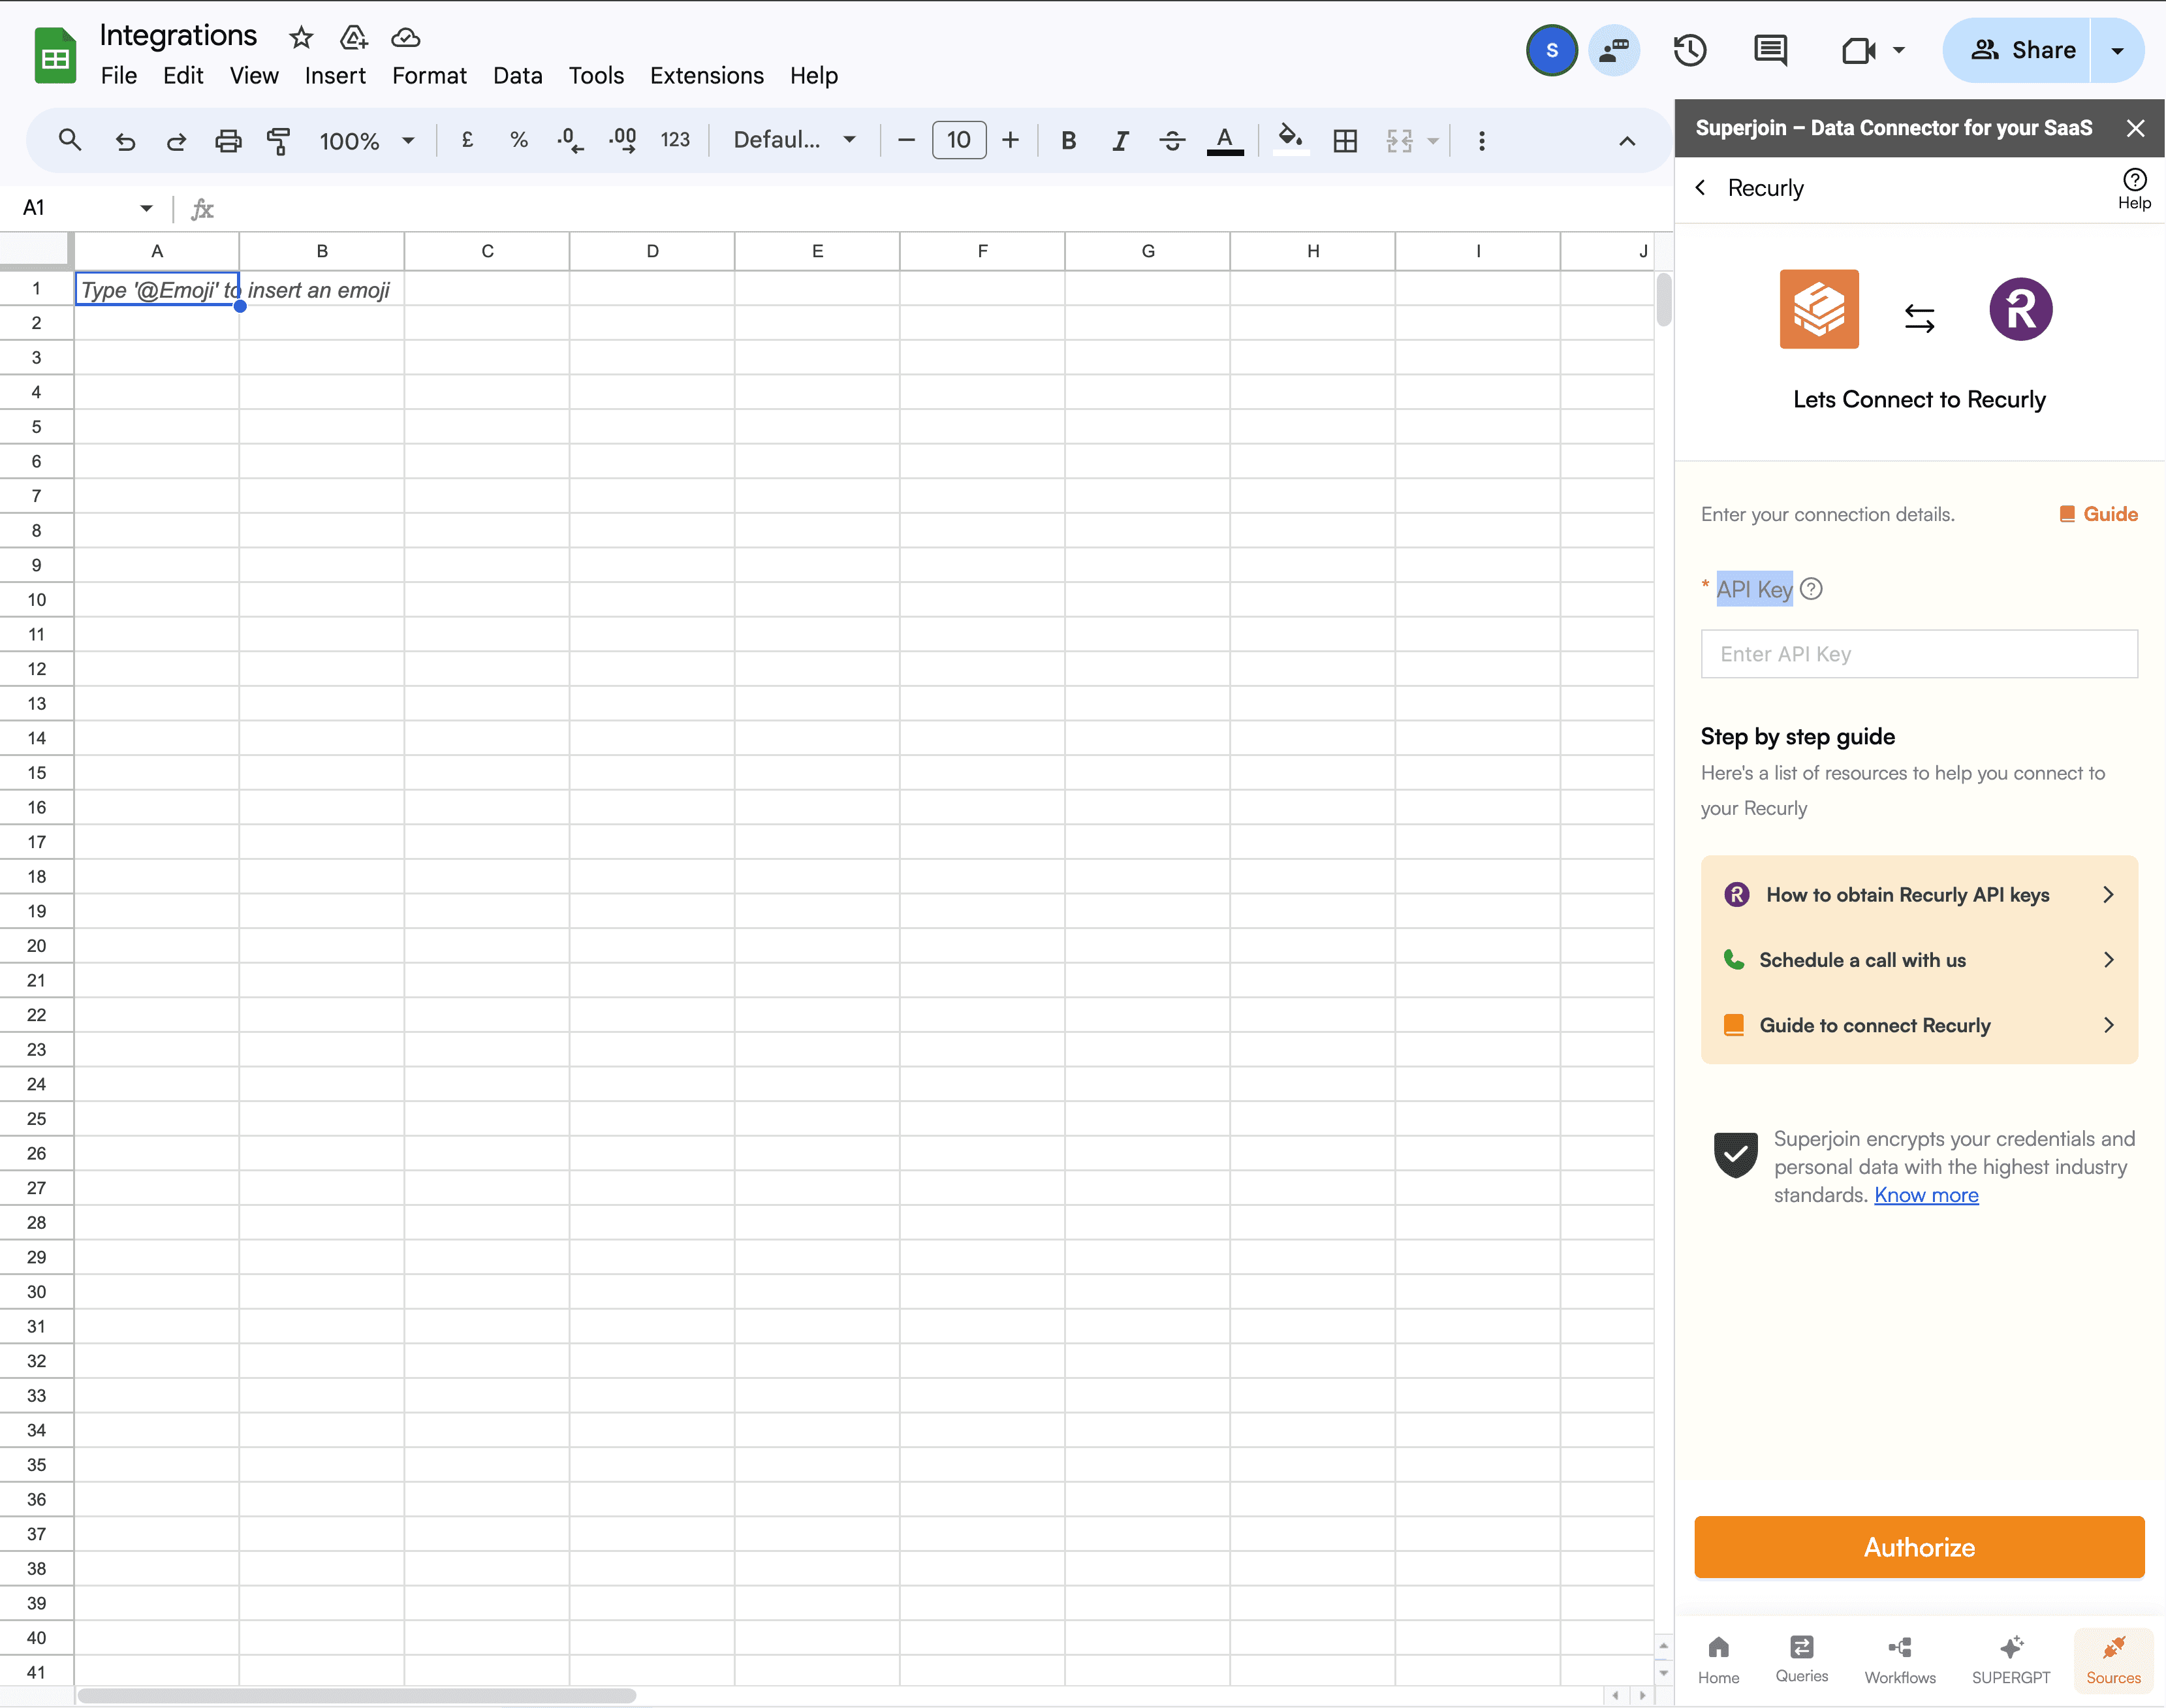
Enter the required details and Click “Authorize” to connect your Recurly account with Superjoin.
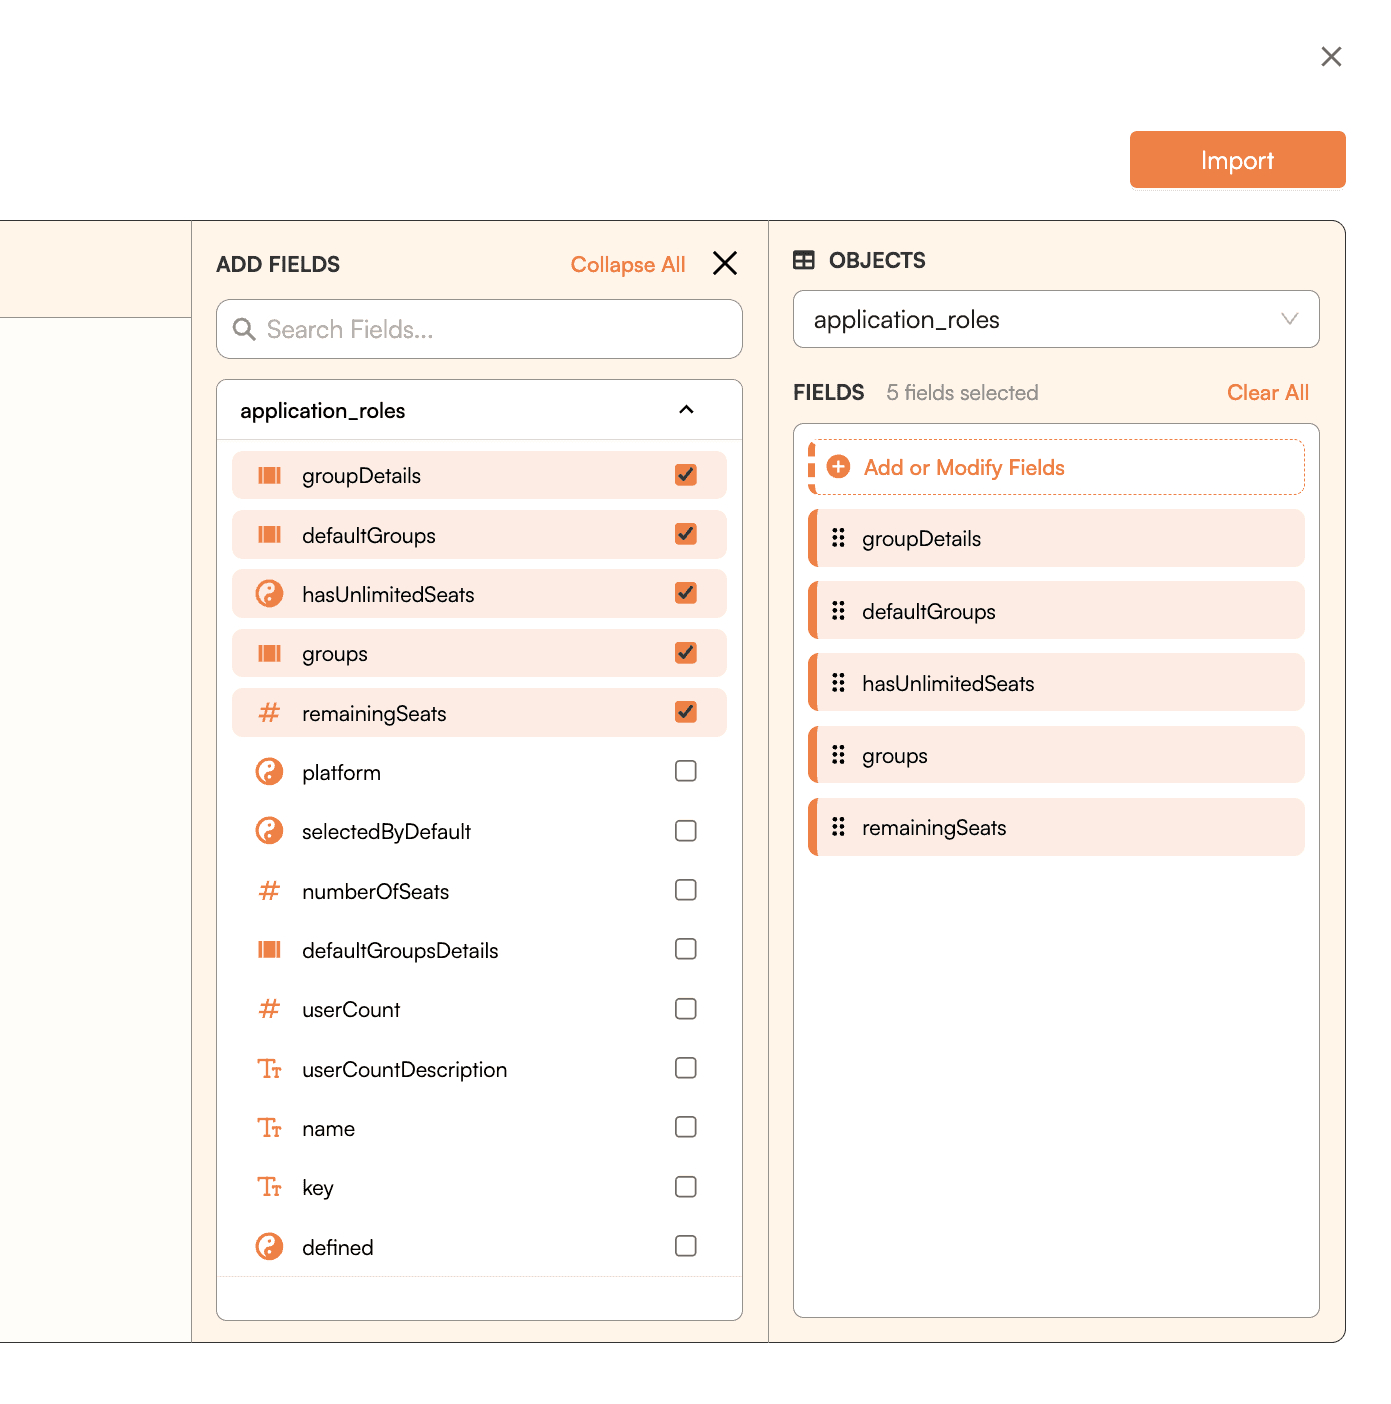
Once connected, select the specific fields you want to import from Recurly using the data preview section.
Click “Import Data” to bring Recurly data into Google Sheets.
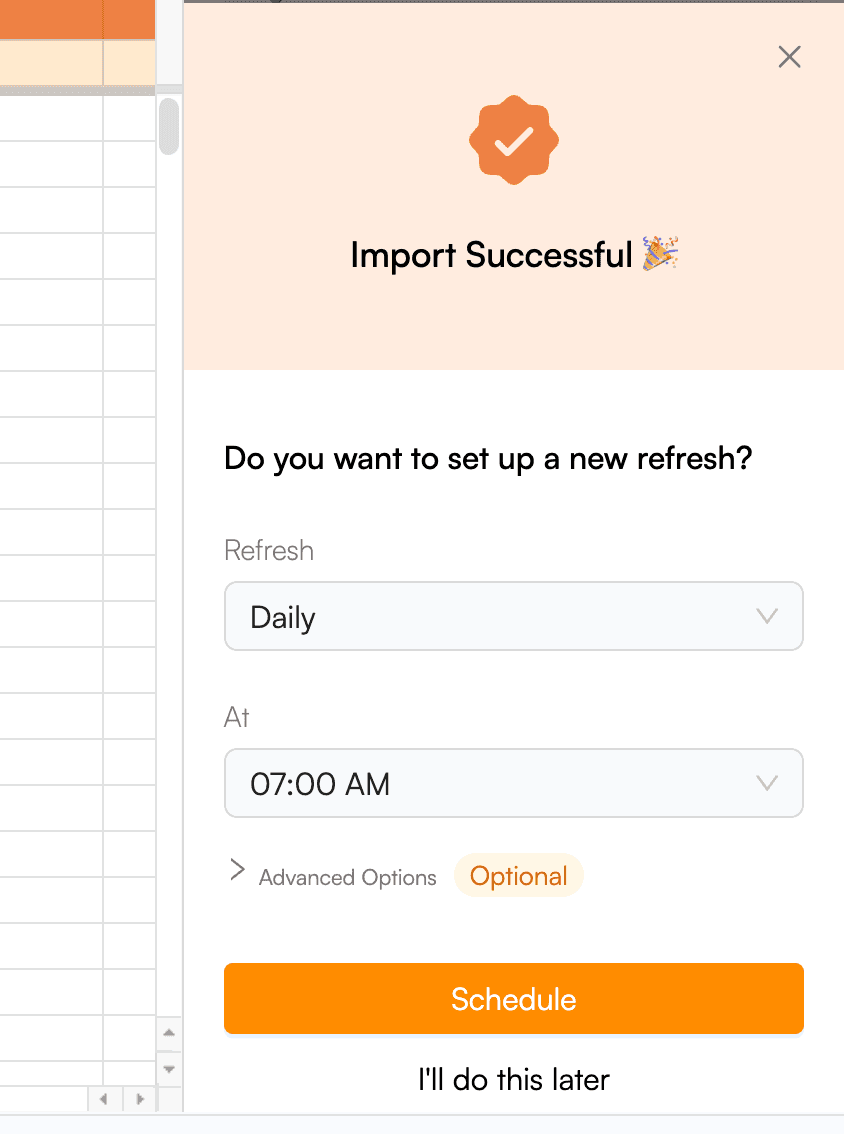
Set a schedule to automatically refresh data after importing, ensuring your Google Sheets always contain the latest information from Recurly.
Method 2: Manually Exporting Recurly data into CSV
Go to the Recurly website and log in using your credentials.
From the Recurly dashboard, locate the "Data Exports" option. This is usually found under the "Reports" or "Data" section in the main navigation menu.
Recurly offers various types of data exports such as invoices, subscriptions, transactions, accounts, and more. Choose the specific data type you need.
Depending on the type of data you're exporting, you may have options to customize the export. This could include selecting date ranges, specific fields, or applying filters to narrow down the data.
After configuring your export options, click on the "Export" button. Recurly will start processing the export.
Select "CSV" as the format and download the file to your local drive.
Once the export is complete, you will receive a notification in Recurly. Go back to the "Data Exports" section and download the file.
Limitations:
This method is straightforward but requires manual updates whenever your data changes in Recurly.
Method 3: Using Zapier
Sign up for a Zapier account and log in.

Create a new Zap and select Recurly as the trigger app.
Choose a trigger event.
Connect your Recurly account to Zapier.
Select Google Sheets as the action app and choose "Create Spreadsheet Row" as the action event.
Connect your Google Sheets account to Zapier.
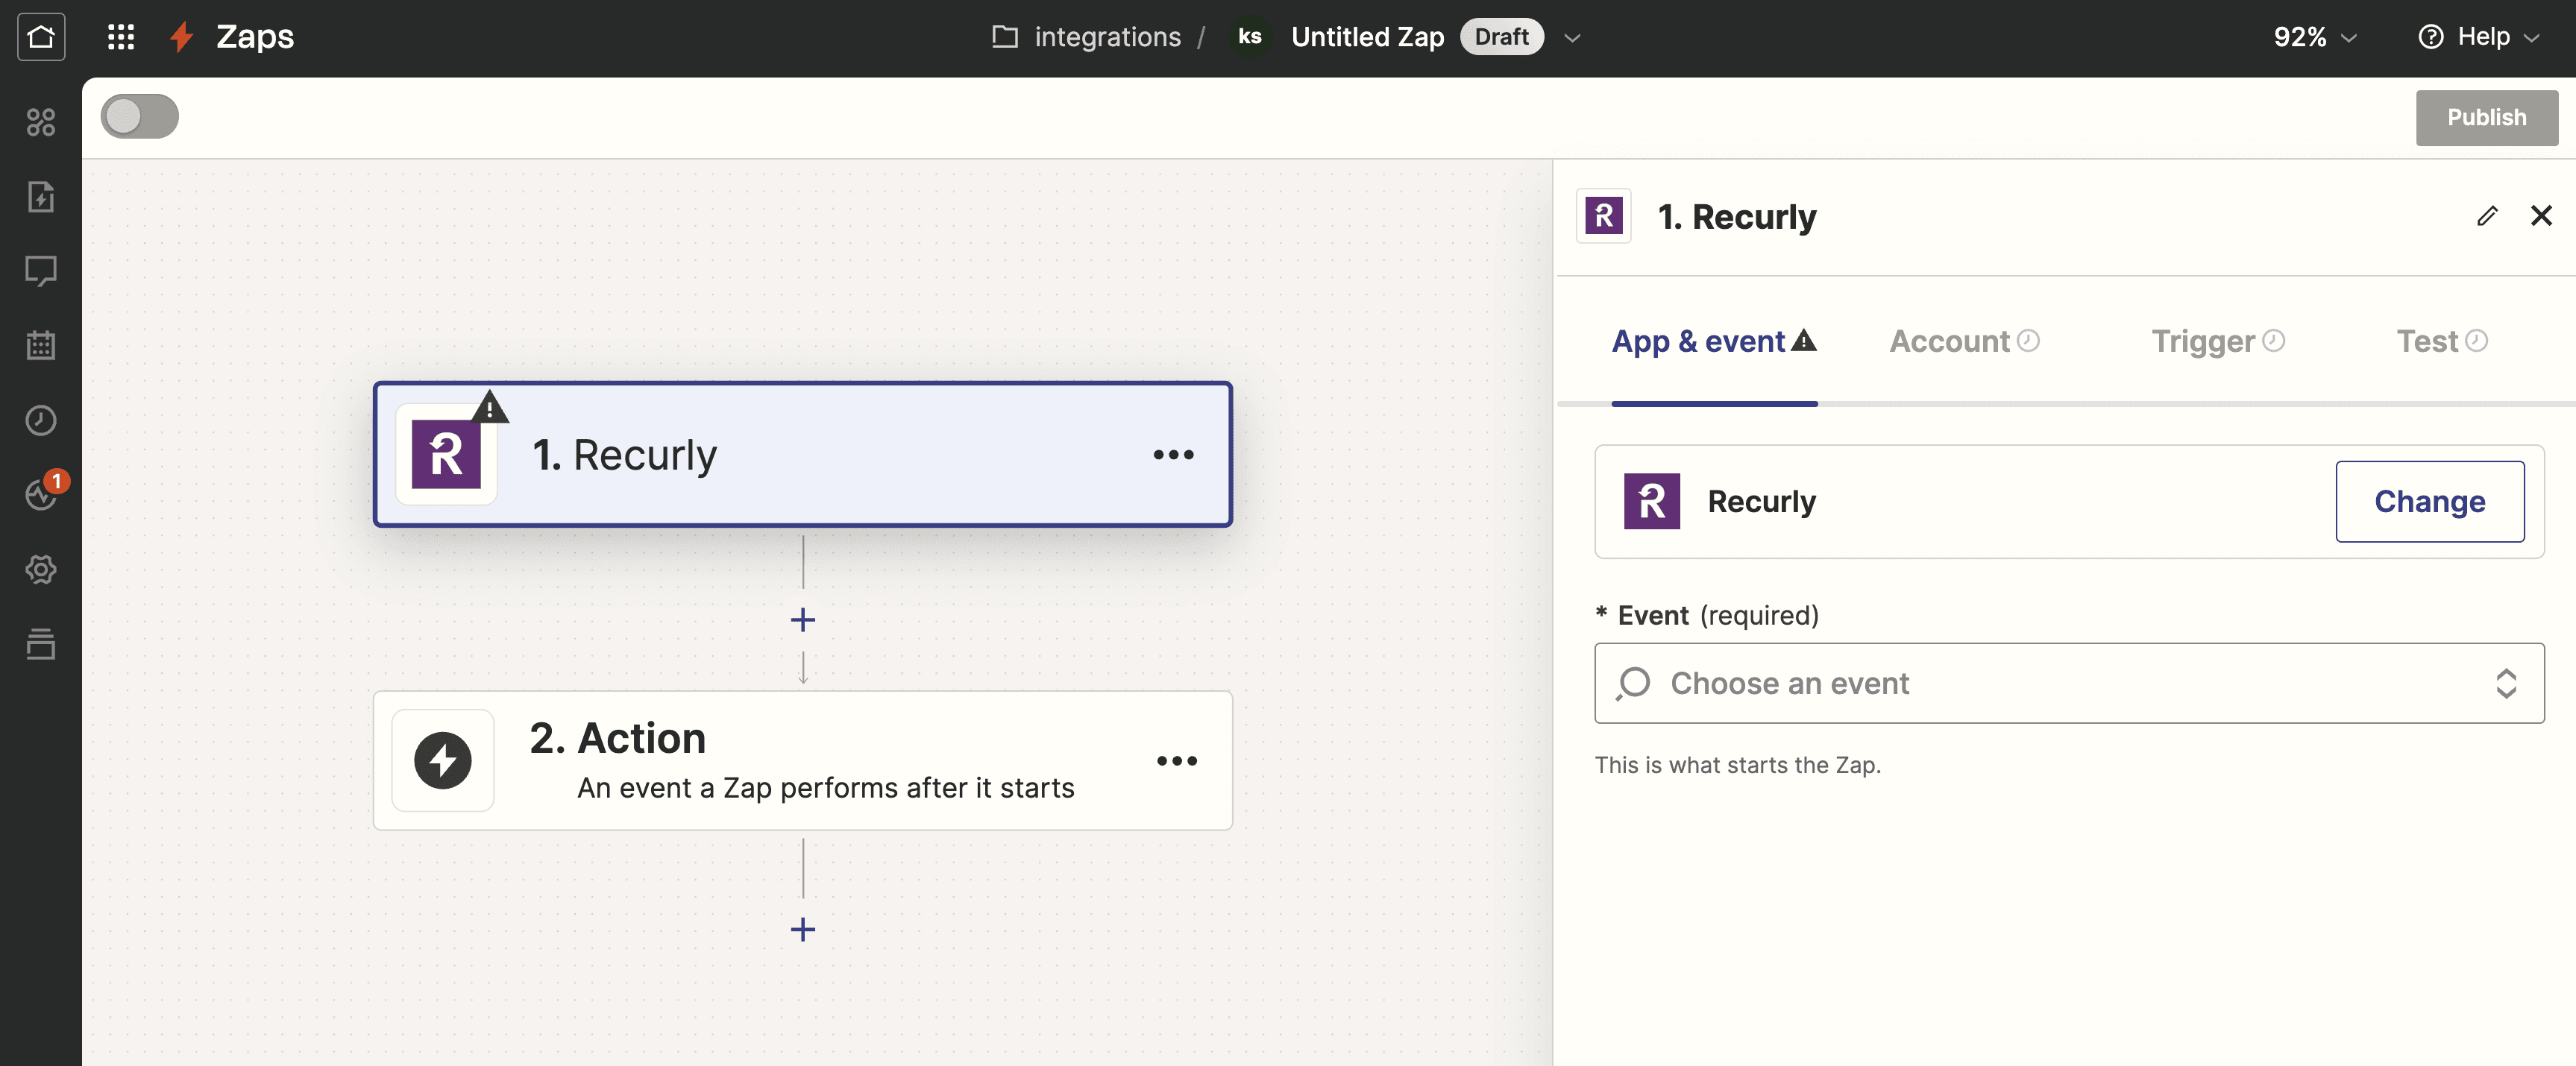
Map the data fields from Recurly to Google Sheets.
Test the Zap to ensure it works correctly.
Turn on the Zap to automate data transfer from Recurly to Google Sheets.
Limitations:
Zapier is useful for creating automated workflows, but it can be limited by the available triggers and actions.
Why Choose Superjoin?
Intuitive Interface: Superjoin offers an intuitive interface that is accessible to users without technical expertise.
Time-Saving: It saves time by eliminating the need for complex query writing.
Automated Updates: Automated updates ensure your data remains current without manual intervention.
Seamless Integration: Seamlessly integrates with Google Sheets for a smooth workflow.
Superjoin provides a comprehensive solution for connecting various integrations to Google Sheets. Its user-friendly design and automation features make it an excellent choice for anyone looking to streamline their data import process and enhance their data analysis capabilities.
Integrating Recurly with Google Sheets can revolutionize how you manage and analyze your subscription billing data. By seamlessly bringing Recurly's comprehensive billing and subscription information into Google Sheets, you gain the ability to create custom reports, perform in-depth data analysis, and share insights across your team effortlessly.
This integration is crucial for businesses looking to streamline their financial operations, monitor customer trends, and make data-driven decisions.
Superjoin makes this process incredibly easy and efficient, even for users without technical expertise, ensuring your data workflow is smooth and automated.
Best Ways to Connect Recurly to Google Sheets
Method 1: Using Superjoin
Superjoin provides the fastest and easiest way to connect Recurly to Google Sheets without any technical know-how or complex setup processes. Here’s how it works:
Navigate to “Add-ons” and select “Get add-ons”.

Search for “Superjoin” and click “Install”.

Open Superjoin from the Extensions menu.

Click on “Sources” on the Superjoin homepage and click on " Connect New Source" and then choose Recurly.

Enter the required details and Click “Authorize” to connect your Recurly account with Superjoin.

Once connected, select the specific fields you want to import from Recurly using the data preview section.
Click “Import Data” to bring Recurly data into Google Sheets.

Set a schedule to automatically refresh data after importing, ensuring your Google Sheets always contain the latest information from Recurly.

Method 2: Manually Exporting Recurly data into CSV
Go to the Recurly website and log in using your credentials.
From the Recurly dashboard, locate the "Data Exports" option. This is usually found under the "Reports" or "Data" section in the main navigation menu.
Recurly offers various types of data exports such as invoices, subscriptions, transactions, accounts, and more. Choose the specific data type you need.
Depending on the type of data you're exporting, you may have options to customize the export. This could include selecting date ranges, specific fields, or applying filters to narrow down the data.
After configuring your export options, click on the "Export" button. Recurly will start processing the export.
Select "CSV" as the format and download the file to your local drive.
Once the export is complete, you will receive a notification in Recurly. Go back to the "Data Exports" section and download the file.
Limitations:
This method is straightforward but requires manual updates whenever your data changes in Recurly.
Method 3: Using Zapier
Sign up for a Zapier account and log in.

Create a new Zap and select Recurly as the trigger app.
Choose a trigger event.
Connect your Recurly account to Zapier.
Select Google Sheets as the action app and choose "Create Spreadsheet Row" as the action event.
Connect your Google Sheets account to Zapier.

Map the data fields from Recurly to Google Sheets.
Test the Zap to ensure it works correctly.
Turn on the Zap to automate data transfer from Recurly to Google Sheets.
Limitations:
Zapier is useful for creating automated workflows, but it can be limited by the available triggers and actions.
Why Choose Superjoin?
Intuitive Interface: Superjoin offers an intuitive interface that is accessible to users without technical expertise.
Time-Saving: It saves time by eliminating the need for complex query writing.
Automated Updates: Automated updates ensure your data remains current without manual intervention.
Seamless Integration: Seamlessly integrates with Google Sheets for a smooth workflow.
Superjoin provides a comprehensive solution for connecting various integrations to Google Sheets. Its user-friendly design and automation features make it an excellent choice for anyone looking to streamline their data import process and enhance their data analysis capabilities.
FAQs
What is Superjoin?
What is Superjoin?
Do I need technical skills to use Superjoin?
Do I need technical skills to use Superjoin?
Can I automate data updates with Superjoin?
Can I automate data updates with Superjoin?
Automatic Data Pulls
Visual Data Preview
Set Alerts
other related blogs
Try it now

